

Can we plaster with clay on granite walls?
With contributions from Luso_fr
Started 1y. Edited 2moStarted about 1 year ago. Last edit 3 months agoConstruction
In Progress
RenovationBuildingNatural materials
More Information


%20--%3e%3csvg%20version='1.1'%20id='Layer_1'%20xmlns='http://www.w3.org/2000/svg'%20xmlns:xlink='http://www.w3.org/1999/xlink'%20x='0px'%20y='0px'%20viewBox='0%200%2064%2063'%20style='enable-background:new%200%200%2064%2063;'%20xml:space='preserve'%3e%3cstyle%20type='text/css'%3e%20.st0{fill:%23231F20;}%20%3c/style%3e%3cdesc%3eCreated%20with%20Sketch.%3c/desc%3e%3cg%20id='Page-1'%3e%3cg%20id='OA-Logo-Black-Background'%3e%3cpath%20id='Shape'%20class='st0'%20d='M14.1,30.1c-1.5-0.8-8.6-3.8-14.1-7.8c1.8-3.4,3.1-5.6,5-9.1c2.7,1.1,1.9,0.5,4.6,1.7%20c0.8,0.4,10.1,4.5,13.8,6.2c2.4,1.1,4.7,2.2,7,3.3L43,30.5l8.1,3.9c4,2,7.2,3.5,11.3,5.5c0.5,0.3-3.7,9.4-3.7,9.4%20c-1.7-0.6-3.9-1.8-5.5-2.5c-4.7-2.1-9-3.9-13.7-6c-4-1.8-6.7-2.9-10.8-4.5C25,34.9,17.1,31.6,14.1,30.1z'/%3e%3cpath%20id='Shape_1_'%20class='st0'%20d='M12.1,54.9c-0.8,0.6-1.6,1.2-2.5,1.6c-0.4-0.5-0.9-1-1.3-1.5c-0.3-1.2-2.3-4.9-2.7-6.2%20c-0.1-0.4-0.7-2.2-0.8-2.6c0,0,5-3.4,8.2-5.9c3.2-2.6,6.2-5,9.3-7.5c1.4-1.1,3.9-2.5,5.3-3.5c2.5-1.7,13-9.1,15.6-10.5%20c5.4-3.3,11.1-6.3,16.8-9c1.7,3.5,1.8,3,3.8,6.9c0,0-17.8,13.5-22.7,17.1c-3.8,2.8-7.5,5.7-11.3,8.5c-1.7,1.3-3.5,2.4-5.2,3.7'/%3e%3cpath%20id='Shape_2_'%20class='st0'%20d='M20.8,2.9l-0.2-0.8C25,0,31.2-0.3,31.4,0.2c0.4,1.1,0.9,2.2,1.2,3.4c1.4,4.4,2.7,8.7,4,13.1%20c0.4,1.4,2.8,10,2.9,10.5c0.5,2.8,1.2,5.6,1.6,8.4c0.8,4.7,1.4,8.6,2.3,13.3c0.6,3.1,1.3,6.3,2.3,11.3c0,0-5.8,1.4-7.5,1.8%20c-0.8,0.2-1.5,0.4-2.4,0.6c-0.3-1.1-0.2-1.2-0.5-2.1c-0.9-3.7-1.8-7.3-2.6-11c-1.5-6.4-3-12.9-4.4-19.3%20c-1.2-5.4-2.6-10.7-4.4-15.9c-1-3.1-1.8-6.3-2.7-9.5C21.1,3.8,21,3.8,20.8,2.9z'/%3e%3c/g%3e%3c/g%3e%3c/svg%3e)


1
Why plastering with a straw/clay/sand mix ?
Published 10mo. Edited 10moPublished 11 months ago. Last edit 11 months ago
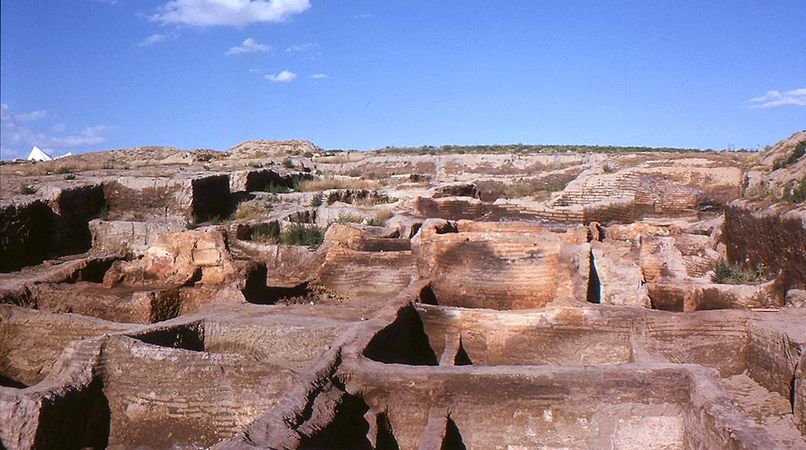
Clay has been used as a construction material for thousands of years. Its first utilisation probably started around 15000 years bc (pre neolithic), but its expansion began during the neolithic with the first cities build out of clay in middle east and mesopotamia such as Çatal Hüyük build around 7500 BC.
This material is abundant, easy to excavate, and shows many interesting properties such as high fire resistancy, moisture regulation, thermal mass and its almost infinite recycling possibility.
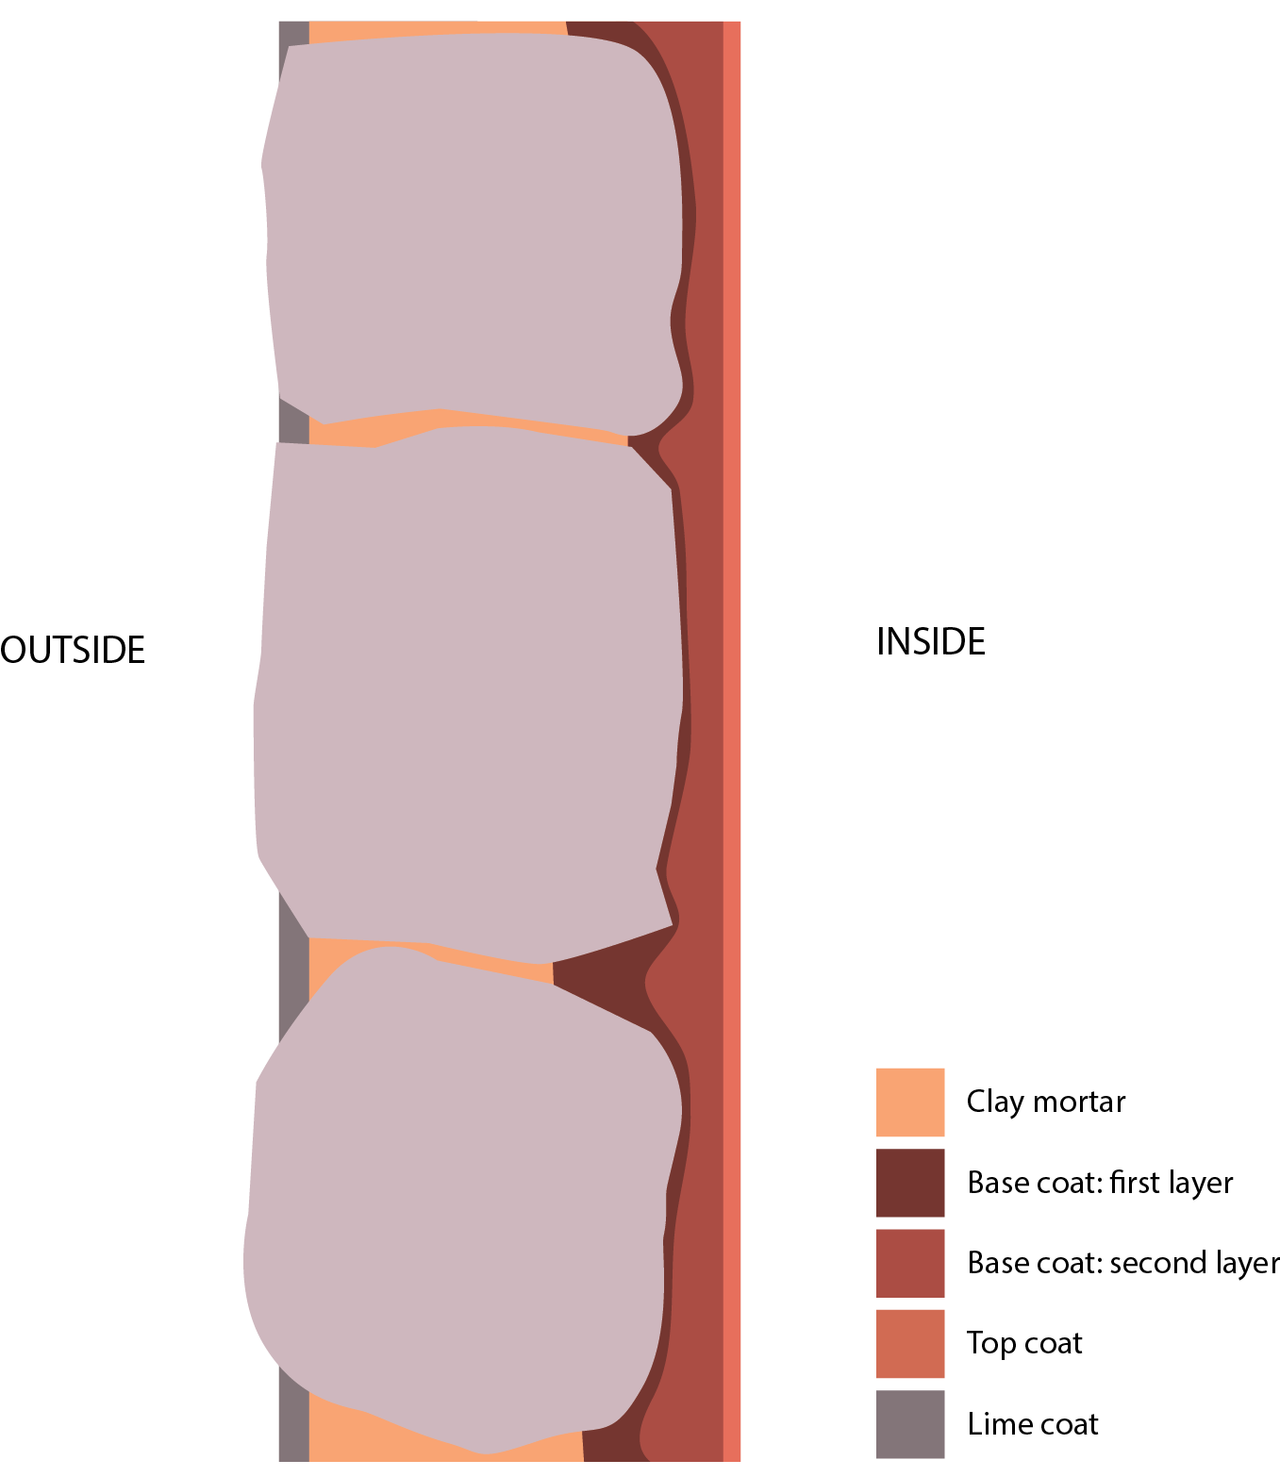
Earthen plastering is the technic we’ll use for the renovation of the granite ruin’s top room interior walls. It’s a mix of variable amounts of clay, straw and sand depending of the properties we want to get.
2
What is clay and where to find it ?
Published 10mo. Edited 10moPublished 11 months ago. Last edit 11 months ago
Clay is one of the components of the soil amongst stones, gravels, sands and silts. How to get it ?
> Construction sites nearby / quaries
That was our case with the abandonned brick factory and its colorfull quary. Construction sites can sometimes provide some good quality clay. The excavated soil is often evacuated as it’s considered as a waste.
> Your land
Maybe your garden or land is full of clay underneath ? That would be a game changer ! You will have to dig 40 cm or more beneath the humus layer to find it.
> Suppliers
Specialized stores can provide different types and colors of clay. This clay is mostly designed for decoration i.e top coat finishes (± 5 mm to 10 mm). It comes in bags of 20 kg or big bags. This solution might be expensive if you need a large amount of clay. The costs and ecological footprint of the transportation might be an issue.

3
What is straw and where to find it ?
Published 10mo. Edited 10moPublished 11 months ago. Last edit 11 months ago
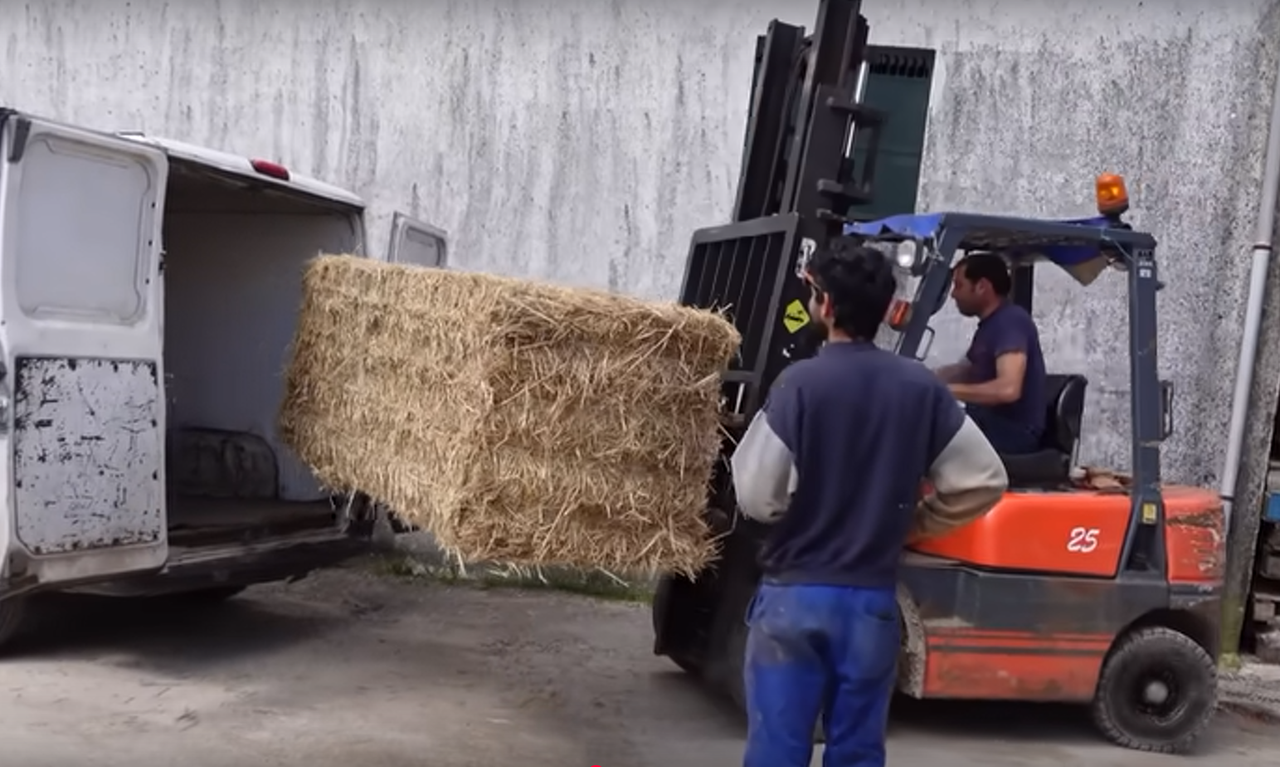
Different types of straw can be used for cob (rice, lavender, barley, rye, oat,…) but the wheat straw seems to be the most abundant and the easier to get here in Portugal (and probably in the whole Europe).
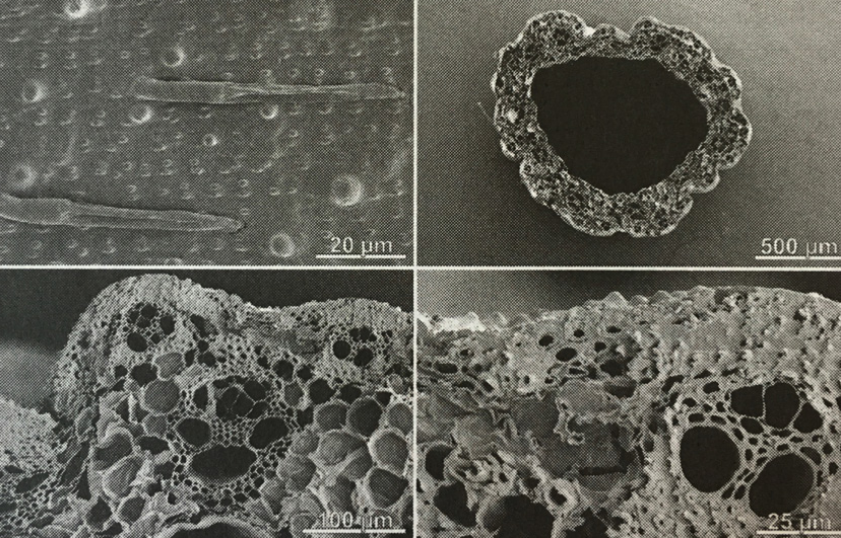
Moreover, wheat straw is thicker than the other ones and way more stronger. Straw has the capacity of storing a lot of still air due to its microporous structure which is good if we want to give more insulating proporties to our plaster.
So ask to your local farmer if he/she can give you a bale or two ! That’s what we did but the quality was not the best. Make sure the strawbale is homogeneous and doesn’t include to much thistle or brambles or other hard stemmed plants.
We use straw and not hay in the plasters. The difference between these two has been explained in this research module: https://community.projectkamp.com/research/can-we-make-our-own-insulation#update_997
Hay can be used to accelerate the fermentation of the mortar and the creation of biopolymers but we didn’t resort to this process.
4
Testing the soil
Published 10mo. Edited 10moPublished 11 months ago. Last edit 11 months ago
To determine the composition of each components and assess the quality of the clay for a contruction use we usually do several tests.
> A quick test to see the composition of your soil is to smear it all around your hands and wash them with water. If it doesn’t come off easily, the soil is more clayey.
> The jar test
This is explained in a previous research module: https://community.projectkamp.com/research/can-we-renovate-granite-walls#update_937
> The shrinkage test
In a mold, put a small amount of the soil (not too wet), ram it and let it dry. If the dry soil is cracked and detached from the edges of the mold, it means that the soil is more clayey.
> The “sausage” test
Take a sample of the soil (again not to wet) and form a sausage by rolling it. Then place it on the edge of a table and gently slide it out of it. If it breaks quickly (less than 5 cm) the soil is more sandy, if it breaks down after 10 cm the soil is more clayey.
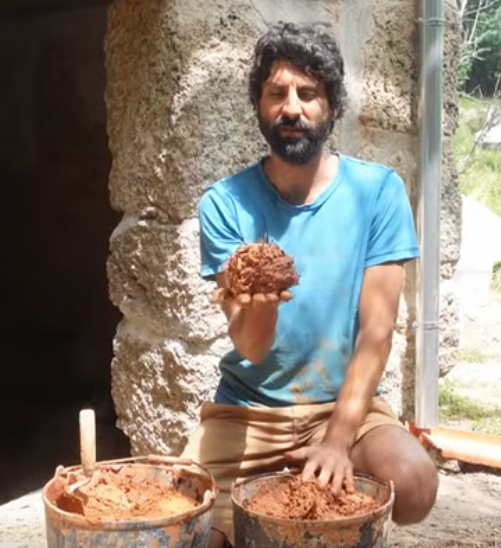
The composition of the soil we used was almost composted of full clay. It is really sticky and easy to model. From the beginning we knew we’ll have to add sand or fibers in it.

5
Making samples to chose the best ratio for our mortar
Published 10mo. Edited 10moPublished 11 months ago. Last edit 11 months ago
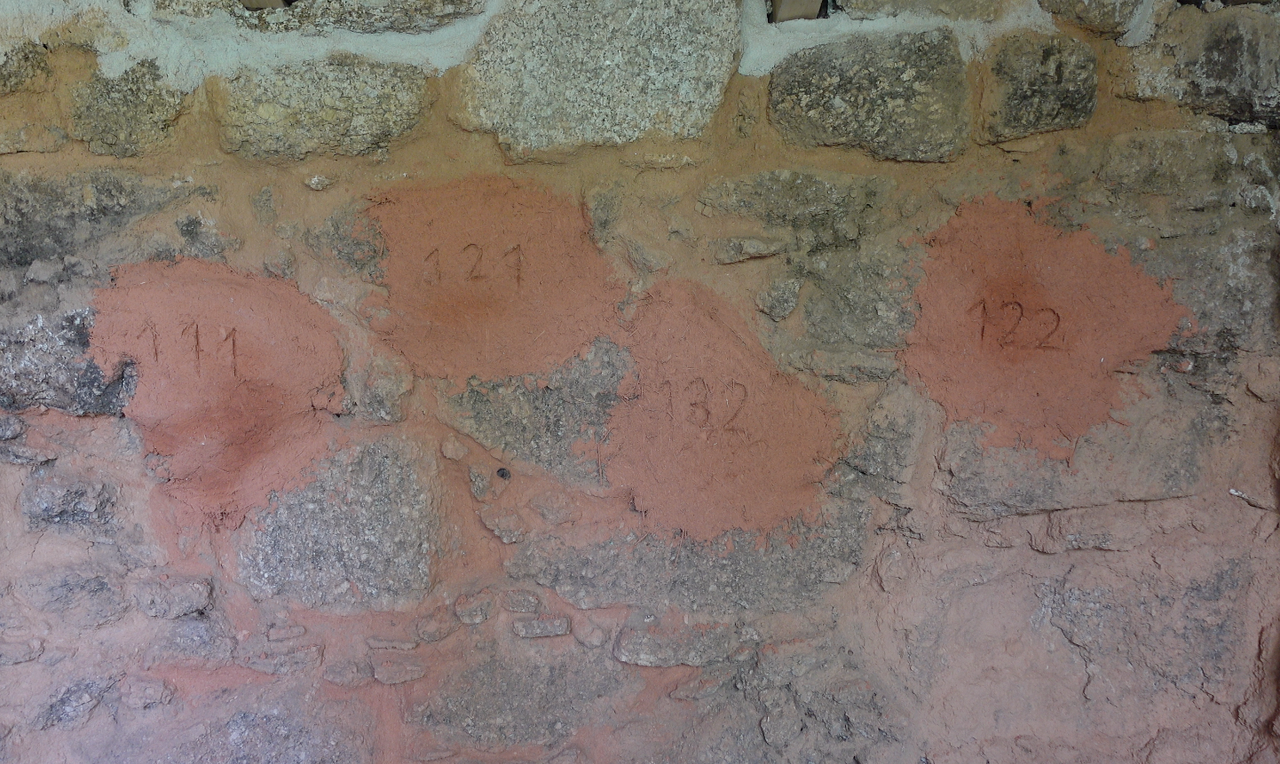
To find the good recipe we did a couple of mixes with different sand ratios:
> 1 part clay / 1 part sand / 1 part straw
> 1 clay / 2 sand / 1 straw
> 1 clay / 3 sand / 1 straw
> 1 clay / 2 sand / 2 straw
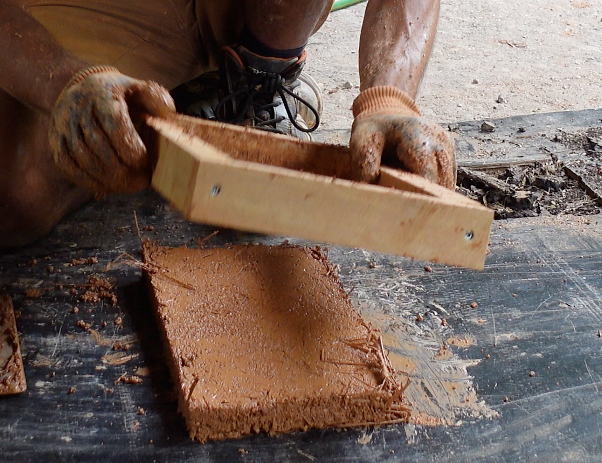
The samples have to mesure at least 20/20 cm and have a thickness as close as possible to the one we will apply onto the walls.
6
Interpreting the results
Published 10mo. Edited 10moPublished 11 months ago. Last edit 11 months ago
When fully dried, we observed that:
> The first one was a bit more cracked than the other one.
> The second sample was fine.
> The third one was a bit crumbly and powdery.
> The fourth one was conclusive too.
Finally we chose the last one (1/2/2) for three main reasons:
- The quantity of straw fibers in the mix was perfect to allow us plastering a thick and strong layer on the walls.
- We had a lot of leftovers from our insulation panels so it was more than relevant to put it in the mixes
- The straw will add insulative properties to the wall even if the earthen plaster itself cannot be insulative. We talk here about thermal correction not insulation.
7
Preparing the walls: flattening the surfaces
Published 10mo. Edited 10moPublished 11 months ago. Last edit 11 months ago
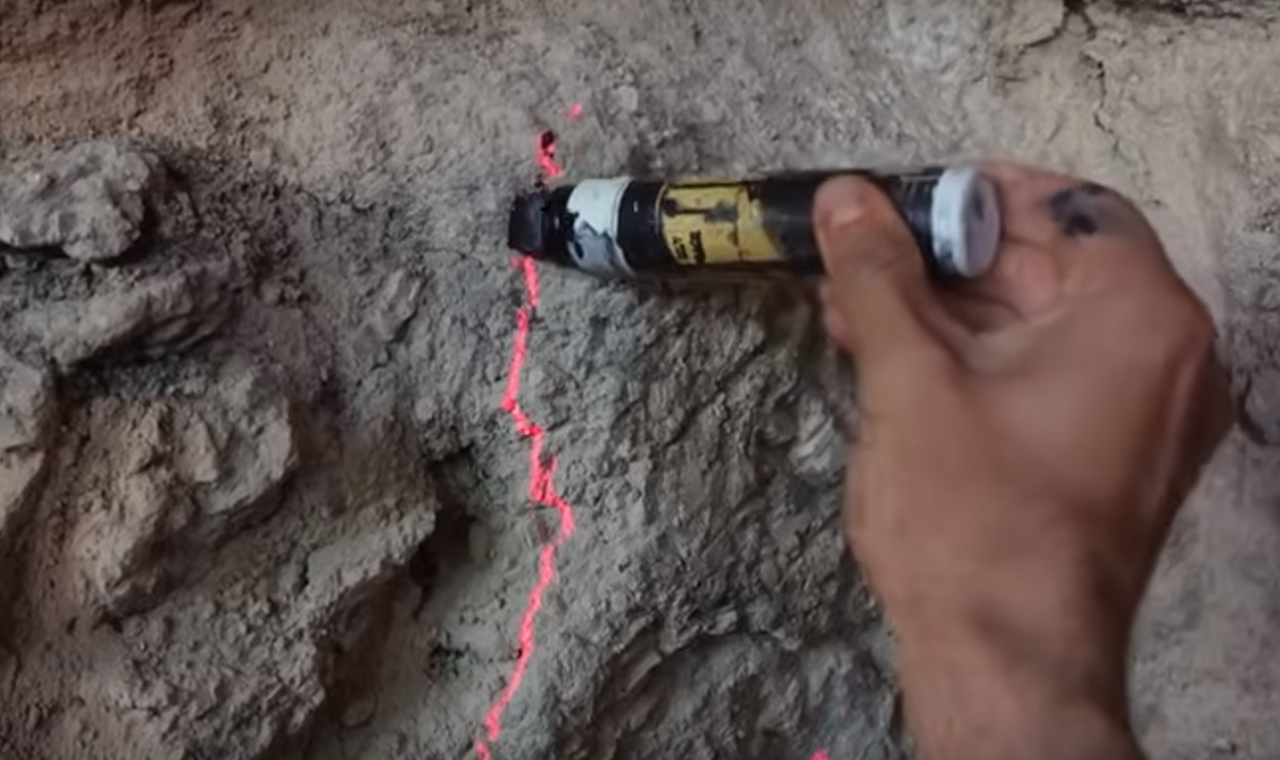
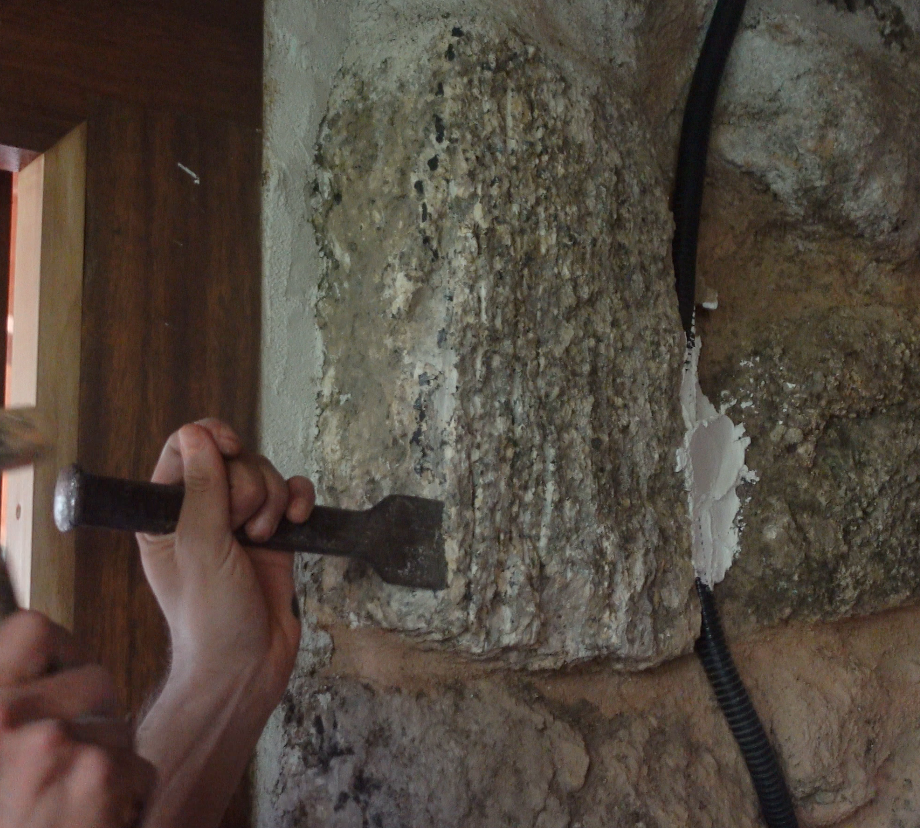
Before plastering the stone walls, we had to control their “flatness” and define the thickness of the future base coat.
The more uneven or "sticking out" the stones are, the thicker the plaster layer will be to fill in the gaps to create an even surface. Protrusion of stones will require more material and more work that’s why we grinded them.
We used a laser to materialize the thickness of the future base coat and marked the stones to grind.
8
Preparing the walls: Electricity wiring
Published 10moPublished 11 months ago
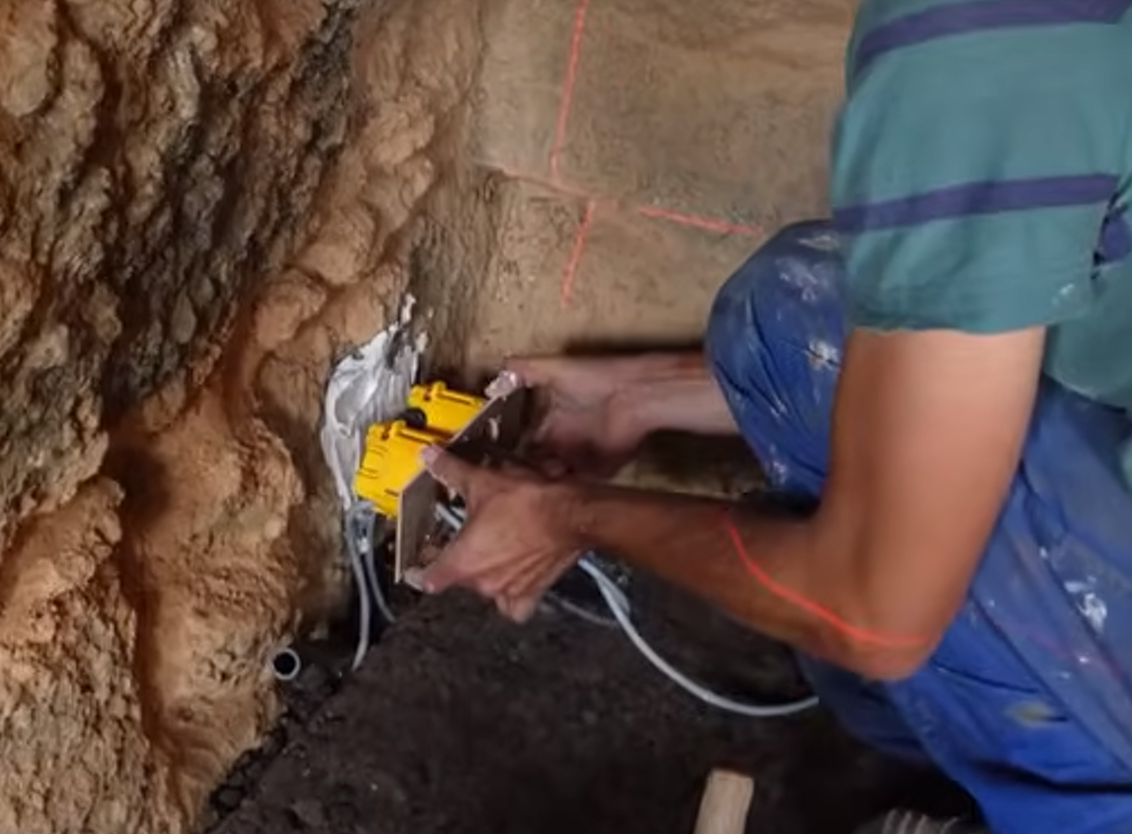
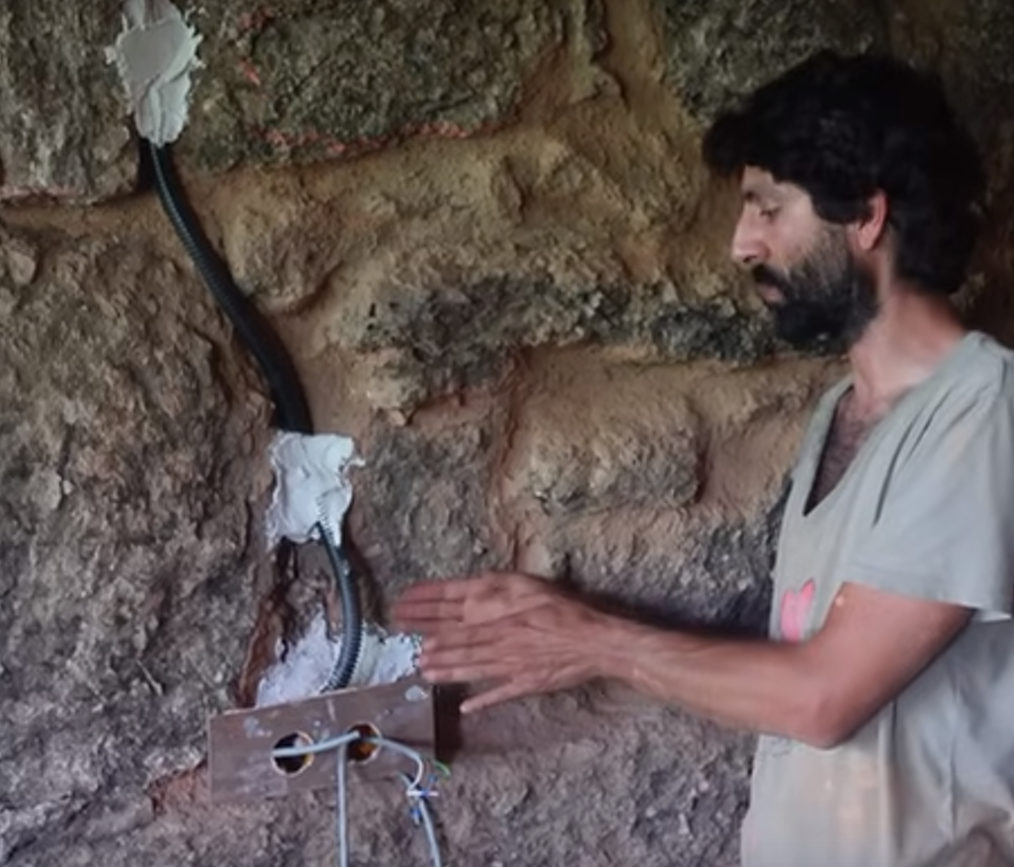
This step is also the right time to have your electricity wiring ready and settled onto the walls.
We used a gipse mortar to hold the wires and the sockets in place. The laser helped us finding the right position of the sockets.

9
Preparing the walls: laying down the cork strips
Published 10mo. Edited 10moPublished 11 months ago. Last edit 11 months ago
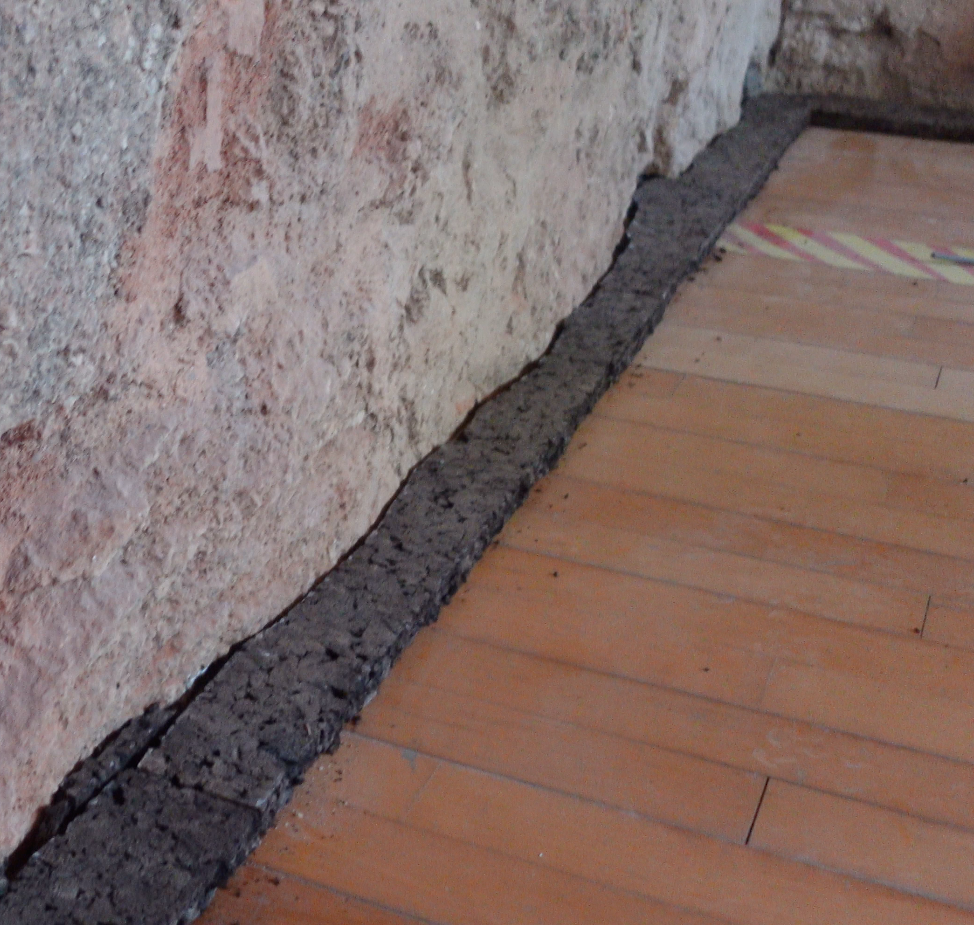
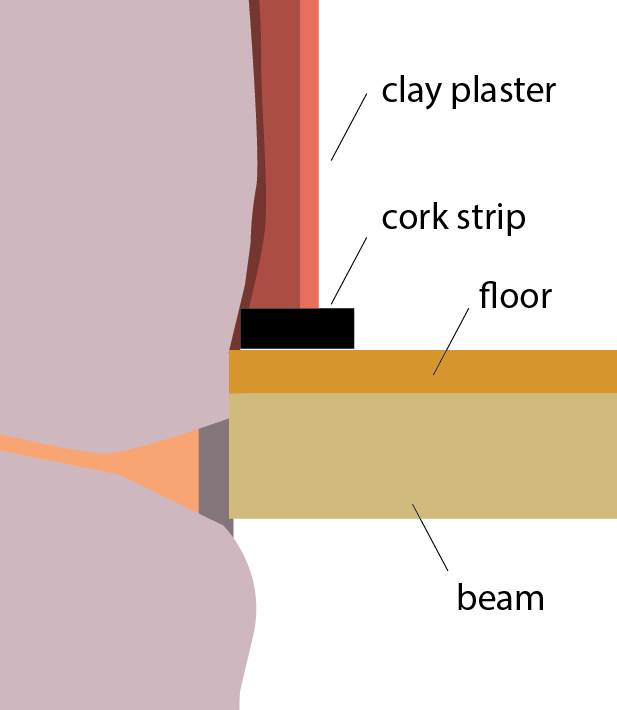
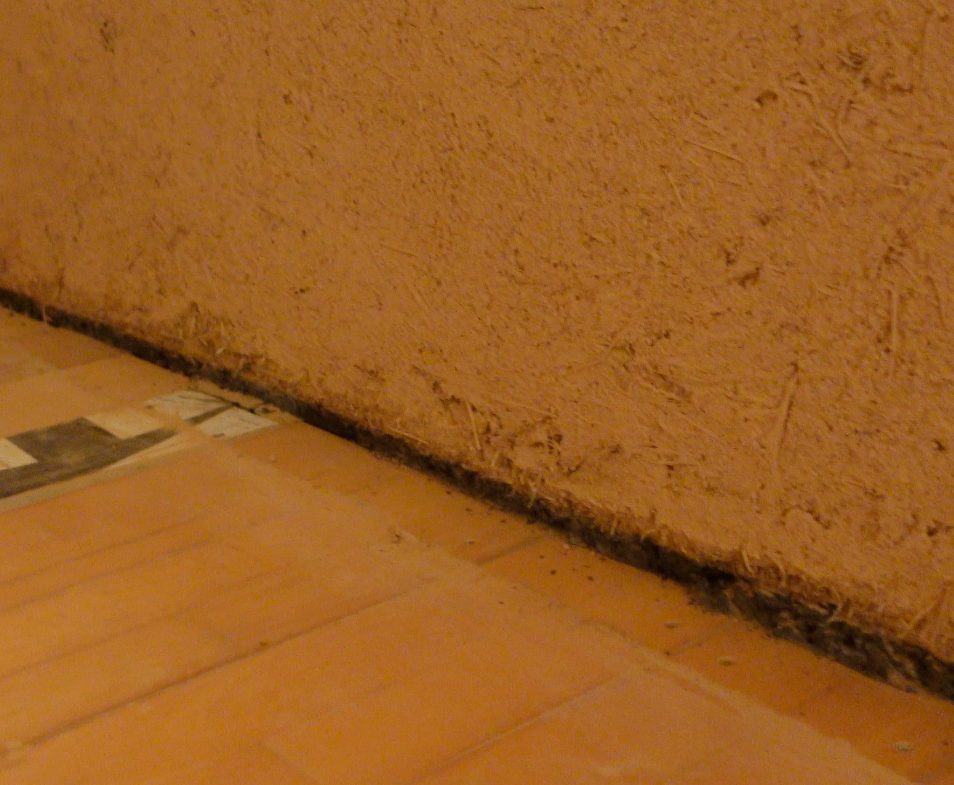
Last step before plastering.
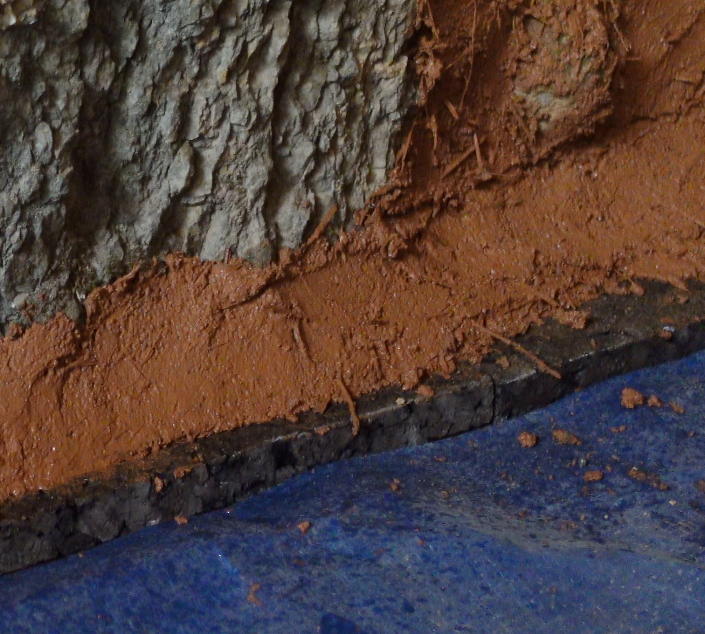
We decided to lay down a cork strip on the bottom of each wall in order to detach the floor from the mortar. The strip was 10 cm wide. If the floor moves due to dilatation on the long run it won’t affect the plaster.
10
Soaking the clay
Published 10moPublished 11 months ago
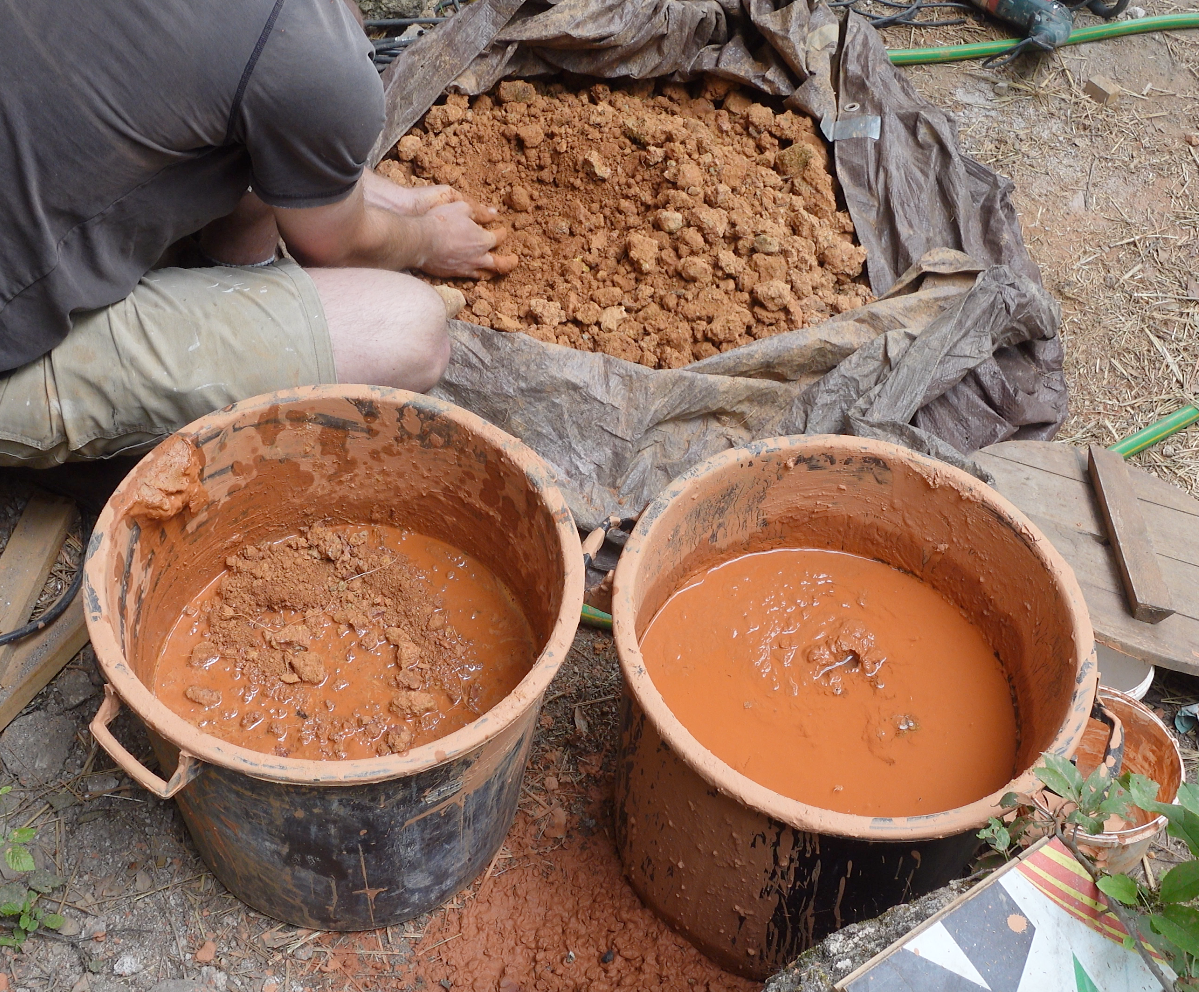
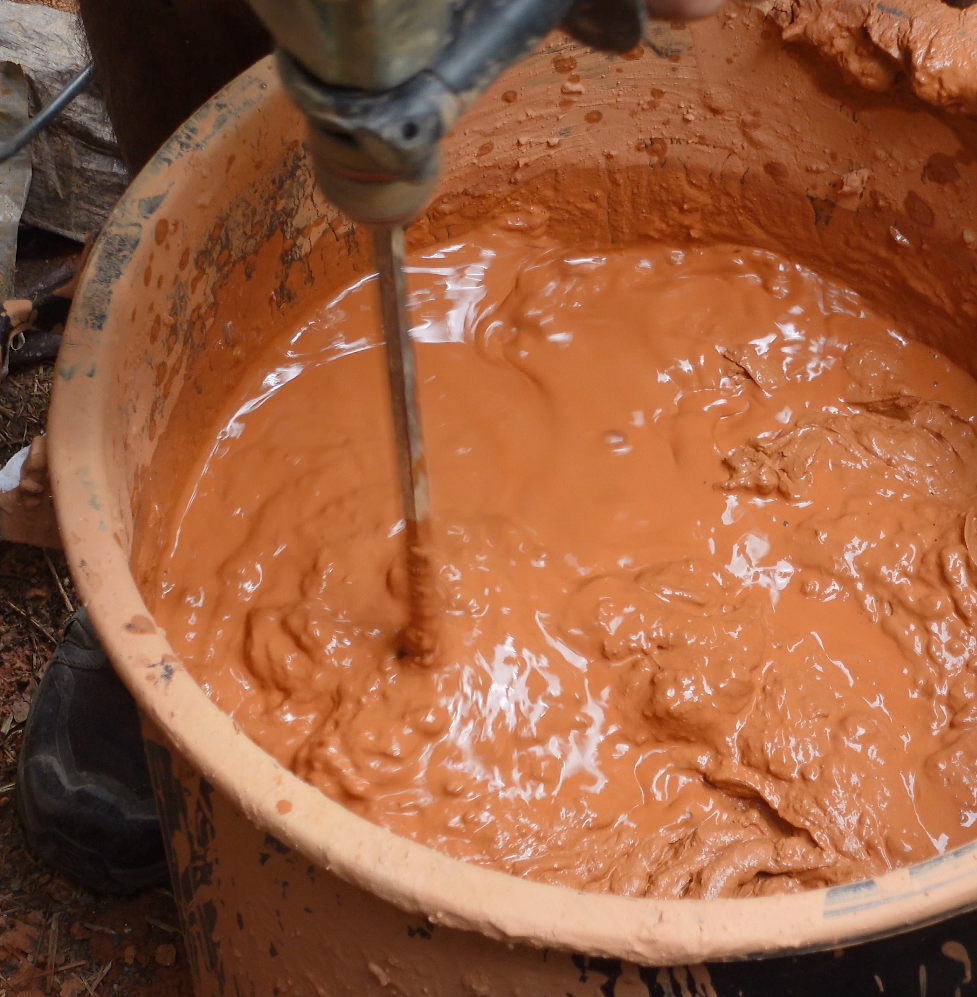
The clay we got was powdery and chunky. We had to soak it in big buckets of water during one or two days to soften it. We always made sure to have two buckets full of soaked clay before starting a new day of plastering. The soaked clay is then mixed with an additional amount of water to make the mixing easier. The consistancy of the clay was in a plastic stage.
11
Preparing the mortar for the base coat
Published 10mo. Edited 10moPublished 11 months ago. Last edit 10 months ago
We used a concrete mixer to prepare our batches. In one mix we could put: 1.5 clay / 3 sand / 3 straw (1/2/2 ratio). Then we add the water until we obtain a soft mortar. The consistancy was between a plastic and a liquid stage for the base coat (you can form a ball with it). It's easier to add more water afterwards than to start with a too liquidy mortar.

12
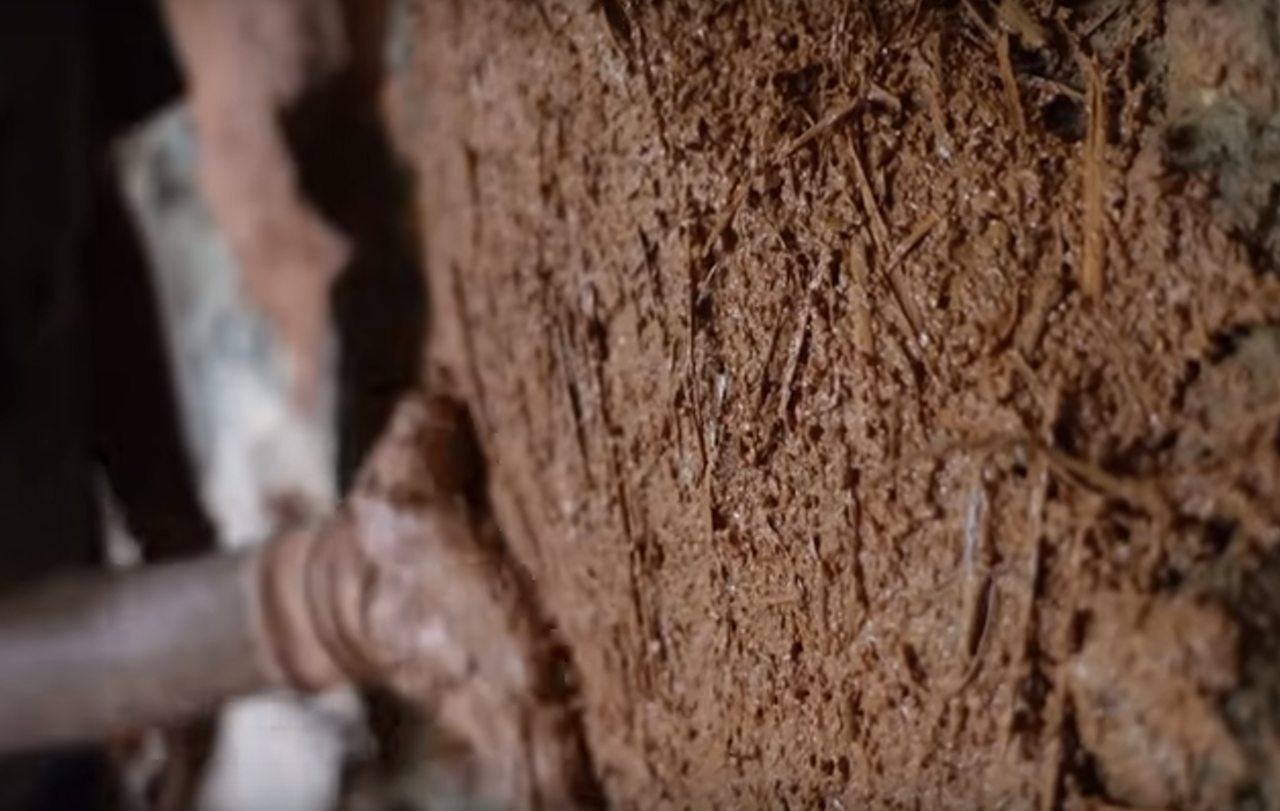
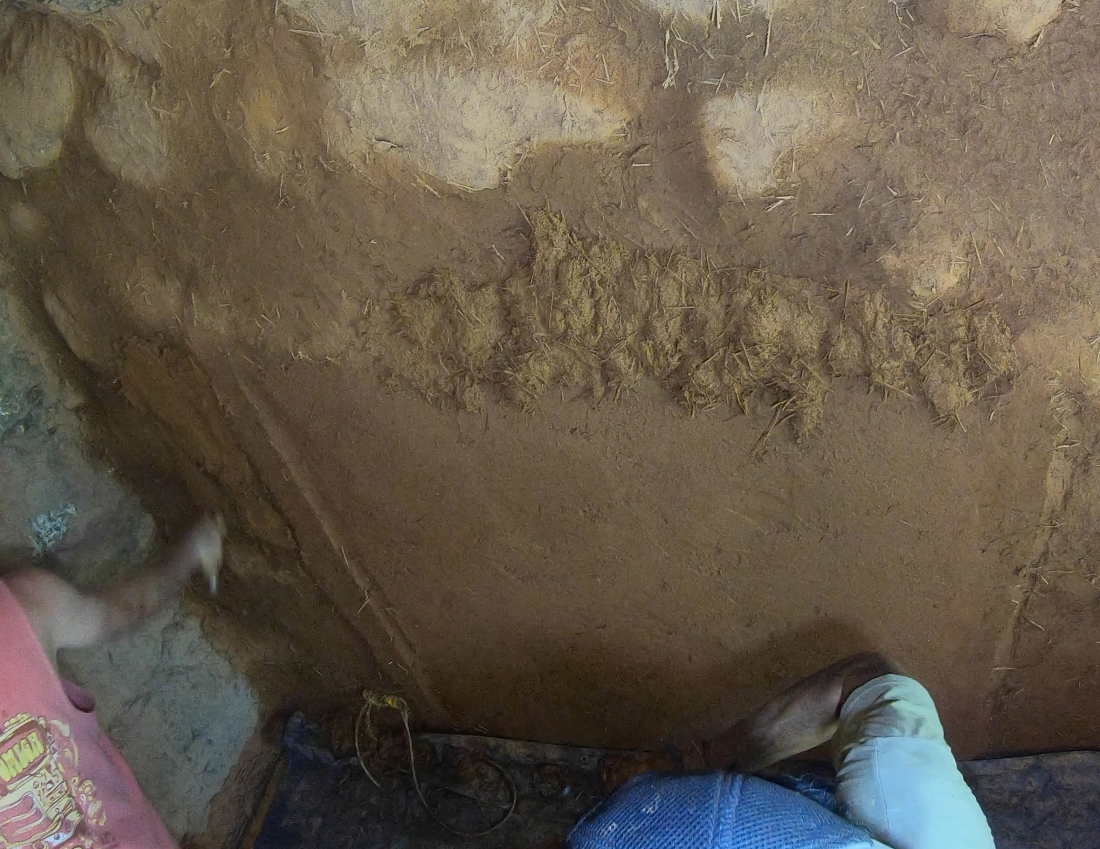
Applying the base coat: first layer
Published 10mo. Edited 10moPublished 11 months ago. Last edit 11 months ago
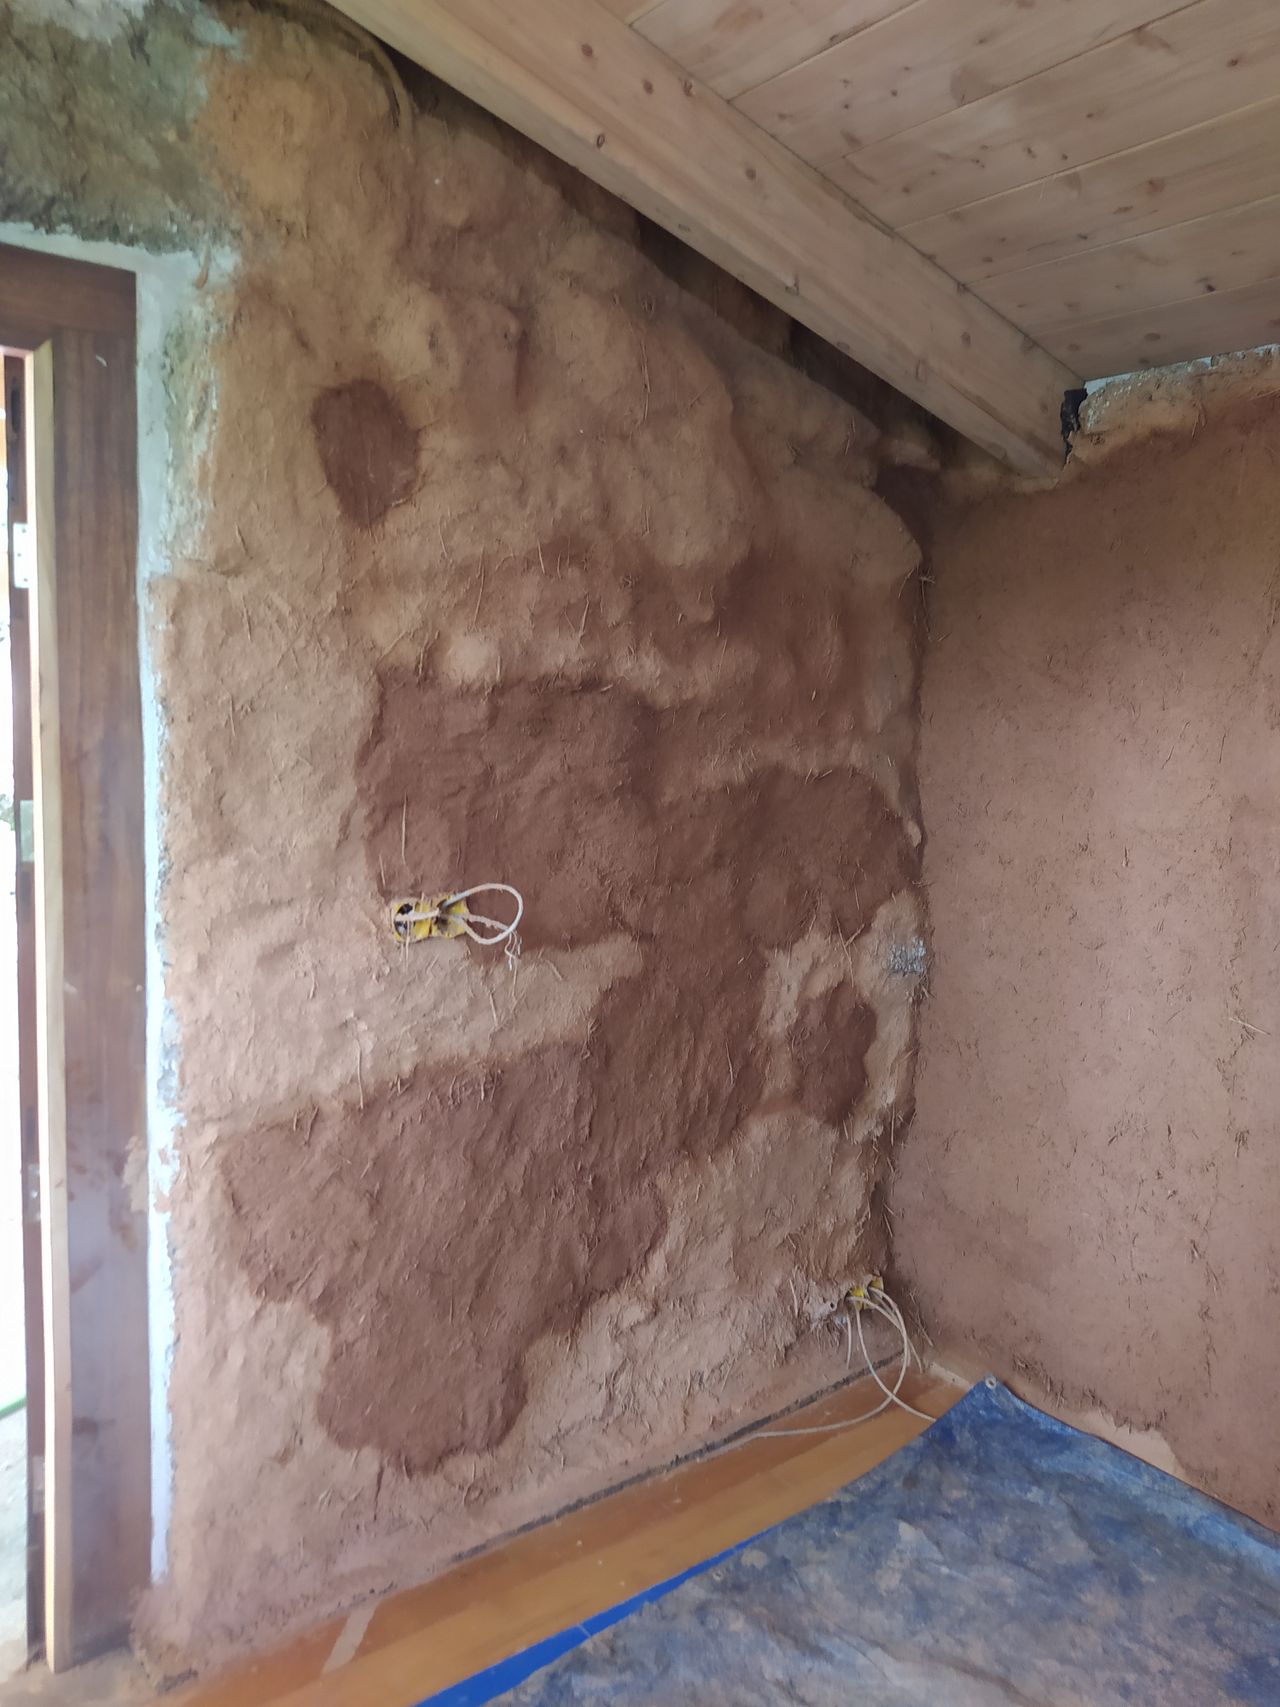
The idea for this first layer is not trying to get too quick to the final thickness we want. Otherwise that coat could fall down because of its own weight.
So we started with a thin coat in order to have the entire surface covered. The preparation coat (base coat) can be either cast with a trowel or applied by hand by scrubing it. The surfaces have to be brushed and wetted before plastering.
The first step was to seal the cork strips to the wall and then to move up to.
13
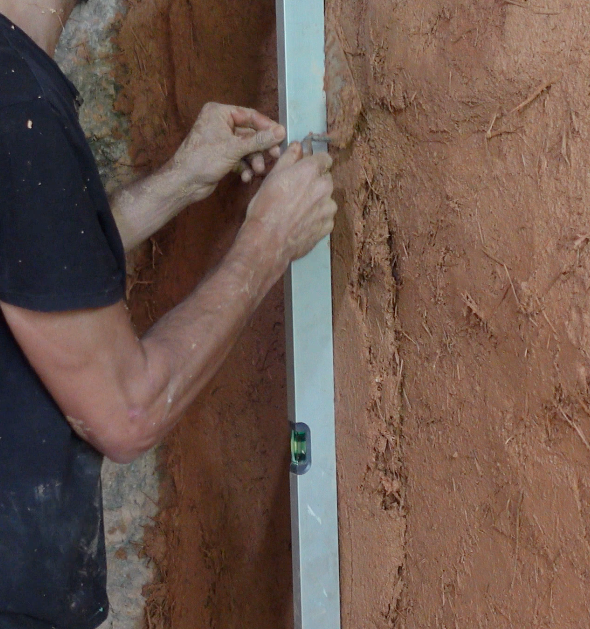
Applying the base coat: Leveling
Published 10moPublished 11 months ago
The walls were uneven and wavy. In order to have a flattish wall at the end we created reference guides or rails. The idea is to find the protruding spot on the stone wall and start from this particular point a leveled guide all the way down or up. We created two or sometimes three reference guides according to the lenght of the wall. This done, we were ready to fill in the gaps between the guides.
14
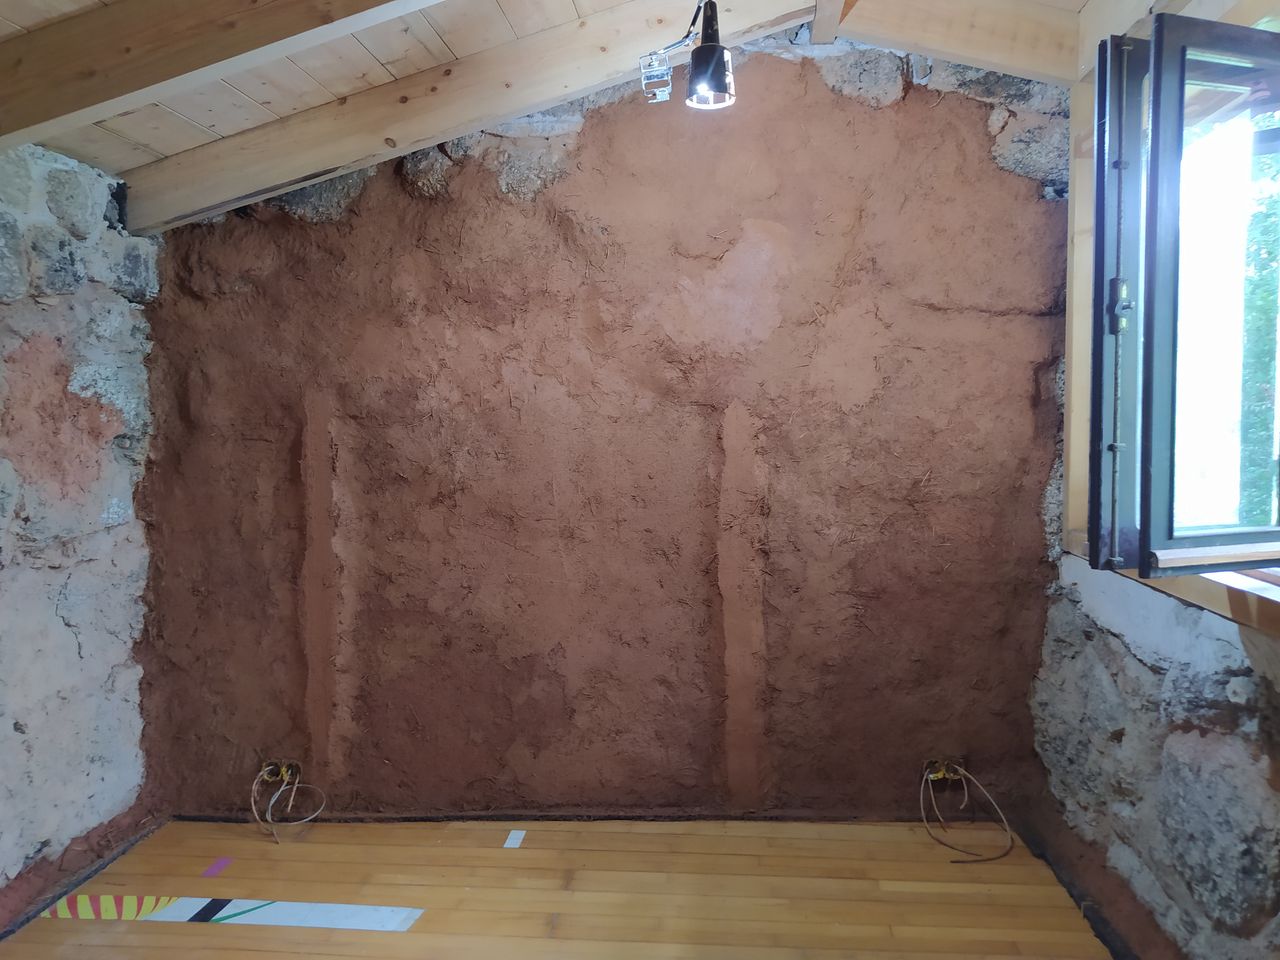
Applying the base coat: second layer
Published 10mo. Edited 2moPublished 11 months ago. Last edit 3 months ago
We have to keep in mind that the clay has to stay wet during the entire process. Working “a fresco” will ensure a better cohesivity of the different layers.
For this coat we used the same mix but at a different stage. The mix was firmer than the previous coat in order to accelerate the drying time and to apply multiple coats during the day.
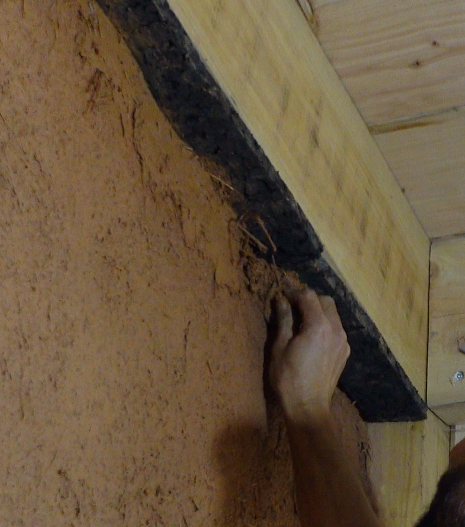
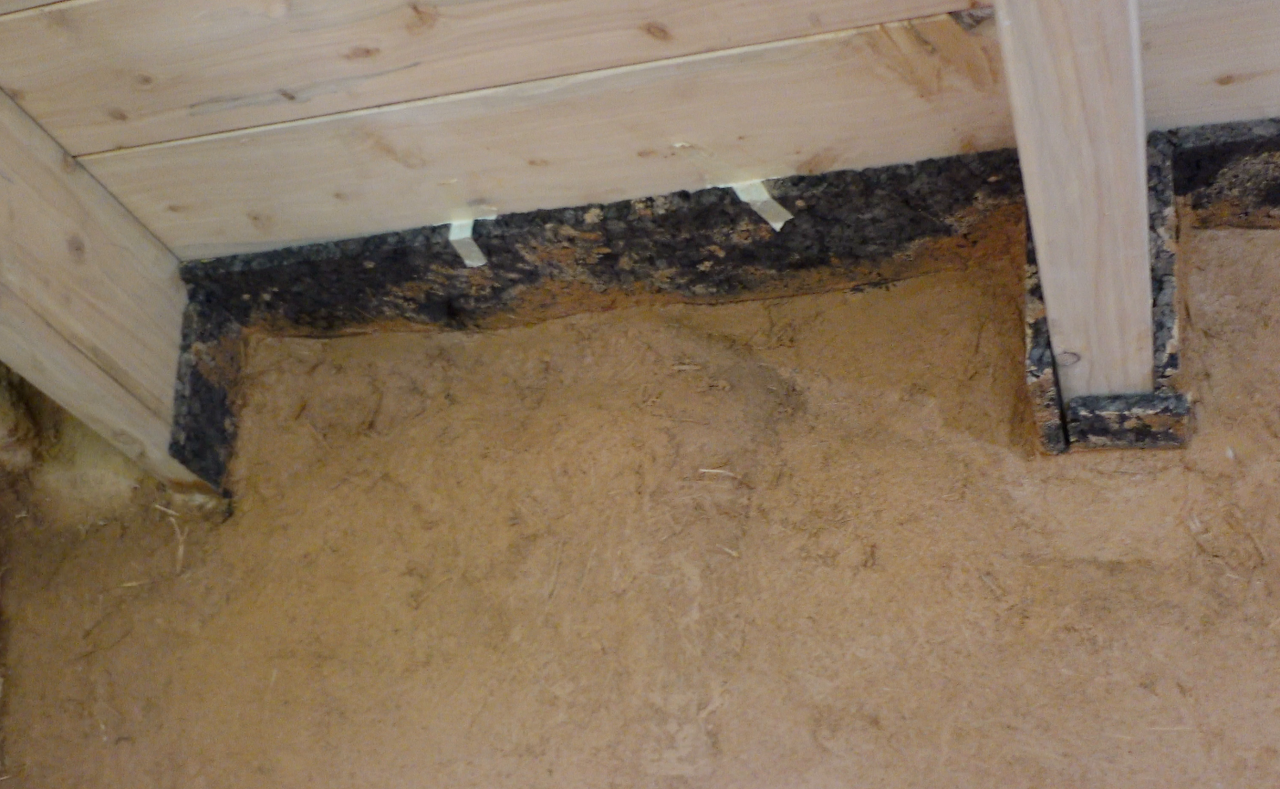
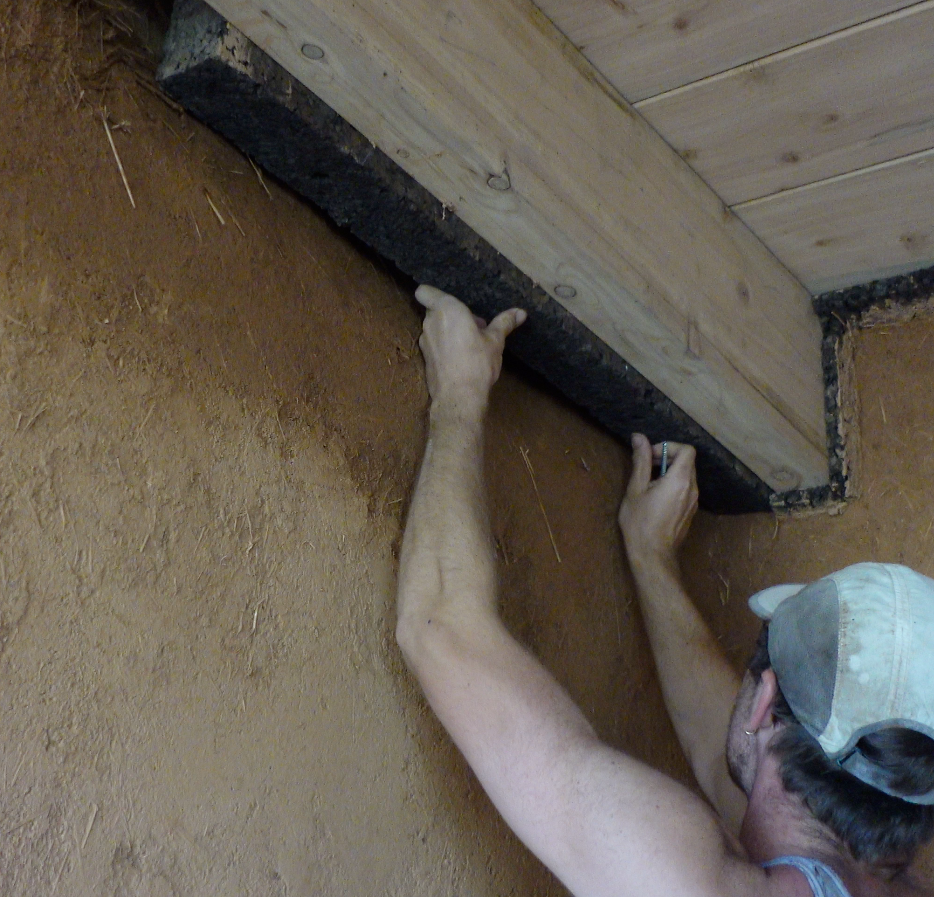
We started from the bottom to the top using trowels or hand to apply the mortar, and hawks to squeeze it onto the wall.
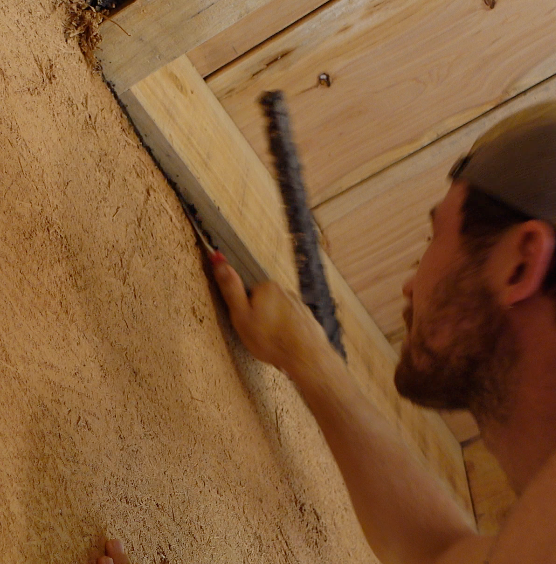
In our particular case we decided to put cork stripes in between the ceiling and the plaster. Once again, the main idea was to detach the plaster from the ceiling and to prevent an excessive shrinkage after drying.
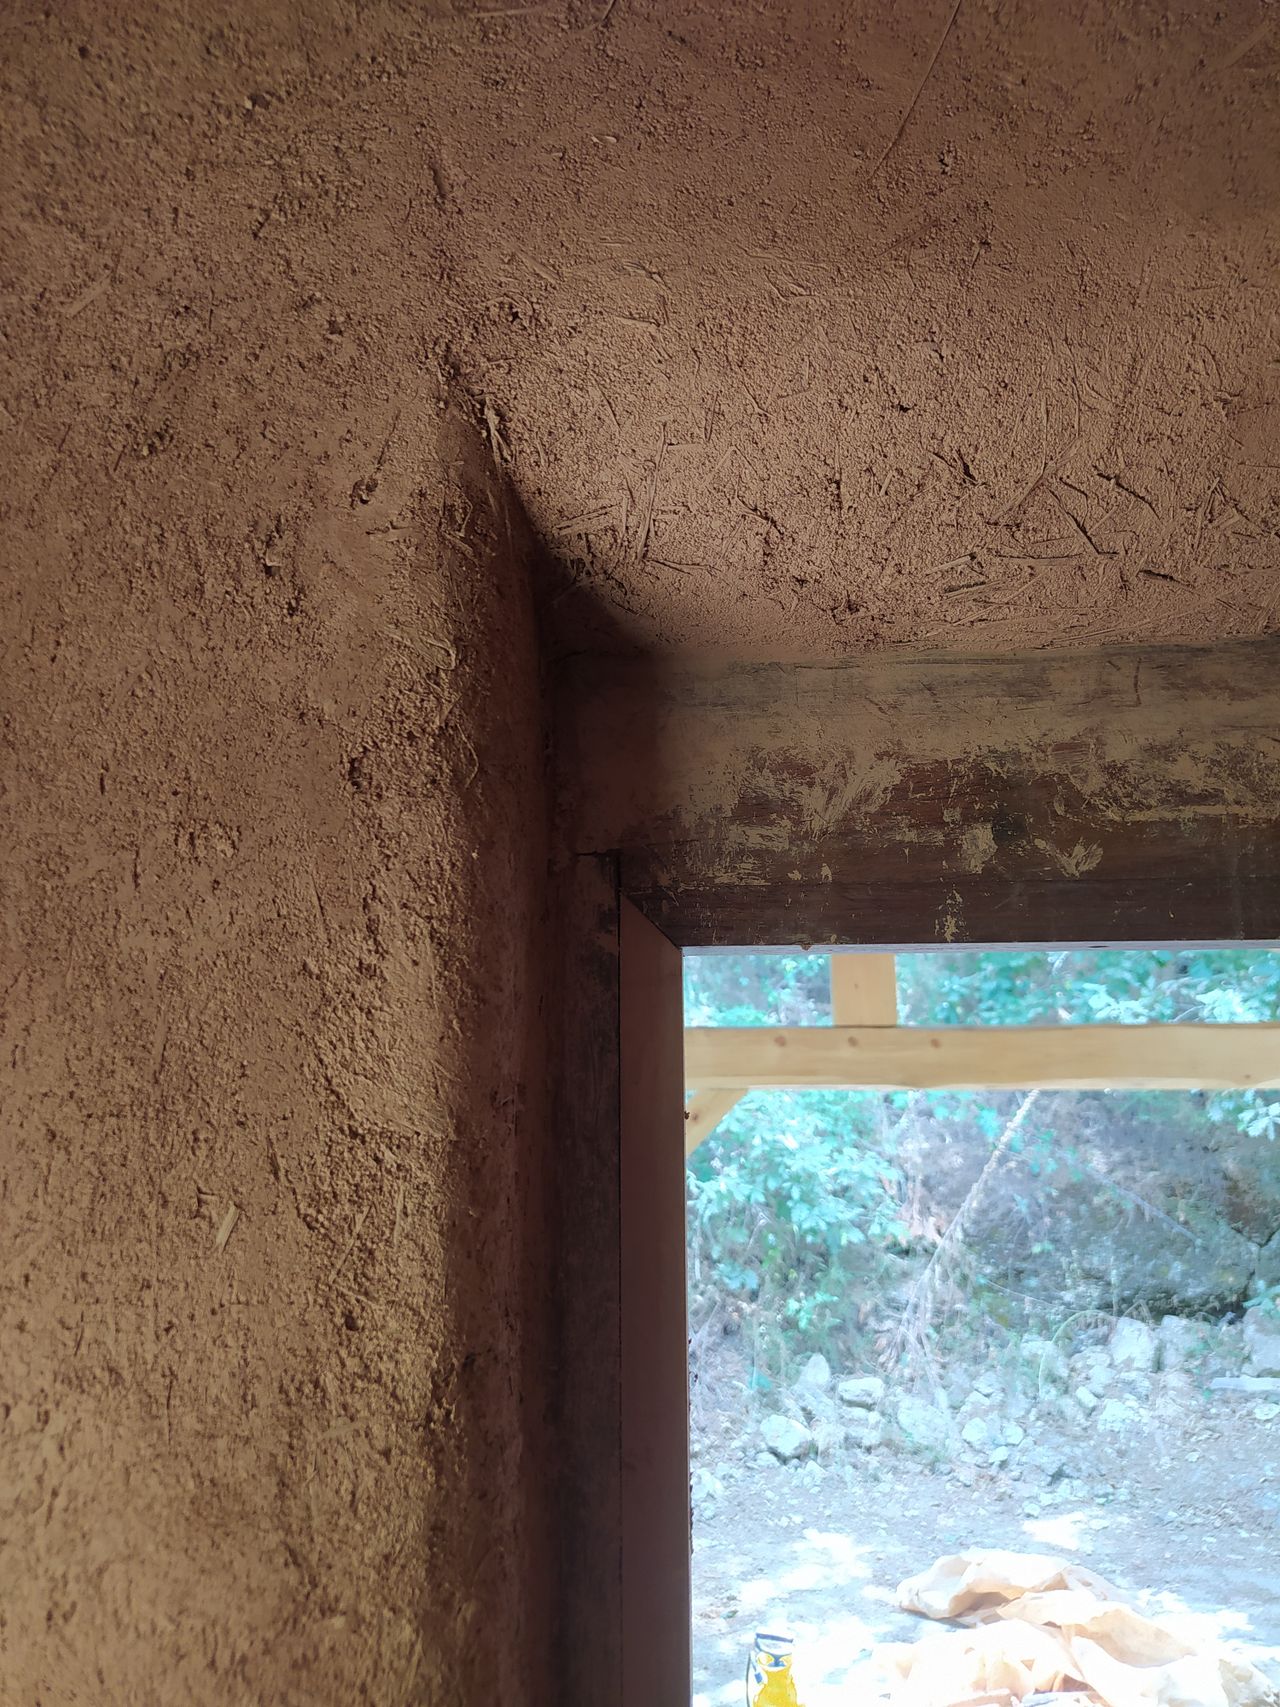
The corners at the entrance were rounded so they will be sturdier and resist the coming and going in the room. We used a trowel to form these corners.

15
Making samples to choose the good ratio for the top coat
Published 10moPublished 11 months ago
Meanwhile the base coat was drying, we moulded two samples of the exact same ratio (1/2/2). Dried, we used them as sample to try different finishes and tools for the top coat.
The ratio for the top coat was 1 clay for 2,5 sand without adding fibers. The thickness we wanted to apply was 5 mm approximatively.
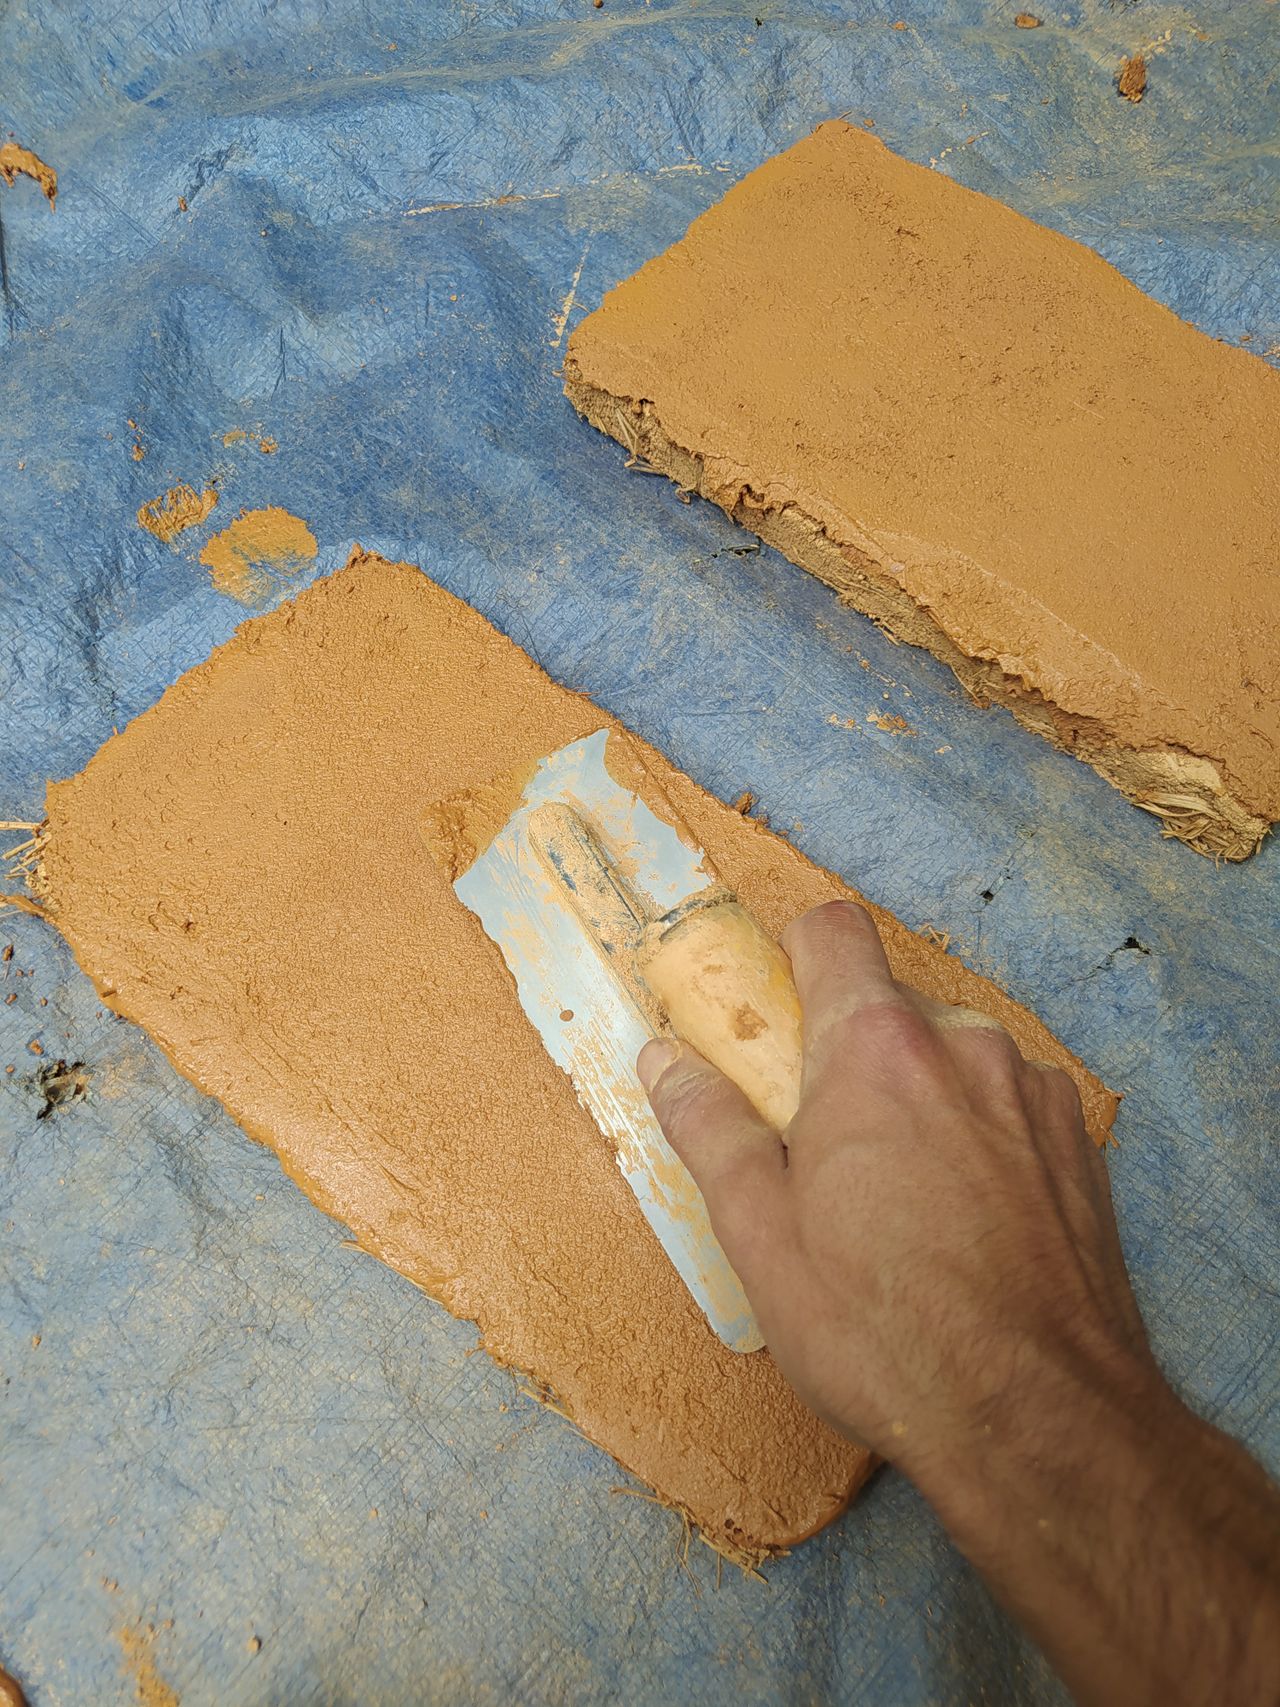
We tried a smooth finish on one sample and a rougher one on the other. Both of them were applied using a trowel. A float sponge finish has been done on one of them.
The sponje finish is really practical as it can flatten and remove marks previously made on the plaster.
16
Straining the clay
Published 10mo. Edited 10moPublished 11 months ago. Last edit 11 months ago
This step is important to remove the remaining little rocks contained in the clay. We used a DIY 5 mm thieve to make so. It was not ideal but we removed a lot of small rocks.

17
Preparing the mortar for the base coat
Published 10moPublished 11 months ago
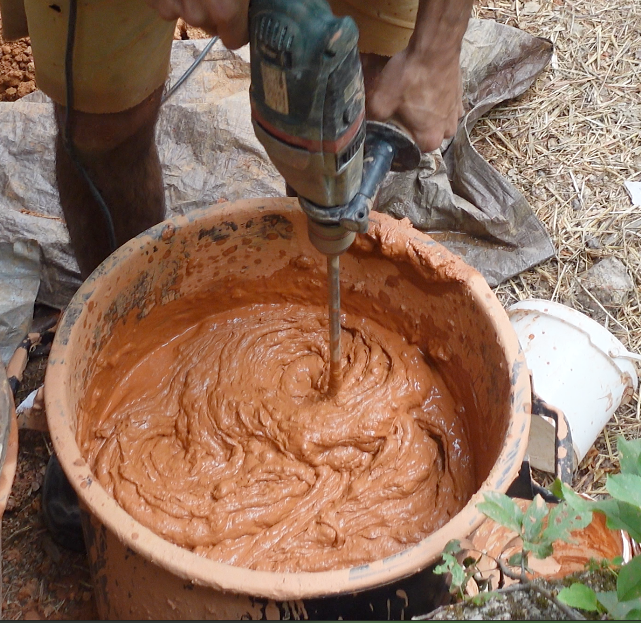
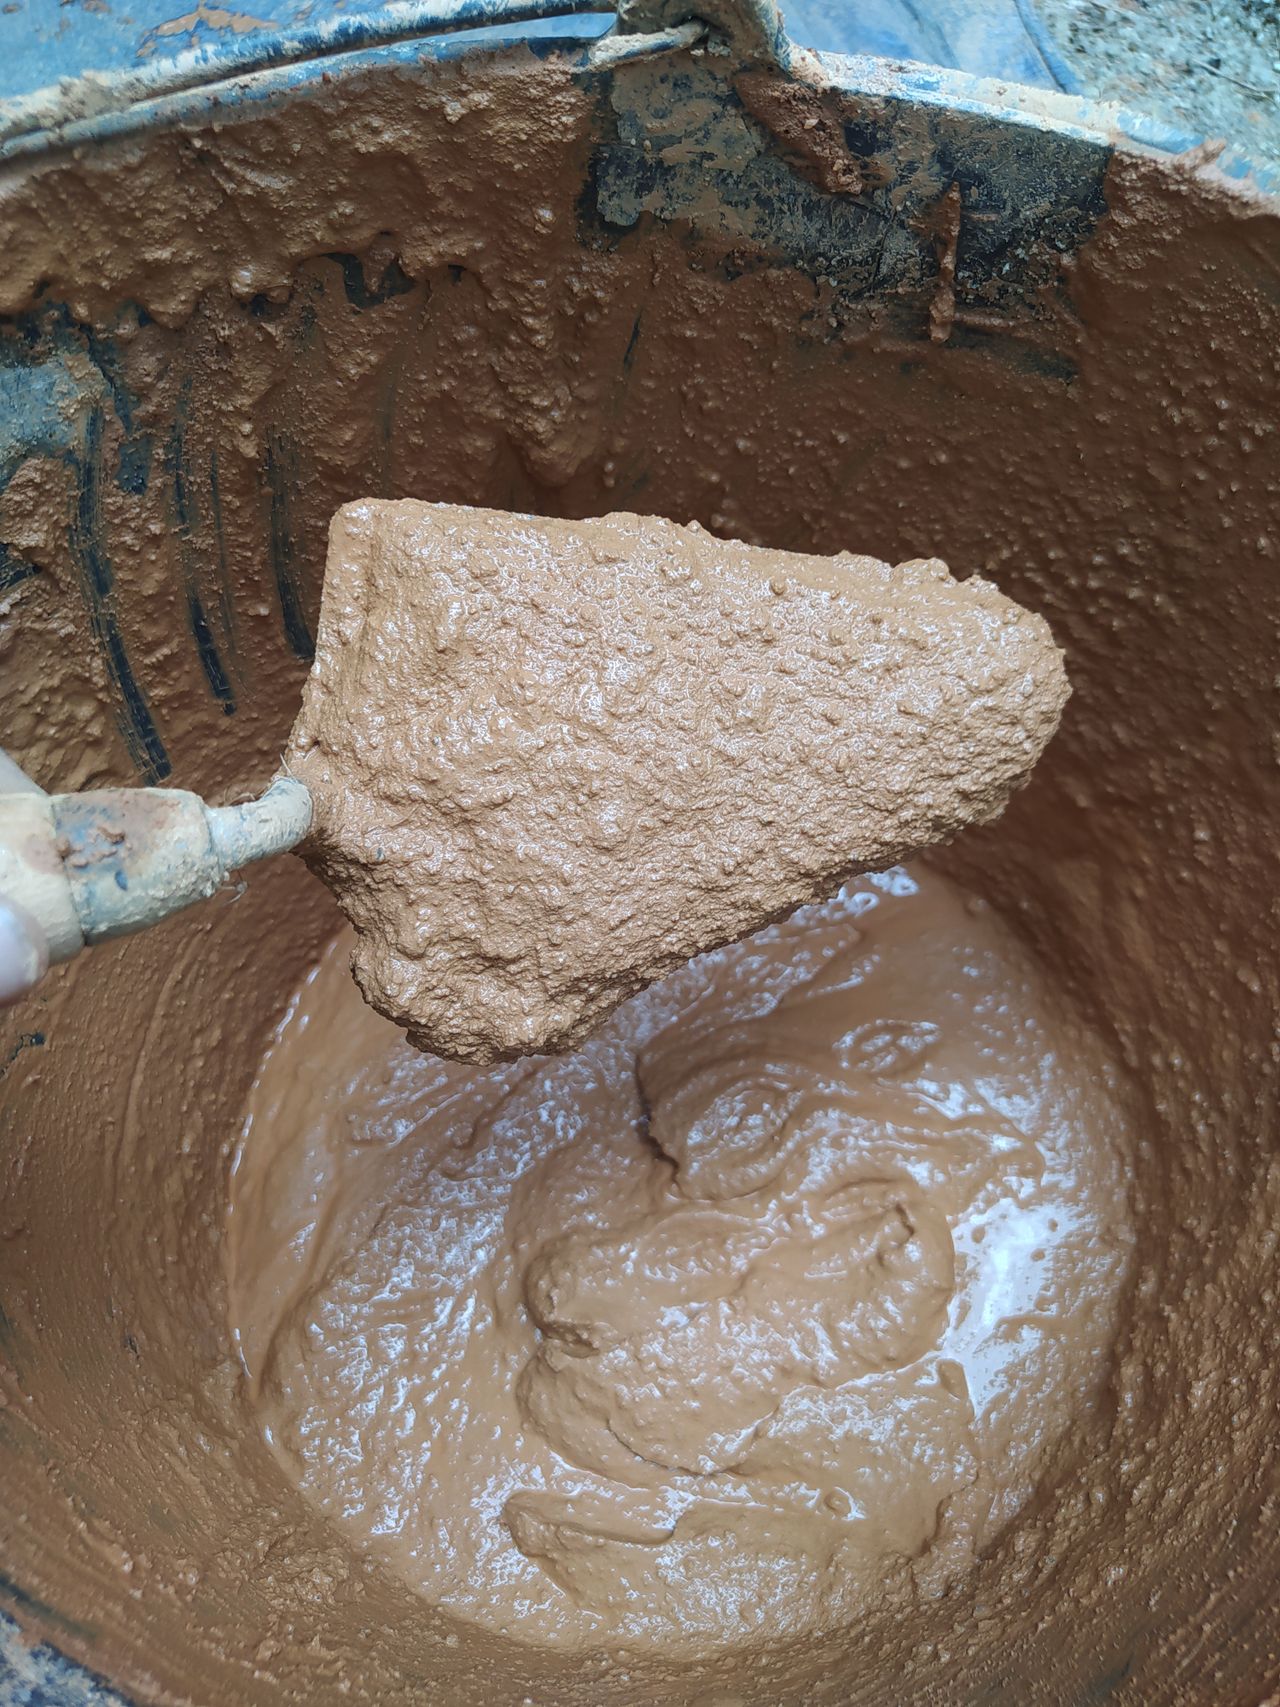
We used a mixing drill to prepare our batches.
The sand we used for this coat was thiner than the previous one (0 to 3 mm). We mixed it with the strained clay and add water until we obtain a creamy and soft mortar. The trowel test is a good test: if the mortar stick on the trowel it’s good to be applied.
18
Applying the top coat
Published 10moPublished 11 months ago
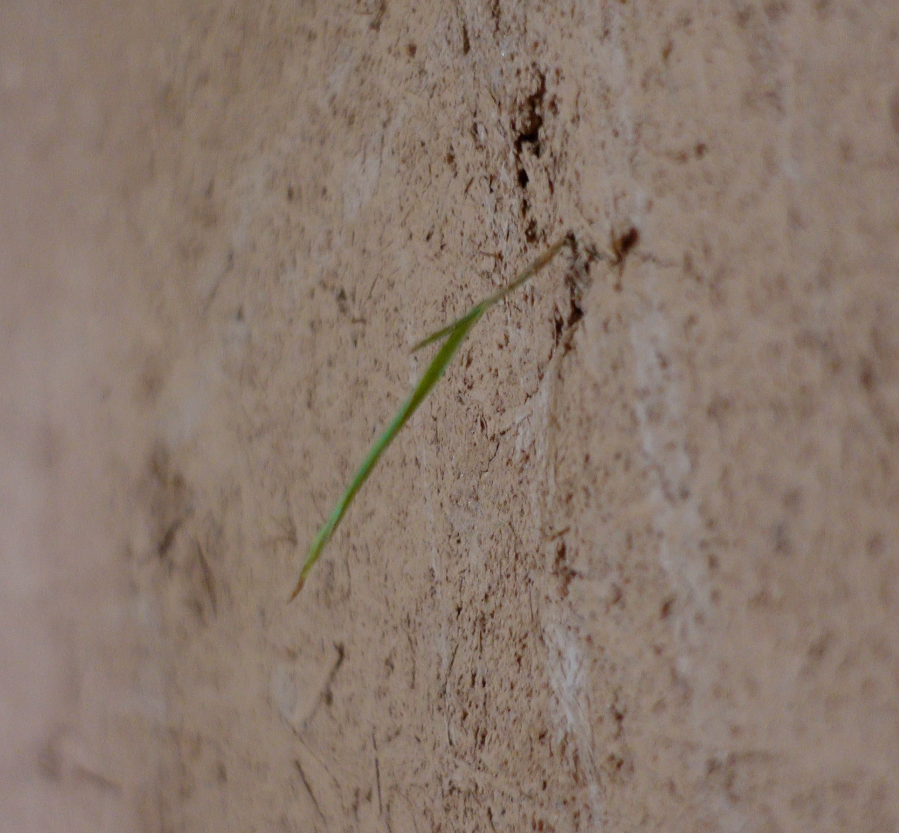
When the one and only sprout died it meant that the walls were dry inside and ready to be plastered.
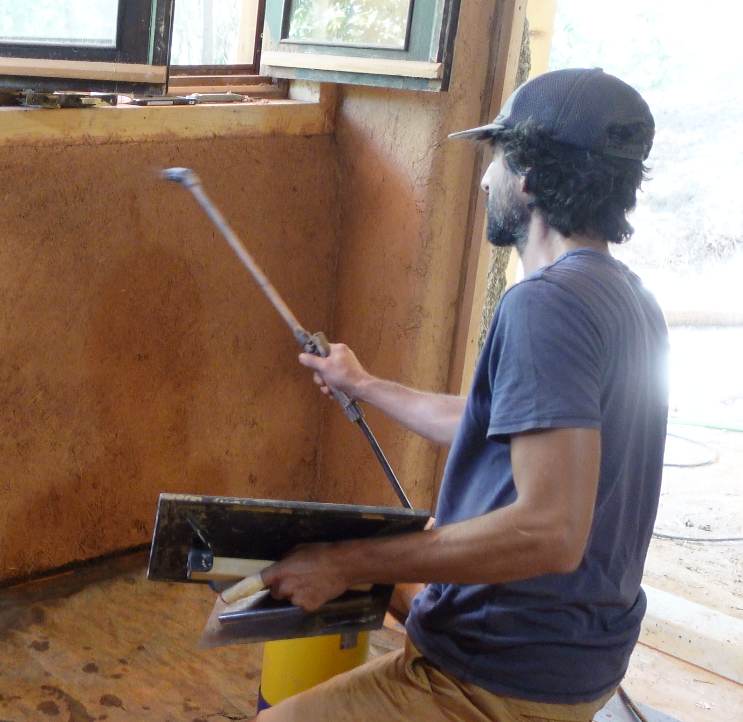
The non adhering particules have to be removed by using a soft brush. The sticking out straws have to be cut with cissors to facilitate the plastering. We also cut the cork strips flush to the wall before plastering. The top coat will cover the cork.
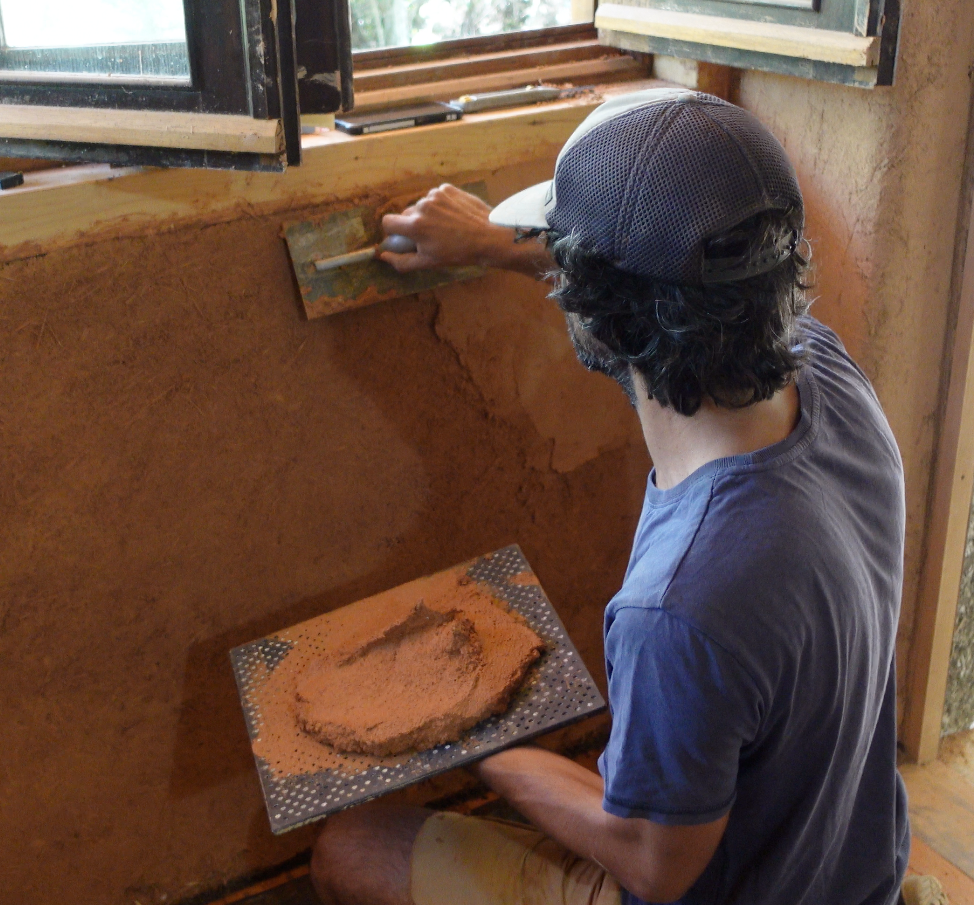
We used trowels and hawks to apply the mortar. The main idea is to completely cover the wall starting from the top to the bottom to not damage the flat surface you obtain (in case some mortar fall down). When the coat starts becoming firmer, we can use the hawk to gently flatten the surface and remove the eventual marks.
The coat we applied was approximatively 5 mm thick.
19
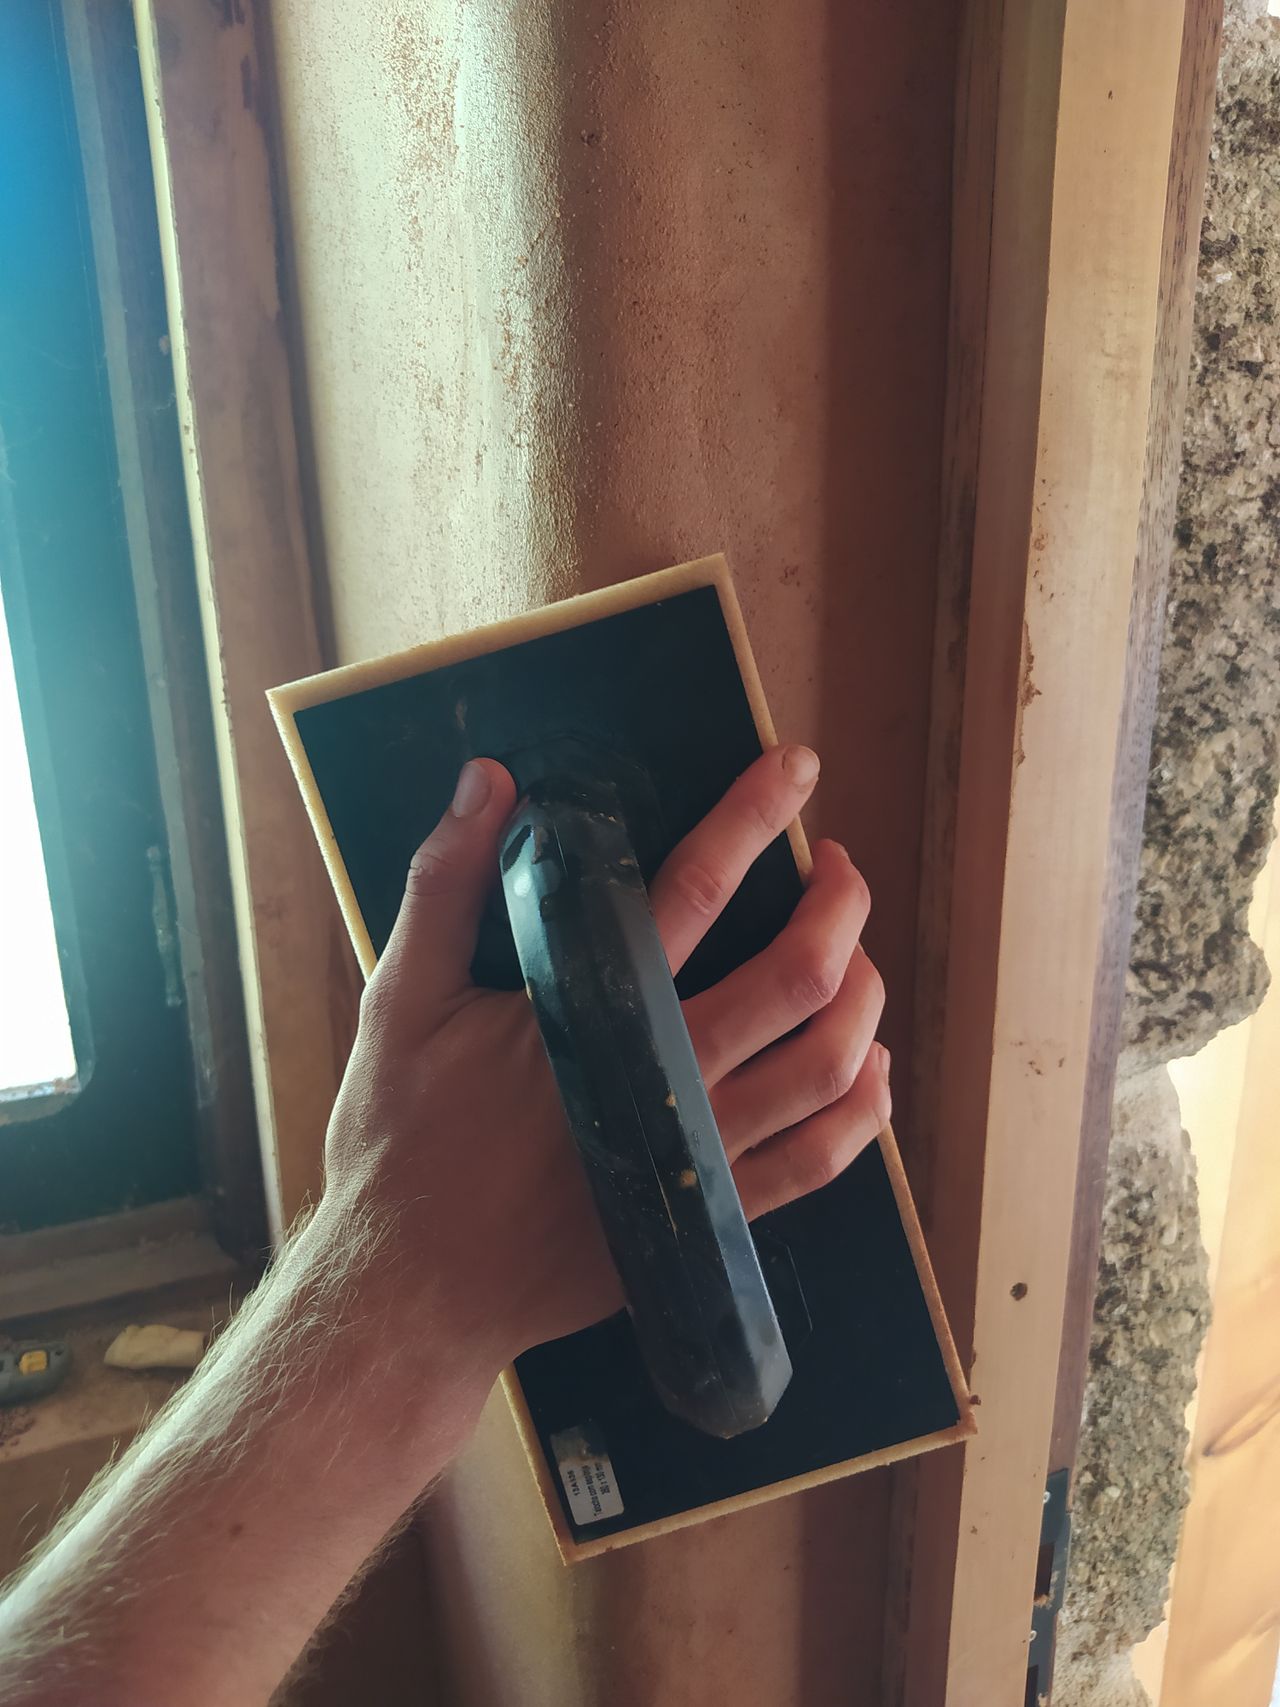
Finishing: using a sponje float
Published 10moPublished 11 months ago
The sponje float has to be wet but not soaked otherwise you will wash out too much clay from the surface while rubbing the wall. No need to push to much the float onto the wall, rub the surface by keeping doing a figure of eight movement.

%20--%3e%3csvg%20version='1.1'%20id='Layer_1'%20xmlns='http://www.w3.org/2000/svg'%20xmlns:xlink='http://www.w3.org/1999/xlink'%20x='0px'%20y='0px'%20viewBox='0%200%2064%2063'%20style='enable-background:new%200%200%2064%2063;'%20xml:space='preserve'%3e%3cstyle%20type='text/css'%3e%20.st0{fill:%2320B7EB;}%20.st1{fill:%23E9475A;}%20.st2{fill:%23FECE4E;}%20%3c/style%3e%3cdesc%3eCreated%20with%20Sketch.%3c/desc%3e%3cg%20id='Page-1'%3e%3cg%20id='OA-Logo-Black-Background'%3e%3cpath%20id='Shape'%20class='st0'%20d='M14.1,30.1c-1.5-0.8-8.6-3.8-14.1-7.8c1.8-3.4,3.1-5.6,5-9.1c2.7,1.1,1.9,0.5,4.6,1.7%20c0.8,0.4,10.1,4.5,13.8,6.2c2.4,1.1,4.7,2.2,7,3.3L43,30.5l8.1,3.9c4,2,7.2,3.5,11.3,5.5c0.5,0.3-3.7,9.4-3.7,9.4%20c-1.7-0.6-3.9-1.8-5.5-2.5c-4.7-2.1-9-3.9-13.7-6c-4-1.8-6.7-2.9-10.8-4.5C25,34.9,17.1,31.6,14.1,30.1z'/%3e%3cpath%20id='Shape_1_'%20class='st1'%20d='M12.1,54.9c-0.8,0.6-1.6,1.2-2.5,1.6c-0.4-0.5-0.9-1-1.3-1.5c-0.3-1.2-2.3-4.9-2.7-6.2%20c-0.1-0.4-0.7-2.2-0.8-2.6c0,0,5-3.4,8.2-5.9c3.2-2.6,6.2-5,9.3-7.5c1.4-1.1,3.9-2.5,5.3-3.5c2.5-1.7,13-9.1,15.6-10.5%20c5.4-3.3,11.1-6.3,16.8-9c1.7,3.5,1.8,3,3.8,6.9c0,0-17.8,13.5-22.7,17.1c-3.8,2.8-7.5,5.7-11.3,8.5c-1.7,1.3-3.5,2.4-5.2,3.7'/%3e%3cpath%20id='Shape_2_'%20class='st2'%20d='M20.8,2.9l-0.2-0.8C25,0,31.2-0.3,31.4,0.2c0.4,1.1,0.9,2.2,1.2,3.4c1.4,4.4,2.7,8.7,4,13.1%20c0.4,1.4,2.8,10,2.9,10.5c0.5,2.8,1.2,5.6,1.6,8.4c0.8,4.7,1.4,8.6,2.3,13.3c0.6,3.1,1.3,6.3,2.3,11.3c0,0-5.8,1.4-7.5,1.8%20c-0.8,0.2-1.5,0.4-2.4,0.6c-0.3-1.1-0.2-1.2-0.5-2.1c-0.9-3.7-1.8-7.3-2.6-11c-1.5-6.4-3-12.9-4.4-19.3%20c-1.2-5.4-2.6-10.7-4.4-15.9c-1-3.1-1.8-6.3-2.7-9.5C21.1,3.8,21,3.8,20.8,2.9z'/%3e%3c/g%3e%3c/g%3e%3c/svg%3e)