

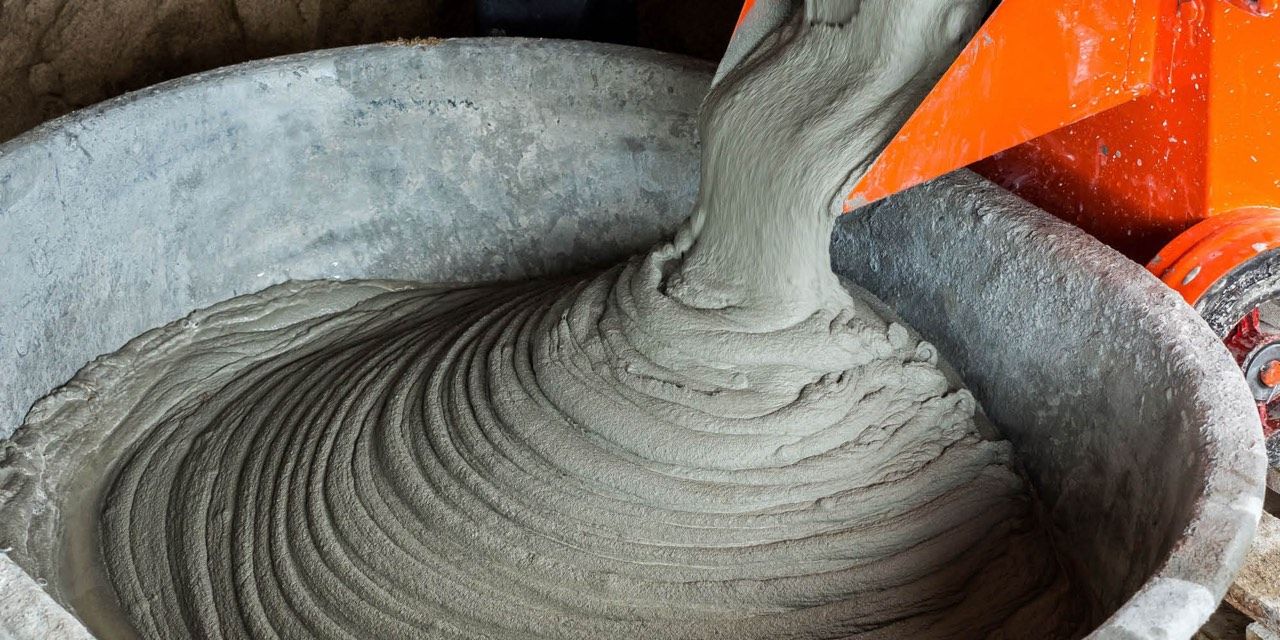
Can we use magnesium oxide to replace Portland cement?
With contributions from colline-the-lobster
Started 3y. Edited 1yStarted over 3 years ago. Last edit over 1 year agoConstruction
In Progress
More Information


%20--%3e%3csvg%20version='1.1'%20id='Layer_1'%20xmlns='http://www.w3.org/2000/svg'%20xmlns:xlink='http://www.w3.org/1999/xlink'%20x='0px'%20y='0px'%20viewBox='0%200%2064%2063'%20style='enable-background:new%200%200%2064%2063;'%20xml:space='preserve'%3e%3cstyle%20type='text/css'%3e%20.st0{fill:%23231F20;}%20%3c/style%3e%3cdesc%3eCreated%20with%20Sketch.%3c/desc%3e%3cg%20id='Page-1'%3e%3cg%20id='OA-Logo-Black-Background'%3e%3cpath%20id='Shape'%20class='st0'%20d='M14.1,30.1c-1.5-0.8-8.6-3.8-14.1-7.8c1.8-3.4,3.1-5.6,5-9.1c2.7,1.1,1.9,0.5,4.6,1.7%20c0.8,0.4,10.1,4.5,13.8,6.2c2.4,1.1,4.7,2.2,7,3.3L43,30.5l8.1,3.9c4,2,7.2,3.5,11.3,5.5c0.5,0.3-3.7,9.4-3.7,9.4%20c-1.7-0.6-3.9-1.8-5.5-2.5c-4.7-2.1-9-3.9-13.7-6c-4-1.8-6.7-2.9-10.8-4.5C25,34.9,17.1,31.6,14.1,30.1z'/%3e%3cpath%20id='Shape_1_'%20class='st0'%20d='M12.1,54.9c-0.8,0.6-1.6,1.2-2.5,1.6c-0.4-0.5-0.9-1-1.3-1.5c-0.3-1.2-2.3-4.9-2.7-6.2%20c-0.1-0.4-0.7-2.2-0.8-2.6c0,0,5-3.4,8.2-5.9c3.2-2.6,6.2-5,9.3-7.5c1.4-1.1,3.9-2.5,5.3-3.5c2.5-1.7,13-9.1,15.6-10.5%20c5.4-3.3,11.1-6.3,16.8-9c1.7,3.5,1.8,3,3.8,6.9c0,0-17.8,13.5-22.7,17.1c-3.8,2.8-7.5,5.7-11.3,8.5c-1.7,1.3-3.5,2.4-5.2,3.7'/%3e%3cpath%20id='Shape_2_'%20class='st0'%20d='M20.8,2.9l-0.2-0.8C25,0,31.2-0.3,31.4,0.2c0.4,1.1,0.9,2.2,1.2,3.4c1.4,4.4,2.7,8.7,4,13.1%20c0.4,1.4,2.8,10,2.9,10.5c0.5,2.8,1.2,5.6,1.6,8.4c0.8,4.7,1.4,8.6,2.3,13.3c0.6,3.1,1.3,6.3,2.3,11.3c0,0-5.8,1.4-7.5,1.8%20c-0.8,0.2-1.5,0.4-2.4,0.6c-0.3-1.1-0.2-1.2-0.5-2.1c-0.9-3.7-1.8-7.3-2.6-11c-1.5-6.4-3-12.9-4.4-19.3%20c-1.2-5.4-2.6-10.7-4.4-15.9c-1-3.1-1.8-6.3-2.7-9.5C21.1,3.8,21,3.8,20.8,2.9z'/%3e%3c/g%3e%3c/g%3e%3c/svg%3e)


1
Intro to magnesium phosphate cement
Published 3y. Edited 3yPublished over 3 years ago. Last edit over 3 years ago
Magnesium phosphate cement is created when magnesium oxide bonds with potassium phosphate or ammonium phosphate. In some parts of the world it is possible to buy premixed magnesium oxide cement, but it is not widely used or known about. It is also possible to mix the cement yourself out of the raw materials, so this is what we tried.
MgOP cement was intriguing for a few reasons:
-It shares a lot of properties with cement. It is strong, fast setting and not water soluble.
-There is already some research online and so we could base our experiments on that
-The raw materials seemed easy to find
- MgOP Cement has the unique ability to bond with organic fibers and materials. This means burlap, wood, non-synthetic cloth, and other natural materials can be used to create different properties
-Portland Cement is so basic it can burn skin and it kills plants if left sitting for too long. MgoP is supposed to be fine on your skin and can even be good for plants as it slowly erodes back into the soil.
-MgOP still has a carbon footprint, but from what we have read it is much lower than Portland Cement.
And lastly, all of this stuff sounds great but we haven't ever worked with it before. So we wanted to do some experiments and see for ourselves!
https://greenhomebuilding.com/QandA/manufactured/magnesiumoxide.htm
https://pubs.acs.org/doi/pdf/10.1021/acs.chemrev.5b00463
https://geoswan.com/wp-content/uploads/2010/11/MgO-GENERAL.pdf

2
Can we find everything we need?
Published 3y. Edited 3yPublished over 3 years ago. Last edit over 3 years ago
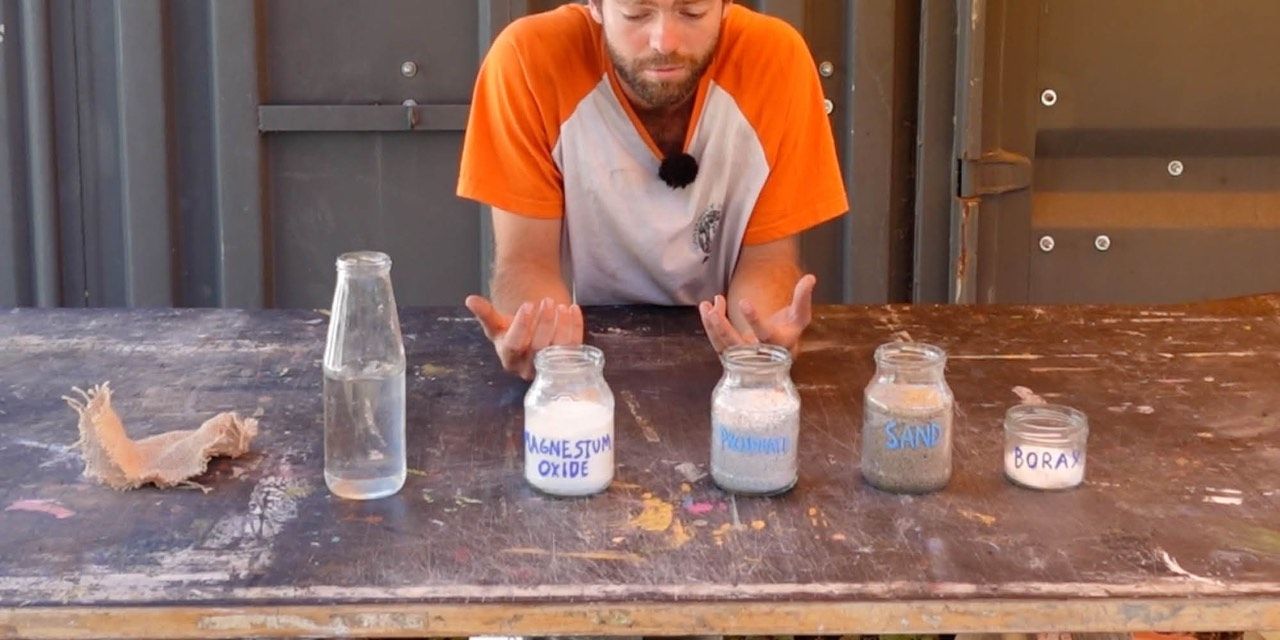
A basic Magnesium Phosphate cement requires 3 things: Magnesium oxide, potassium phosphate or ammonium phosphate and borax. We also used Jute (or burlap or serapilheira depending on where you are from). Sourcing each of these had its own challenges and learning experiences. It is worth saying as well that in some places you can buy magnesium cement premixed and ready to go, if this is true where you are it will be much easier and you will be able to accomplish the same things. Unfortunately Portugal is not one of those places.
Here are some links to pages that list sources of premixed MgoP cements and other products:
https://geoswan.com/wp-content/uploads/2010/11/MgO-GENERAL.pdf
https://www.greenhomebuilding.com/articles/ceramicrete.htm
3
Can we find what we need?: MgO
Published 3y. Edited 3yPublished over 3 years ago. Last edit over 3 years ago
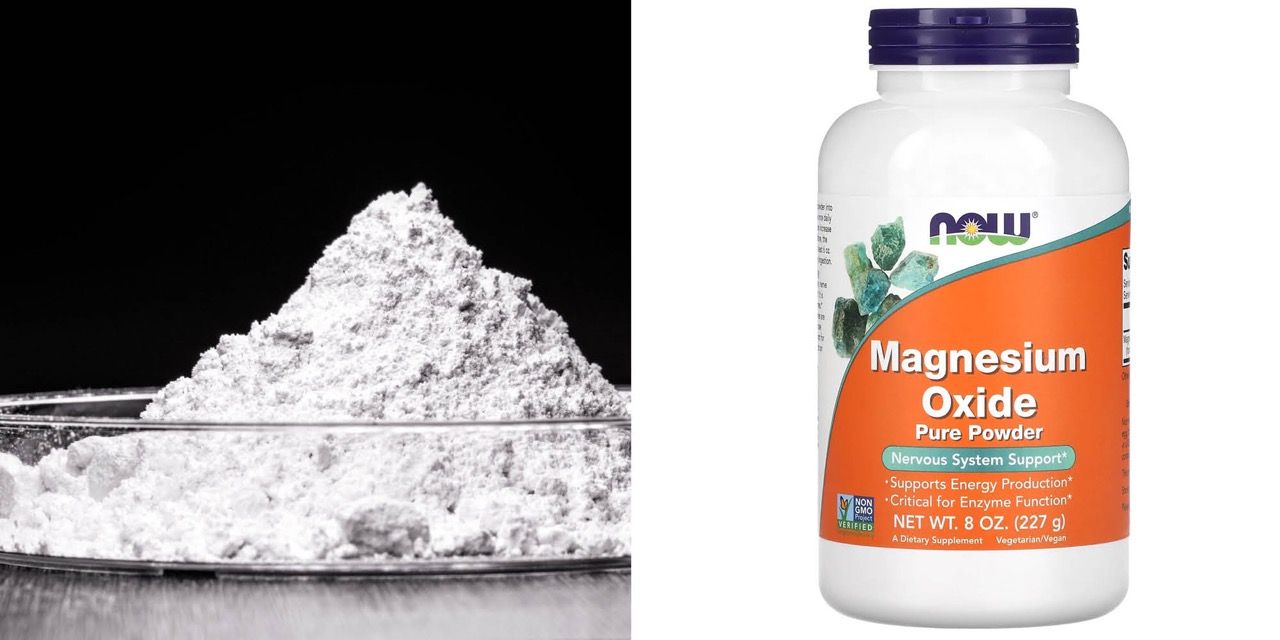
The first thing to know about magnesium oxide is that there are different types. These are split in three categories based on the temperature they are cooked at: light-burned (700-1000 C), hard-burned (1000-1500 C), and dead-burned (1500-2000 C). As the temperature goes up, the reactivity of the magnesium goes down. You would think the more reactive the magnesium the better it would be for cement but it is actually the opposite. The magnesium cooked at lower temperatures is too reactive to be used. When mixed with phosphate, it hardens so fast that there isnt time to do anything with it. Dead-burned magnesium is the most useful for cement applications.
Magnesium oxide can be found in small amounts grocery stores or pharmacies since it is sometimes used as a dietary supplement. I tried a few nutritional companies to see if we could buy in bulk and some said yes, but the “food grade” Magnesium was too expensive to justify using as building material.
I found a company that sold Magnesium oxide for industrial uses. It was “hard-burned”. They had other products that were dead-burned, but they would have taken longer to be delivered. Because they could get the hard-burned magnesium to us fast, and because I didn´t know any better I went for it. We were able to make it work but I would suggest that anyone who tries this themselves find a source of dead-burned magnesium. The reaction time is very quick with hard-burned Magnesium and everything would be easier if it was slower.
4
Can we find what we need?: Phosphate
Published 3y. Edited 3yPublished over 3 years ago. Last edit over 3 years ago
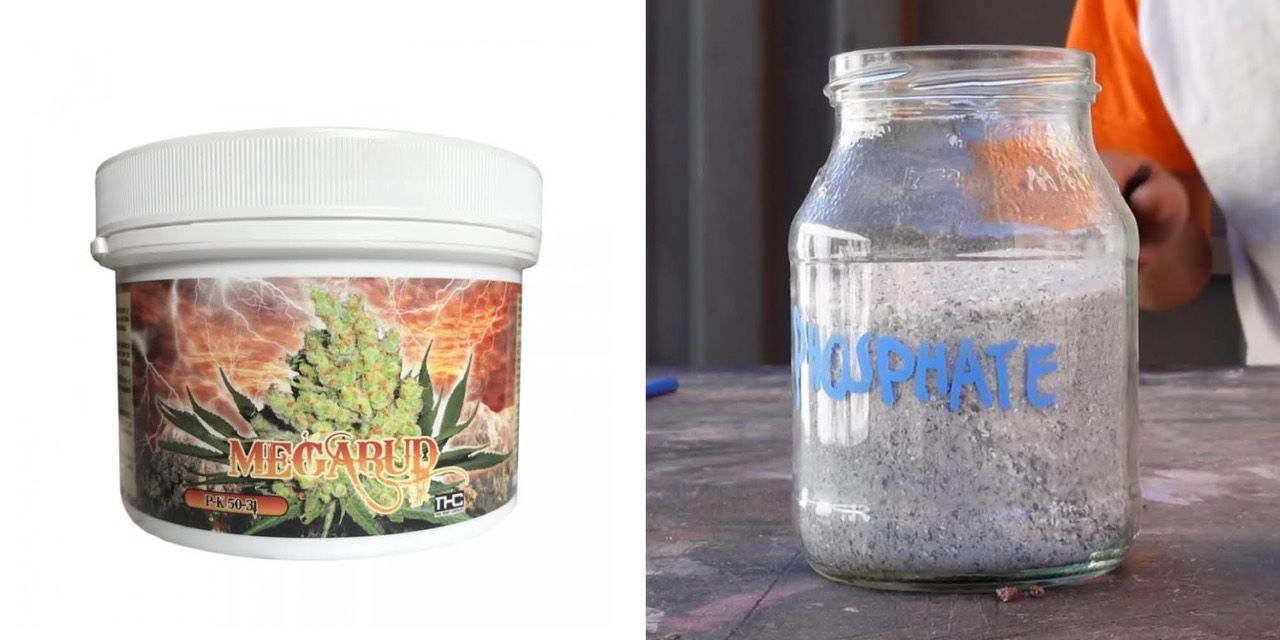
In many places it is possible to find fertilizers with high concentrations of potassium phosphate, but not so easy to find pure potassium phosphate, at least here in Portugal. The first fertilizer we tried had 49% potassium phosphate and came in pellets instead of powder. I tried soaking the pellets till they dissolved and then mixed them with the magnesium. It worked a little bit, but it never hardened into something strong and it also produced some extra fumes and smells so I think some other things were reacting. The take away from this was that 45% potassium phosphate (~34% phosphate and ~15% potassium) was not enough. And that soaking pellets was smelly, hard to control as a variable and a hassle.
The next phosphate source worked much better. I found a hydroponic store for growing indoor marajuana. They had a product called Megabud that was 81% potassium phosphate (50% phosphate and 31% potassium). This also came in powder form and was dissolvable in water which seemed to react more consistently with the magnesium.
The downside was that it was expensive. Some internet searching makes me think that a similar product with the exact same percentages of potassium phosphate could be found in agricultural shops in Portugal and different parts of the world or ordered online for much cheaper. Because we were on a time crunch, and this was a product that we knew we could reliably source, we went with Megabud. It worked great, so I think other fertilizers will as well.
5
Can we find what we need: Borax & Jute
Published 3yPublished over 3 years ago
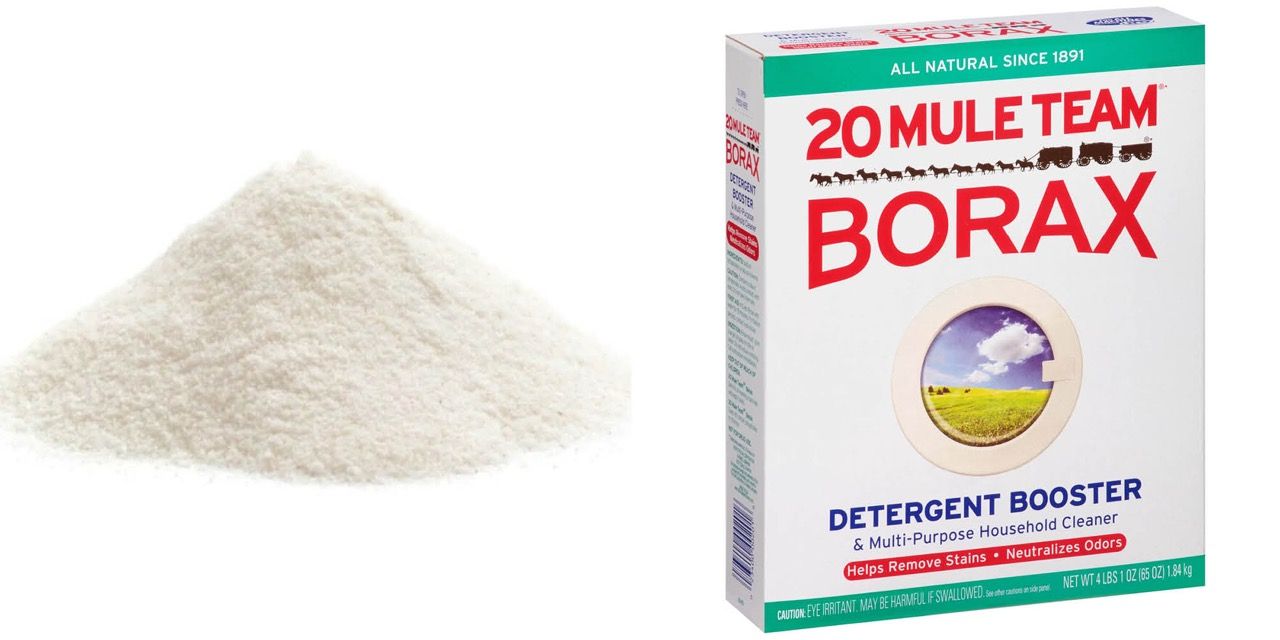
Borax:
Borax or Borato de Sodio is easy and cheap to buy. In many parts of the world you can buy it in any hardware or even grocery store. In Portugal the best way to get it was through pharmacies. They normally sell it small 30g bags for about .90€. If you call in advance they can get you as many kgs as you need within a week.
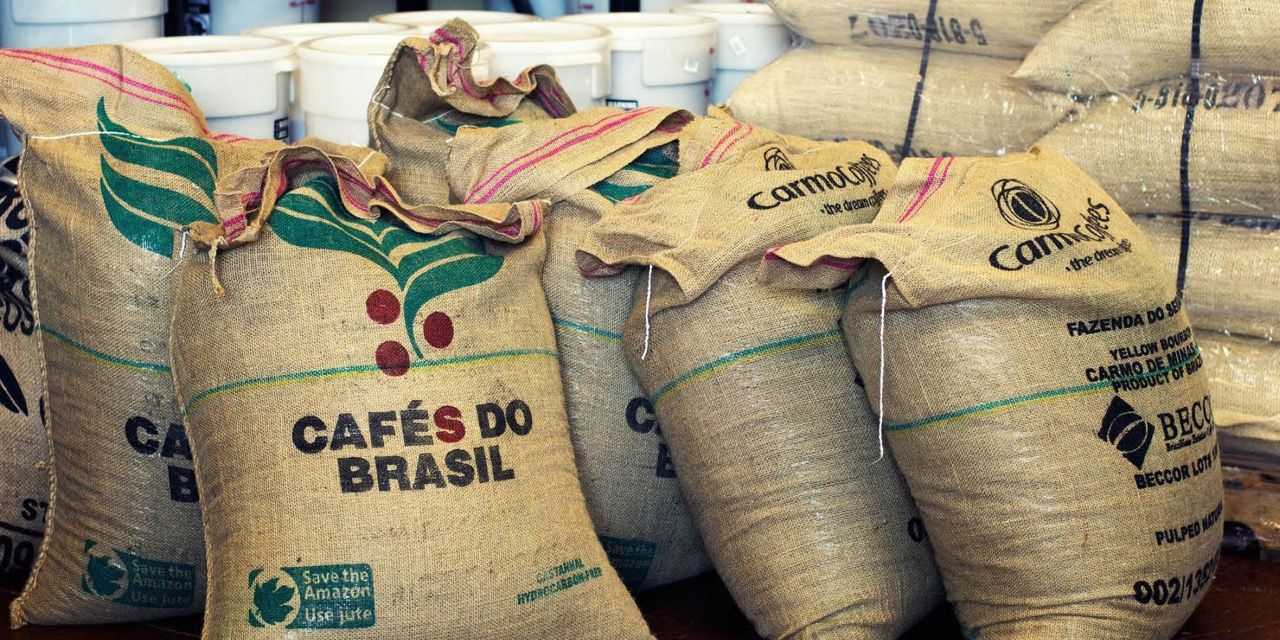
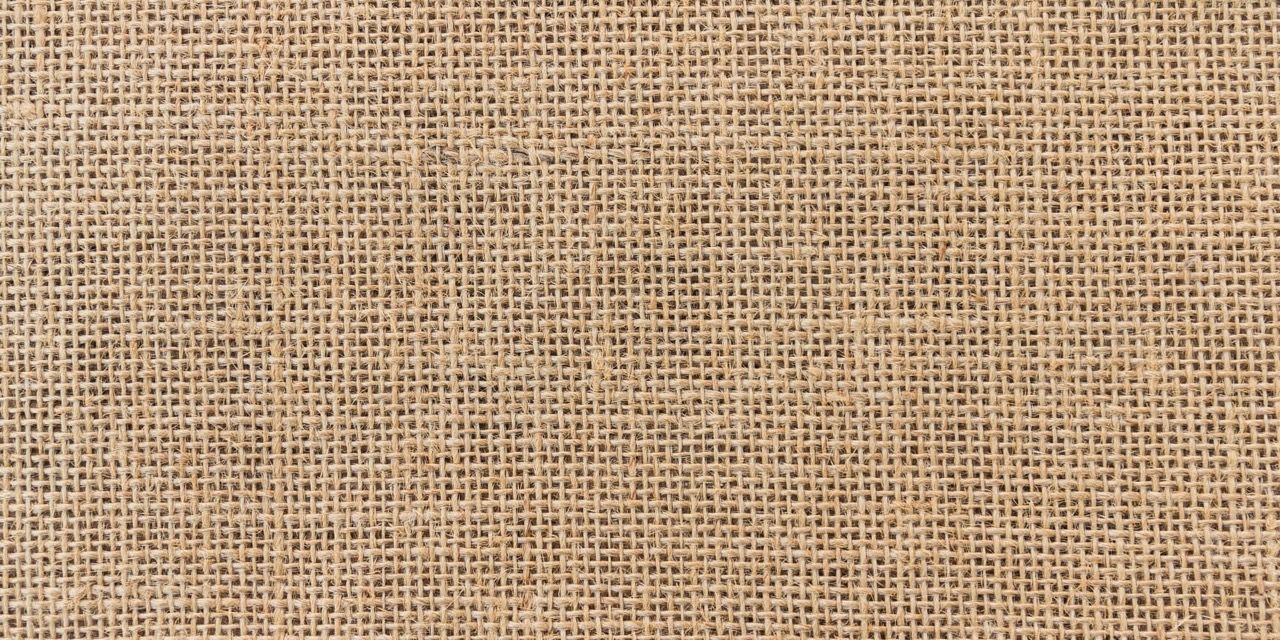
Jute:
Jute should be easy to find used, but we actually had a hard time with it. There are places to the north near Porto and to the south near Lisbon that had extra jute bags, usually old coffee bags, but they also usually charged for them. They were all too far away to be worth it, so we bought some Jute fabric from a store in Coimbra. At 3€ a meter it was still very affordable.
I would like to do some experiments in the future with old cotton sheets or even tshirts. They are also a natural fiber and should bond to the MgOP in the same way. They would be easy to source and probably free or very cheap, but maybe not as strong?... worth looking into
6
Finding the recipe: Experiments overview
Published 3yPublished over 3 years ago
There are lots of patents and research papers online that describe different experiments and ratios of Magnesium Oxide (MgO), Phosphate (P), Borax (B), and water. I will include the papers I found most helpful at the bottom. MgO and P will harden on their own but it happens very quickly. The Borax is added to slow the hardening time down. If we were working with pure elements and the same type of MgO as the researchers, we would have been able to just copy their recipes directly. Since we went with a MgO that had been cooked at a lower temperature and because we weren’t sure how the P fertilizer would act or if the other elements in the fertiliser would effect the properties of the cement we had to do some experiments to figure out the right ratios.
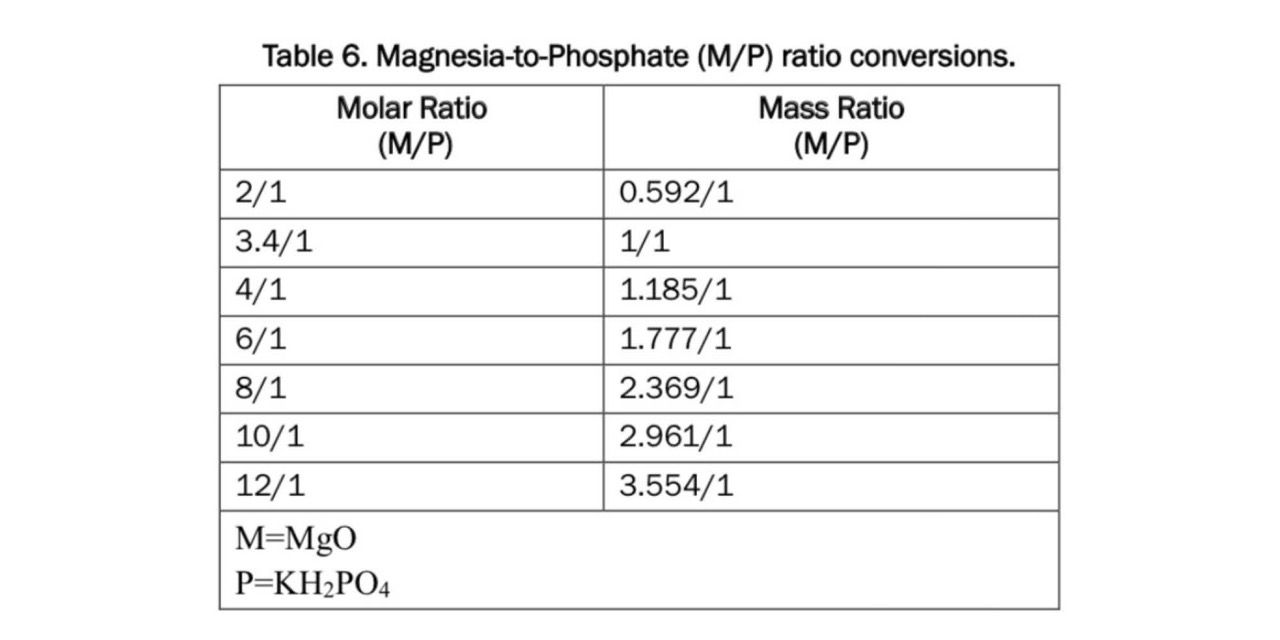
Before getting into the first experiment it is important here to talk a bit about moles. When I talk about the ratio of MgO to P it isn’t the ratio of mass or volume but of actual molecules. A single molecule of MgO is lighter then one of potassium phophate (KH2P4). So if I wanted a 1:1 mole ratio of MgO:KH2P4 by weight the ratio would actually be .296:1(g).
Here is a guide I got from this paper put out by the US Civil Army Corp of Engineers that I found helpful. (Source: https://erdc-library.erdc.dren.mil/jspui/handle/11681/35475)
Also helpful: https://www.matec-conferences.org/articles/matecconf/pdf/2018/01/matecconf_icmae2017_02007.pdf
7
Finding the recipe: Experiment 1
Published 3yPublished over 3 years ago
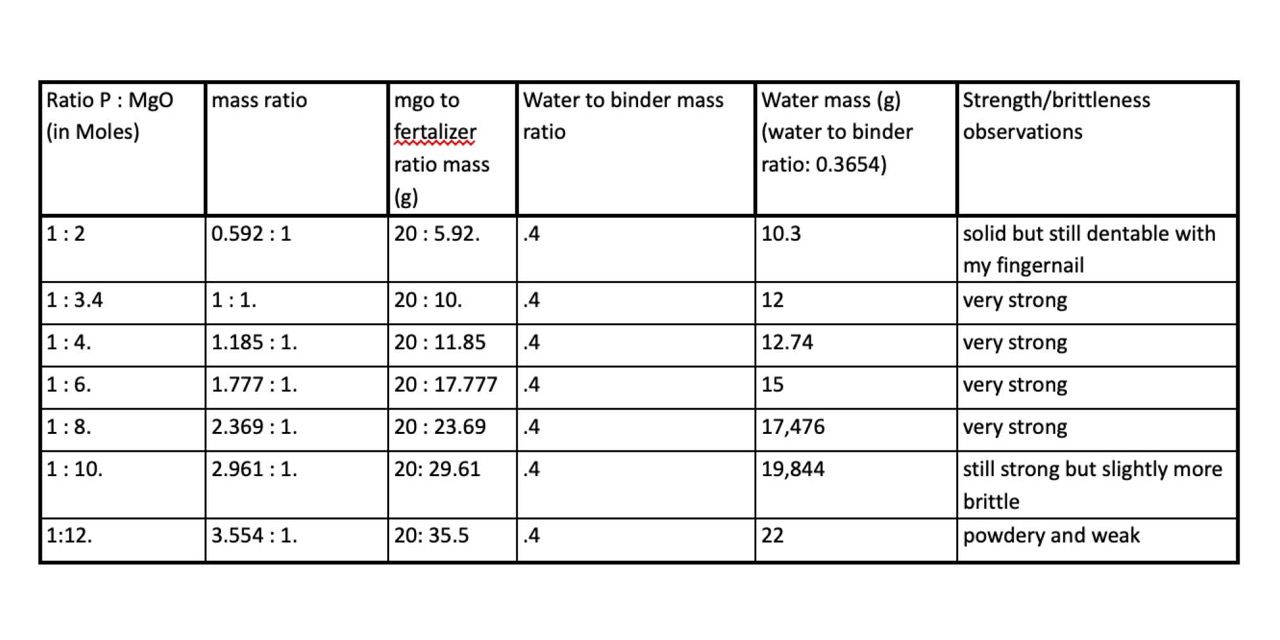
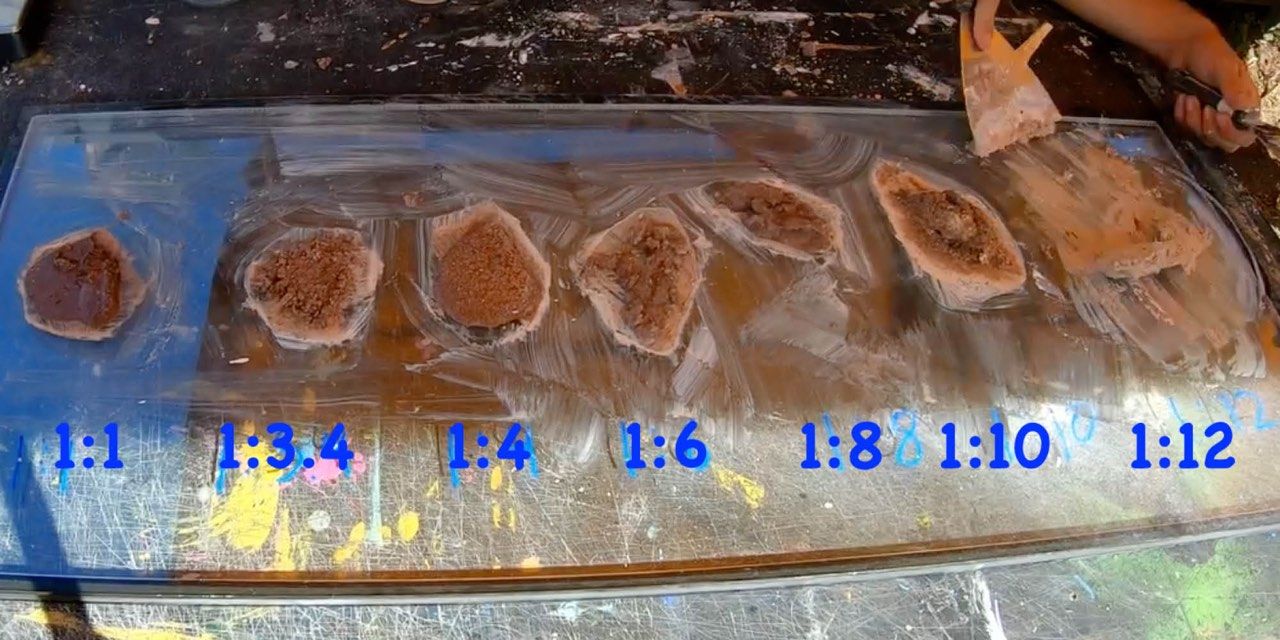
In the first experiment the goal was to find the right ratio between Magnesium Oxide and Phosphate. The mass of Phosphate was constant and I increased the mass of Magnesium Oxide. Because this meant that the total mass of magnesium oxide to phosphate was increasing, I increased the amount of water so that it stayed at a constant ratio (1:0.4) to the increasing combined mass of magnesium oxide and phosphate. I did five iterations of this experiment that you can see in the table below.
Results:
The most important thing learned in this experiment was how many different mixtures created a strong material. Everything from 1:3.4 to 1:8 hardened into a strong substance. The second thing learned was that the material set very quickly. This was when I learned that dead-burned magnesium probably would have been a better alternative to the hard burned and it also showed how necessary the borax would be.
8
Finding the recipe: Experiment 2
Published 3yPublished over 3 years ago
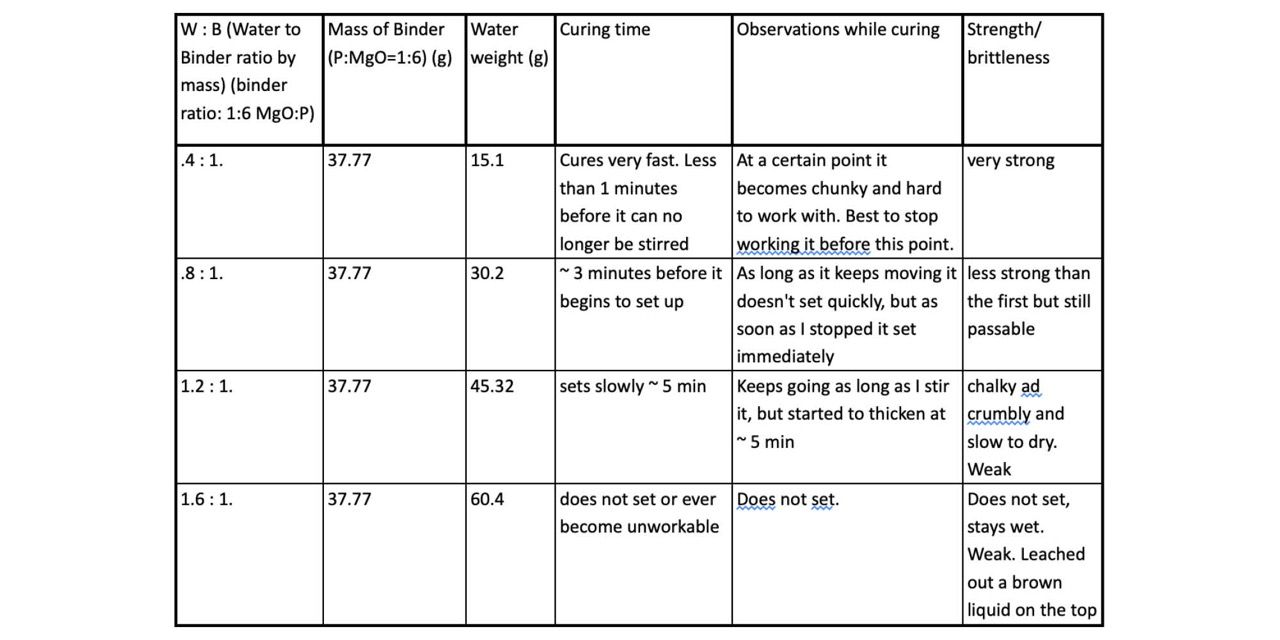
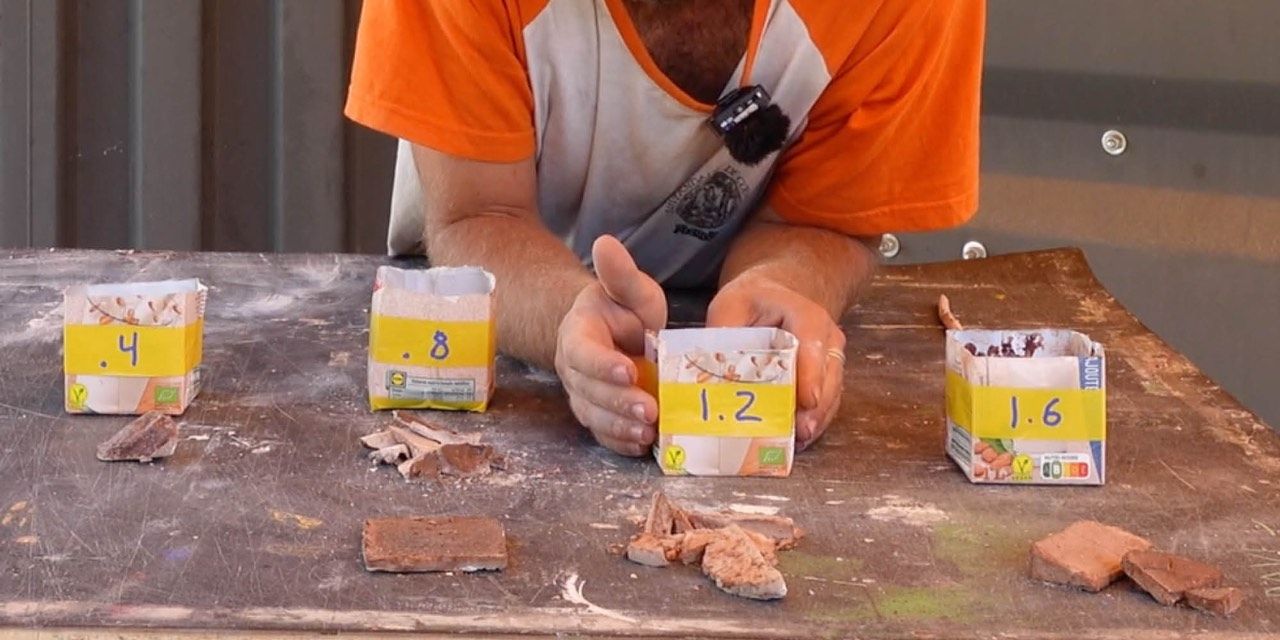
In the second experiment I changed water as a variable. I chose the best ratio of P:MgO from the first experiment and kept that constant. I then took the total mass of that mixture and added different percentages of that mass in mass of water. This table explains the different iterations.
Results:
This experiment showed that increasing the amount of water definitely decreases the strength. It also showed that increasing the amount of water increased the working time before the material hardened. The lowest amount of water we used, .4 (40% mass of water to mass of binder) was the strongest. The next lowest mass of water, .8, was less strong than the first but still strong enough to use in many situations. the higher percentages of water were either very weak or did not harden at all. It might be worth doing more experiments with less water to see if the mix becomes stronger.
9
Field Experiments: Cup
Published 3yPublished over 3 years ago
Once I had a recipe I liked, I wanted to do some small tests to see how the cement would do as a building material. There are different ways to use it, but I was most interested in a method where jute is soaked in the cement and then layered over forms to harden. Think of it like papermaché. This method is also called burlap-crete. We did three tests: a cup, a brick and some layers of jute suspended between wooden posts to mimic how a roof could be built.
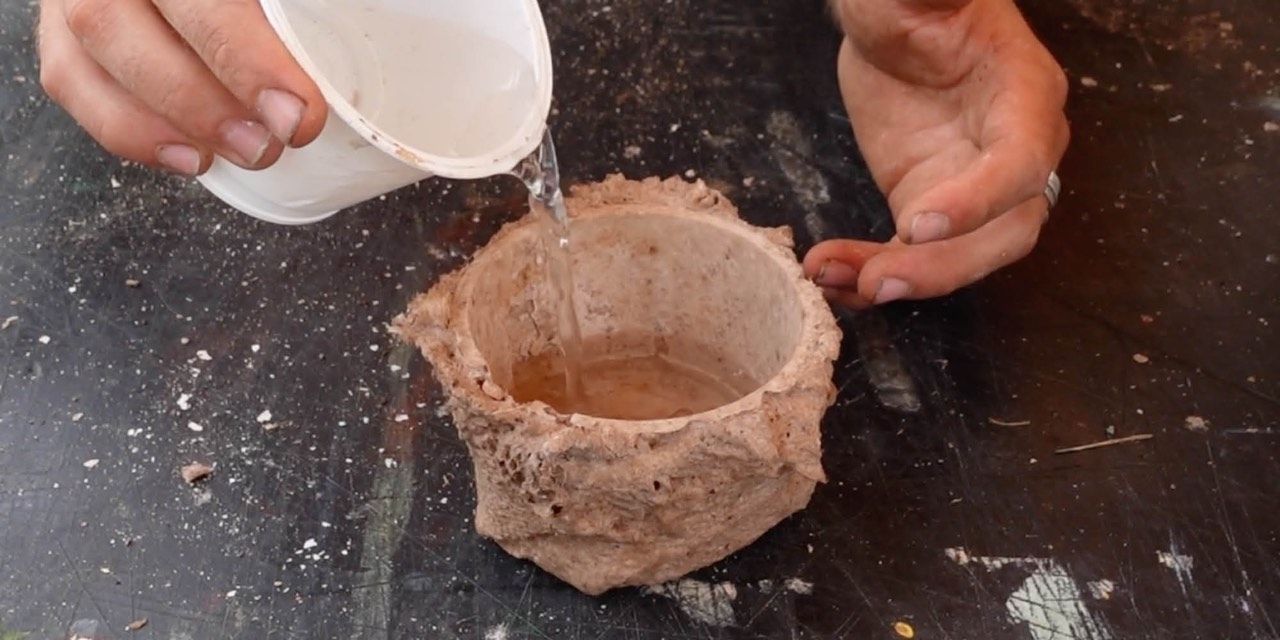
For the cup I layered two pieces of jute soaked in the cement over a plastic cup that served as a mold. The goal of this experiment was to see how water tight this material could be and to see if it dissolved or broke down when sitting in water for a long time. There was a small hole that leaked water about half way down the cup. Other than this the cup held water perfectly and continued to hold water for about 2 weeks until it dried on its own. There was no change in the cement that I could tell after having been exposed to water for such a long time.
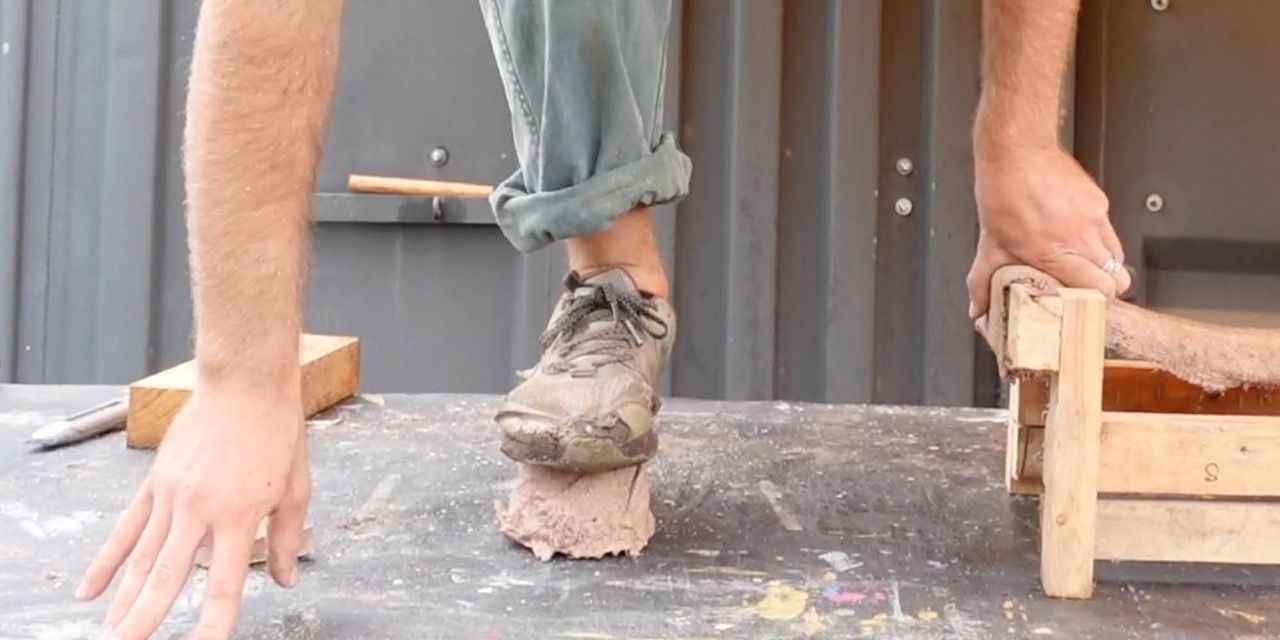
One of the surprises was how strong this cup was. I could stand on it with all my weight and it wouldn’t even bend.
We learned that it is important to take the time to smooth the surfaces and make sure all the holes in the jute have been filled. Another solution to this problem is to mix a second batch of the cement and to spread it on the inside of the cup to seal the holes.
10
Field Experiments: Brick
Published 3yPublished over 3 years ago
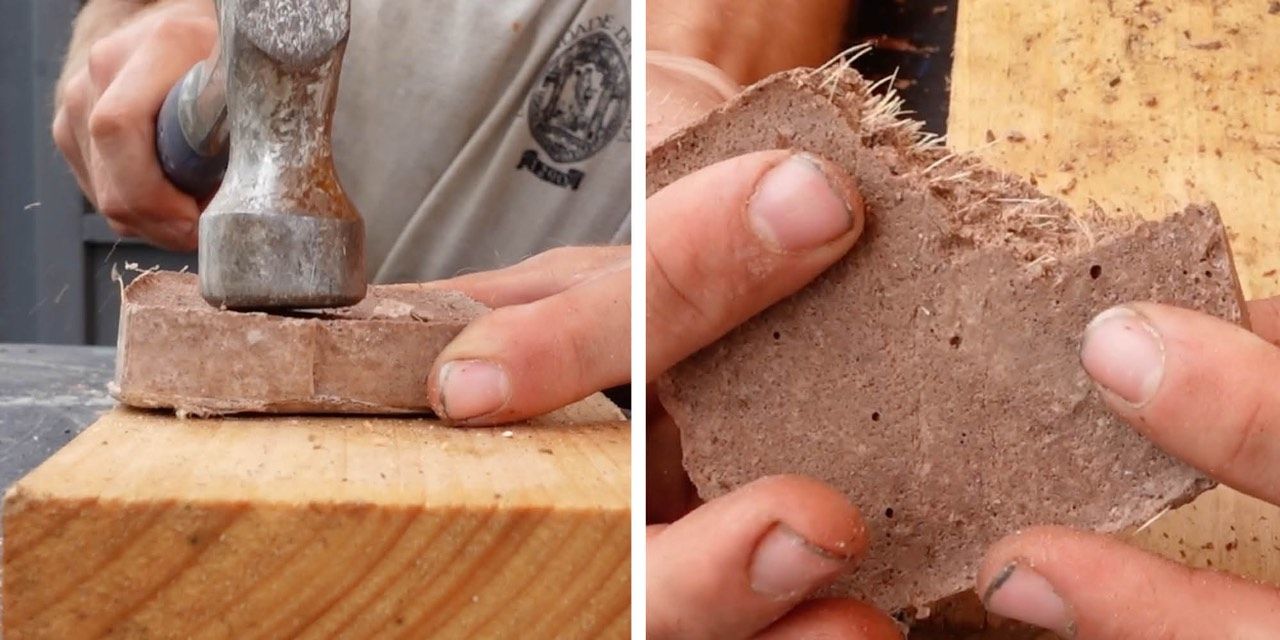
For the brick I did something a bit different. I added sand as an aggregate, like is used in concrete and cinderblocks. I also chopped up jute fabric and mixed it in to give tensile strength, like rebar in a larger portland cement slab. The brick was strong, definitely stronger than a cinderblock. This was an interesting experiment, but I don't think this is the most interesting application. It seems to me that the advantage of the material is that you can make thin, strong structures using the jute and when done in this way it is a very cheap building material. It would be very expensive to use a building method that requires so much volume of material.
11
Field Experiments: Roof Model
Published 3y. Edited 3yPublished over 3 years ago. Last edit over 3 years ago
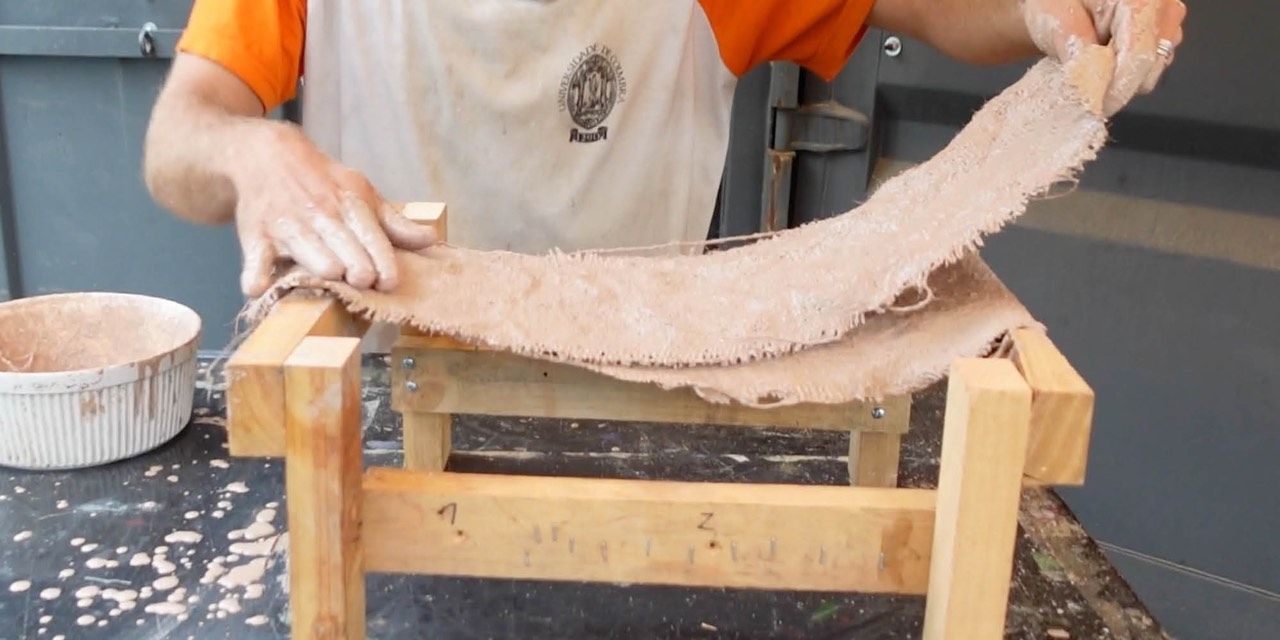
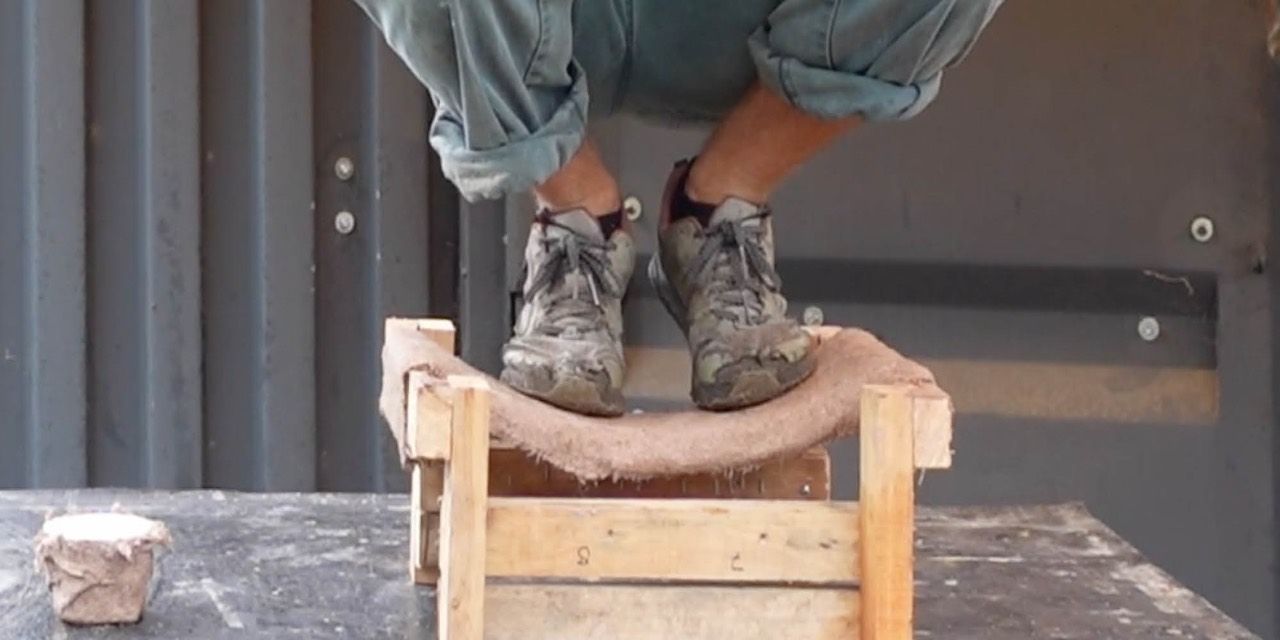
In this experiment I set up a small wooden frame to suspend the cement soaked jute between two beams. I screwed the first layer in so it would not slide out of place before it hardened. I then layer 3 more layers of jute on top. I made sure to press each layer into the one before it and to smooth out any air bubbles so the layers were well laminated together. This is a method called burlap-crete, I think it is normally not done with MgO cement, but I am not sure.
Here are some links to see some larger scale examples:
https://annesley.wordpress.com/burlap-crete-explained/
https://greenhomebuilding.com/QandA/manufactured/magnesiumoxide.htm
I was really impressed with how rigid the cement and burlap became after just a few layers. It was also notable how light this material was compared to the area it covered. The same area of metal or ceramic tile roofing is much heavier.
12
Video of experiments so far!
Published 3yPublished over 3 years ago
This is a longer video cut of the experiments I did. It has a lot more explanation of the process and the results.
Also here is a single list of all the links I found helpful:
https://pubs.acs.org/doi/pdf/10.1021/acs.chemrev.5b00463
https://m.youtube.com/watch?v=dX_QbphiM6I
https://greenhomebuilding.com/QandA/manufactured/magnesiumoxide.htm
https://www.sciencedirect.com/science/article/pii/S2097049822000427
https://www.matec-conferences.org/articles/matecconf/pdf/2018/01/matecconf_icmae2017_02007.pdf
https://www.hindawi.com/journals/amse/2016/7179403/
https://www.aimspress.com/article/doi/10.3934/matersci.2021039?viewType=HTML
https://annesley.wordpress.com/burlap-crete-explained/
https://erdc-library.erdc.dren.mil/jspui/handle/11681/35475)
https://geoswan.com/wp-content/uploads/2010/11/MgO-GENERAL.pdf
https://www.greenhomebuilding.com/articles/ceramicrete.htm
13
Making a shower basin
Published 3y. Edited 3yPublished over 3 years ago. Last edit over 3 years ago
The water catchment basin in the new shower is a great opportunity to test out a new material. This is partly because if it fails it will be easy to replace, but also because it will experience a LOT of water falling on it. This will be a good test to see how it holds up.
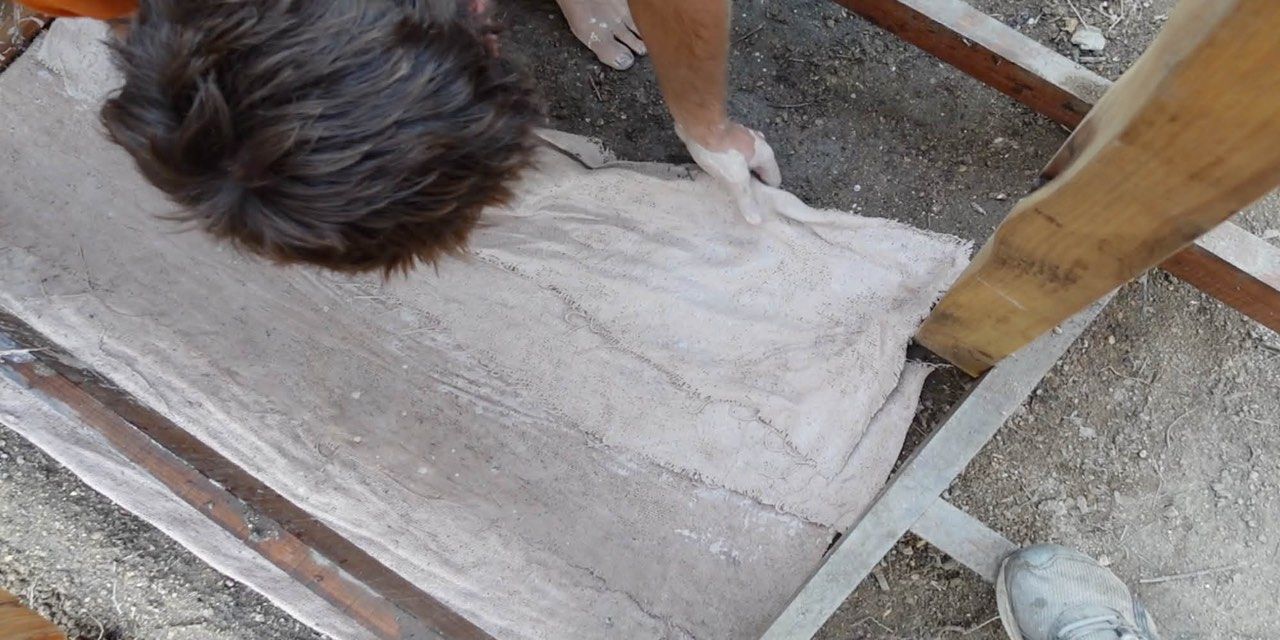
First we shaped the ground into the form of the basin we wanted. We built up the edges and made sure it was tilted towards the drain so water would flow that direction. The ground worked as a mold for the burlap and MgoP cement.
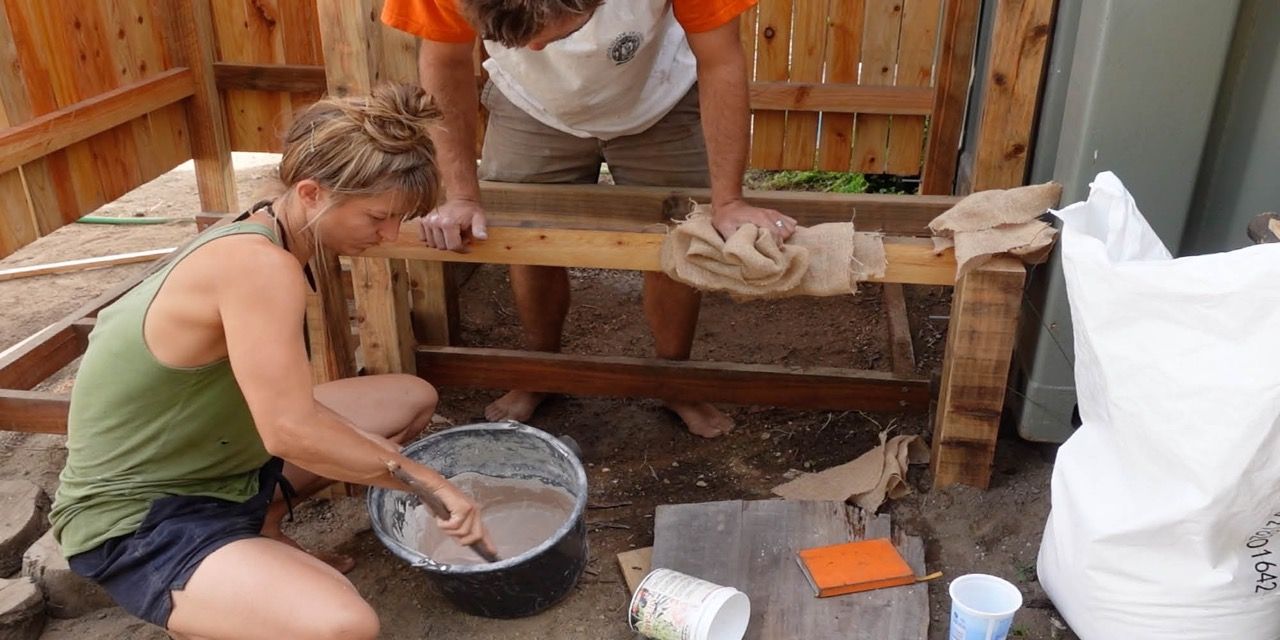
We worked in small batches. Here is the mass of each ingredient in our recipe: Megabud Fertilizer (500g), MgO (444g), borax (140g), water (375g).
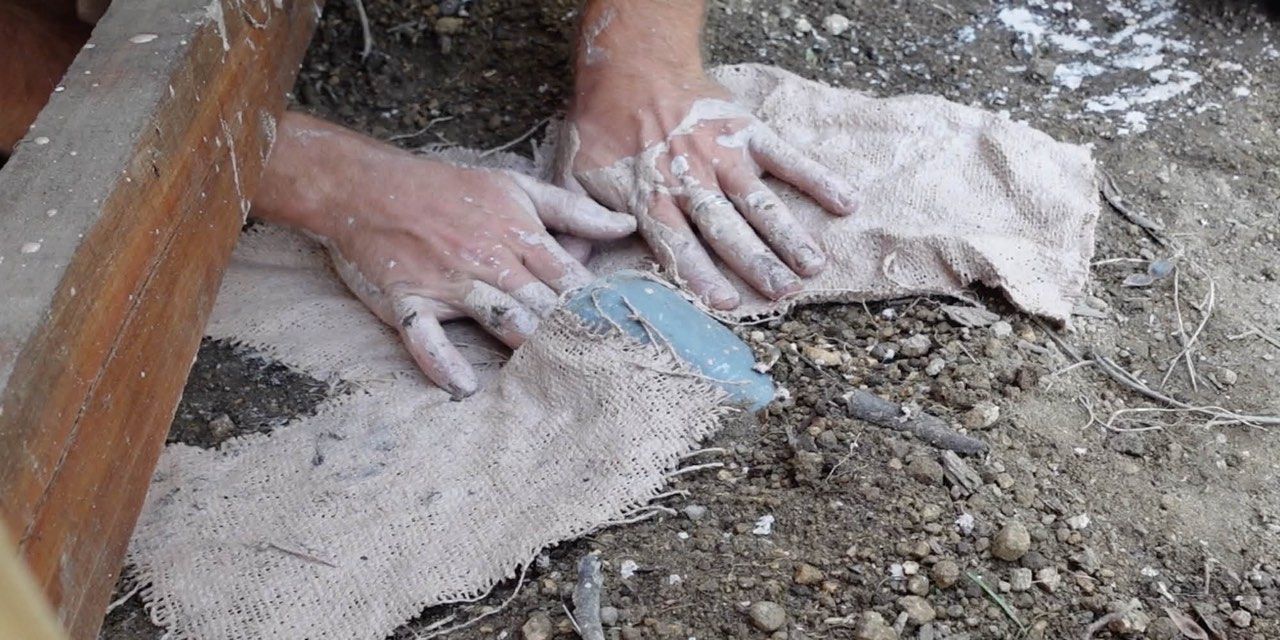
For the first two layers, we cut the jute into strips and ran them through the cement. We then spread them flat on the ground with each new piece overlapping the previous piece. It seems important to press each piece together and squeeze out the air gaps to make sure they bond properly.
For the third layer we took one big piece and laid it down over everything. After doing this there were still some little holes visible in the surface from the jute. To fix this we mixed a last batch of cement and poured the liquid over the basin and spread it with our hands until the basin was smooth and all the holes were filled.
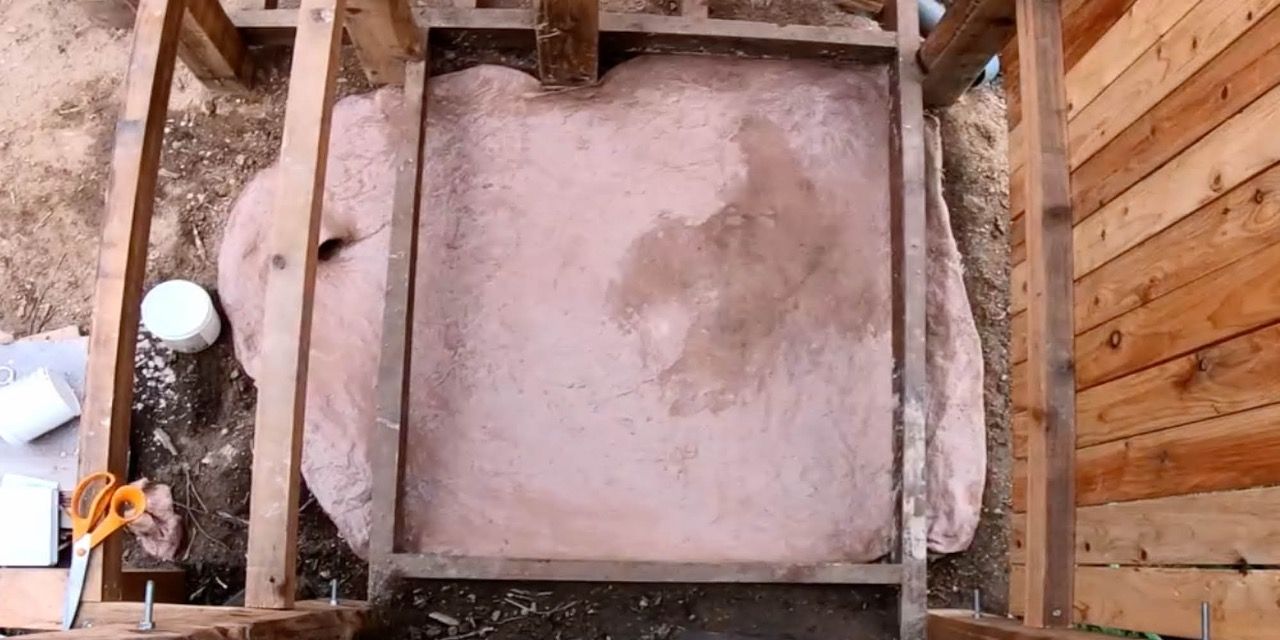
The basin was hard within one hour, but we let it sit overnight before using the shower. The shower has been draining well since.
Check out Project Kamp update video #69, min. 19:06, to see some of the process.
14
2 years after the installation, update on MgPh Concrete
Published 2y. Edited 2yPublished about 2 years ago. Last edit about 2 years ago
2 years ago, Charlie succeeded to use Magnesium phosphate, an alternative for Portland Cement, and made the shower bassin in this new cool material.
Today, we are taking a look. How did it aged?
It took a hit, you can see in the picture, holes, sand accumulating,... The bassin did a good job. The fault is on us. We have been cleaning it every week with a metal brush. Not good. The Magnesium Phosphate cement got thinner and thinner after each clean.
Overall, the material is doing a good job, we are 20 people on average to have a shower daily. That is a lot of water and grease to collect. We want to keep using it. So we will repair the one in place.


15
How can we make the water flow better
Published 2y. Edited 2yPublished about 2 years ago. Last edit about 2 years ago
Looking at what causes the shower bassin to decay, we notice that little puddles of water are creating never drying areas on the Magnesium Phosphate cement. The slop of the bassin isn't steep enough.
We would like to keep the pre-existing structure of the shower bassin, just adding layer on top of it to restaure it. But there is maybe something we can do to make the water flows out into the drain faster, with no puddle.
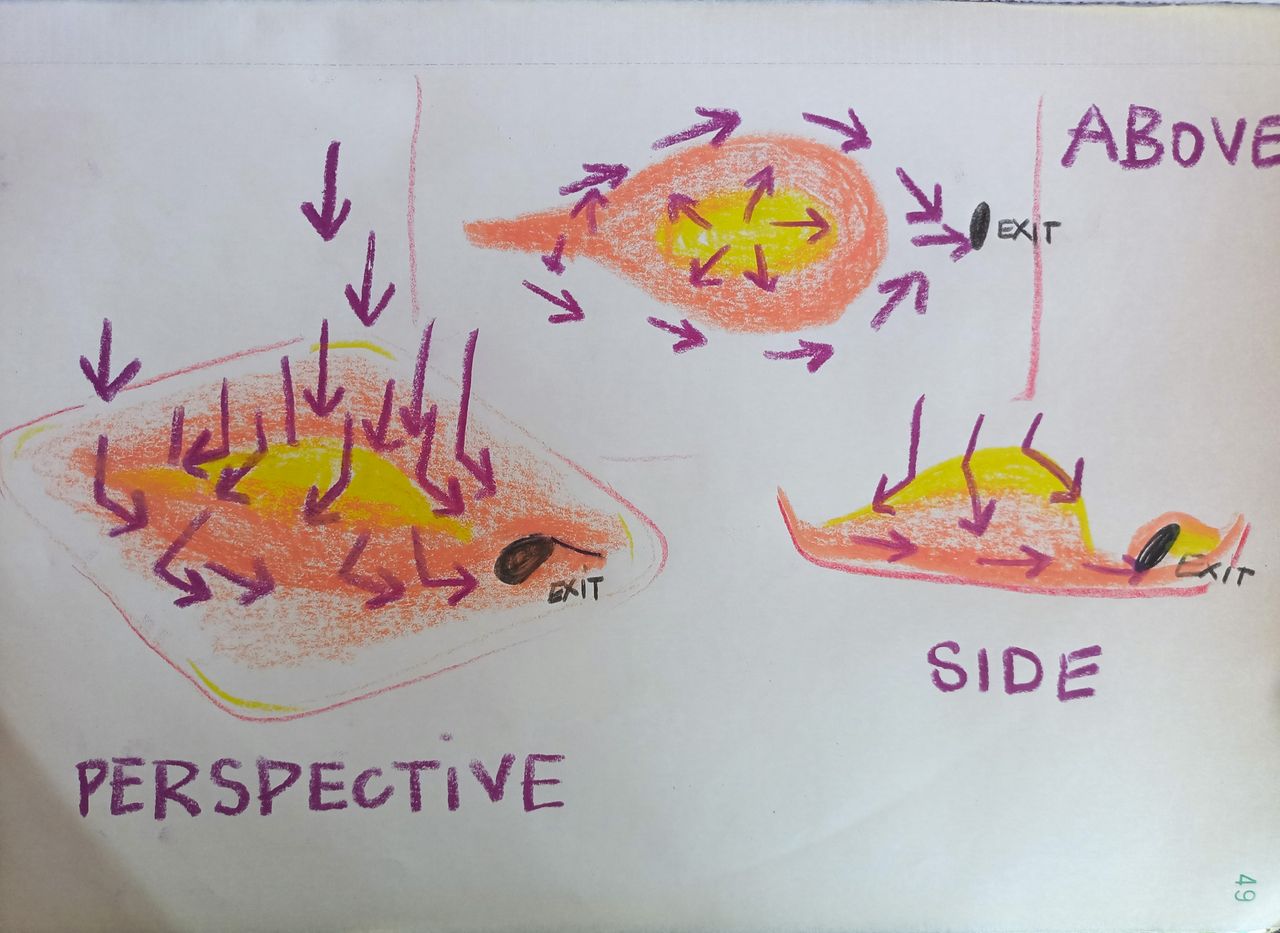
We think it might be interesting to research a way to create asymeetrical volume to avoid a central puddle. Like it shows on the sketch. A sort of hill (yellow) that would allow tehe water to keep it's speed and re-direct it into the drain. We are still looking into it, if you have ay ideas or reference that it inspires you, please do.
The raindrops are the purple arrows. Yellow is the top of the "hill".
%20--%3e%3csvg%20version='1.1'%20id='Layer_1'%20xmlns='http://www.w3.org/2000/svg'%20xmlns:xlink='http://www.w3.org/1999/xlink'%20x='0px'%20y='0px'%20viewBox='0%200%2064%2063'%20style='enable-background:new%200%200%2064%2063;'%20xml:space='preserve'%3e%3cstyle%20type='text/css'%3e%20.st0{fill:%2320B7EB;}%20.st1{fill:%23E9475A;}%20.st2{fill:%23FECE4E;}%20%3c/style%3e%3cdesc%3eCreated%20with%20Sketch.%3c/desc%3e%3cg%20id='Page-1'%3e%3cg%20id='OA-Logo-Black-Background'%3e%3cpath%20id='Shape'%20class='st0'%20d='M14.1,30.1c-1.5-0.8-8.6-3.8-14.1-7.8c1.8-3.4,3.1-5.6,5-9.1c2.7,1.1,1.9,0.5,4.6,1.7%20c0.8,0.4,10.1,4.5,13.8,6.2c2.4,1.1,4.7,2.2,7,3.3L43,30.5l8.1,3.9c4,2,7.2,3.5,11.3,5.5c0.5,0.3-3.7,9.4-3.7,9.4%20c-1.7-0.6-3.9-1.8-5.5-2.5c-4.7-2.1-9-3.9-13.7-6c-4-1.8-6.7-2.9-10.8-4.5C25,34.9,17.1,31.6,14.1,30.1z'/%3e%3cpath%20id='Shape_1_'%20class='st1'%20d='M12.1,54.9c-0.8,0.6-1.6,1.2-2.5,1.6c-0.4-0.5-0.9-1-1.3-1.5c-0.3-1.2-2.3-4.9-2.7-6.2%20c-0.1-0.4-0.7-2.2-0.8-2.6c0,0,5-3.4,8.2-5.9c3.2-2.6,6.2-5,9.3-7.5c1.4-1.1,3.9-2.5,5.3-3.5c2.5-1.7,13-9.1,15.6-10.5%20c5.4-3.3,11.1-6.3,16.8-9c1.7,3.5,1.8,3,3.8,6.9c0,0-17.8,13.5-22.7,17.1c-3.8,2.8-7.5,5.7-11.3,8.5c-1.7,1.3-3.5,2.4-5.2,3.7'/%3e%3cpath%20id='Shape_2_'%20class='st2'%20d='M20.8,2.9l-0.2-0.8C25,0,31.2-0.3,31.4,0.2c0.4,1.1,0.9,2.2,1.2,3.4c1.4,4.4,2.7,8.7,4,13.1%20c0.4,1.4,2.8,10,2.9,10.5c0.5,2.8,1.2,5.6,1.6,8.4c0.8,4.7,1.4,8.6,2.3,13.3c0.6,3.1,1.3,6.3,2.3,11.3c0,0-5.8,1.4-7.5,1.8%20c-0.8,0.2-1.5,0.4-2.4,0.6c-0.3-1.1-0.2-1.2-0.5-2.1c-0.9-3.7-1.8-7.3-2.6-11c-1.5-6.4-3-12.9-4.4-19.3%20c-1.2-5.4-2.6-10.7-4.4-15.9c-1-3.1-1.8-6.3-2.7-9.5C21.1,3.8,21,3.8,20.8,2.9z'/%3e%3c/g%3e%3c/g%3e%3c/svg%3e)