

Can we bake wood fired bread in community amounts?
With contributions from geoffroydl
Started 4y. Edited 1yStarted over 4 years ago. Last edit about 1 year agoFood
In Progress
More Information


%20--%3e%3csvg%20version='1.1'%20id='Layer_1'%20xmlns='http://www.w3.org/2000/svg'%20xmlns:xlink='http://www.w3.org/1999/xlink'%20x='0px'%20y='0px'%20viewBox='0%200%2064%2063'%20style='enable-background:new%200%200%2064%2063;'%20xml:space='preserve'%3e%3cstyle%20type='text/css'%3e%20.st0{fill:%23231F20;}%20%3c/style%3e%3cdesc%3eCreated%20with%20Sketch.%3c/desc%3e%3cg%20id='Page-1'%3e%3cg%20id='OA-Logo-Black-Background'%3e%3cpath%20id='Shape'%20class='st0'%20d='M14.1,30.1c-1.5-0.8-8.6-3.8-14.1-7.8c1.8-3.4,3.1-5.6,5-9.1c2.7,1.1,1.9,0.5,4.6,1.7%20c0.8,0.4,10.1,4.5,13.8,6.2c2.4,1.1,4.7,2.2,7,3.3L43,30.5l8.1,3.9c4,2,7.2,3.5,11.3,5.5c0.5,0.3-3.7,9.4-3.7,9.4%20c-1.7-0.6-3.9-1.8-5.5-2.5c-4.7-2.1-9-3.9-13.7-6c-4-1.8-6.7-2.9-10.8-4.5C25,34.9,17.1,31.6,14.1,30.1z'/%3e%3cpath%20id='Shape_1_'%20class='st0'%20d='M12.1,54.9c-0.8,0.6-1.6,1.2-2.5,1.6c-0.4-0.5-0.9-1-1.3-1.5c-0.3-1.2-2.3-4.9-2.7-6.2%20c-0.1-0.4-0.7-2.2-0.8-2.6c0,0,5-3.4,8.2-5.9c3.2-2.6,6.2-5,9.3-7.5c1.4-1.1,3.9-2.5,5.3-3.5c2.5-1.7,13-9.1,15.6-10.5%20c5.4-3.3,11.1-6.3,16.8-9c1.7,3.5,1.8,3,3.8,6.9c0,0-17.8,13.5-22.7,17.1c-3.8,2.8-7.5,5.7-11.3,8.5c-1.7,1.3-3.5,2.4-5.2,3.7'/%3e%3cpath%20id='Shape_2_'%20class='st0'%20d='M20.8,2.9l-0.2-0.8C25,0,31.2-0.3,31.4,0.2c0.4,1.1,0.9,2.2,1.2,3.4c1.4,4.4,2.7,8.7,4,13.1%20c0.4,1.4,2.8,10,2.9,10.5c0.5,2.8,1.2,5.6,1.6,8.4c0.8,4.7,1.4,8.6,2.3,13.3c0.6,3.1,1.3,6.3,2.3,11.3c0,0-5.8,1.4-7.5,1.8%20c-0.8,0.2-1.5,0.4-2.4,0.6c-0.3-1.1-0.2-1.2-0.5-2.1c-0.9-3.7-1.8-7.3-2.6-11c-1.5-6.4-3-12.9-4.4-19.3%20c-1.2-5.4-2.6-10.7-4.4-15.9c-1-3.1-1.8-6.3-2.7-9.5C21.1,3.8,21,3.8,20.8,2.9z'/%3e%3c/g%3e%3c/g%3e%3c/svg%3e)


1
Our essential tools (oven + starter)
Published 4yPublished over 4 years ago
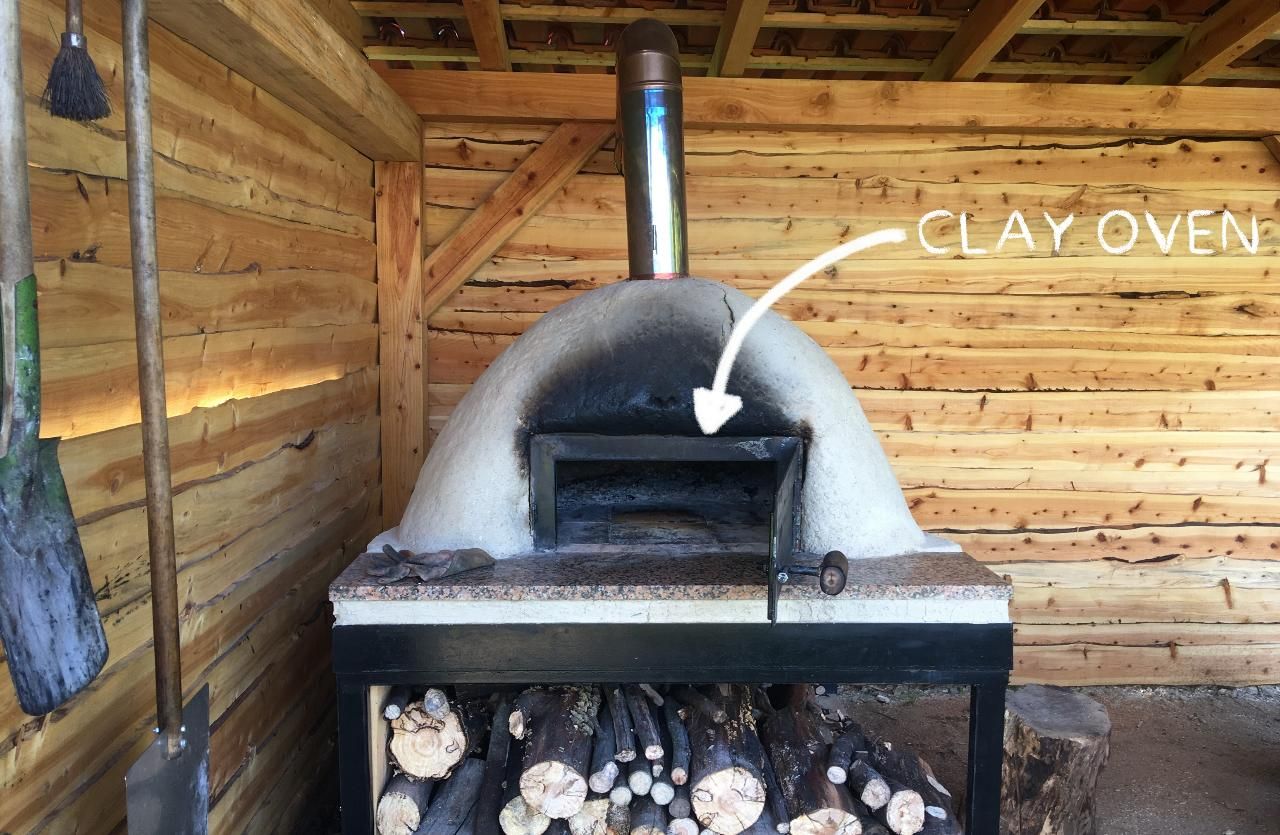
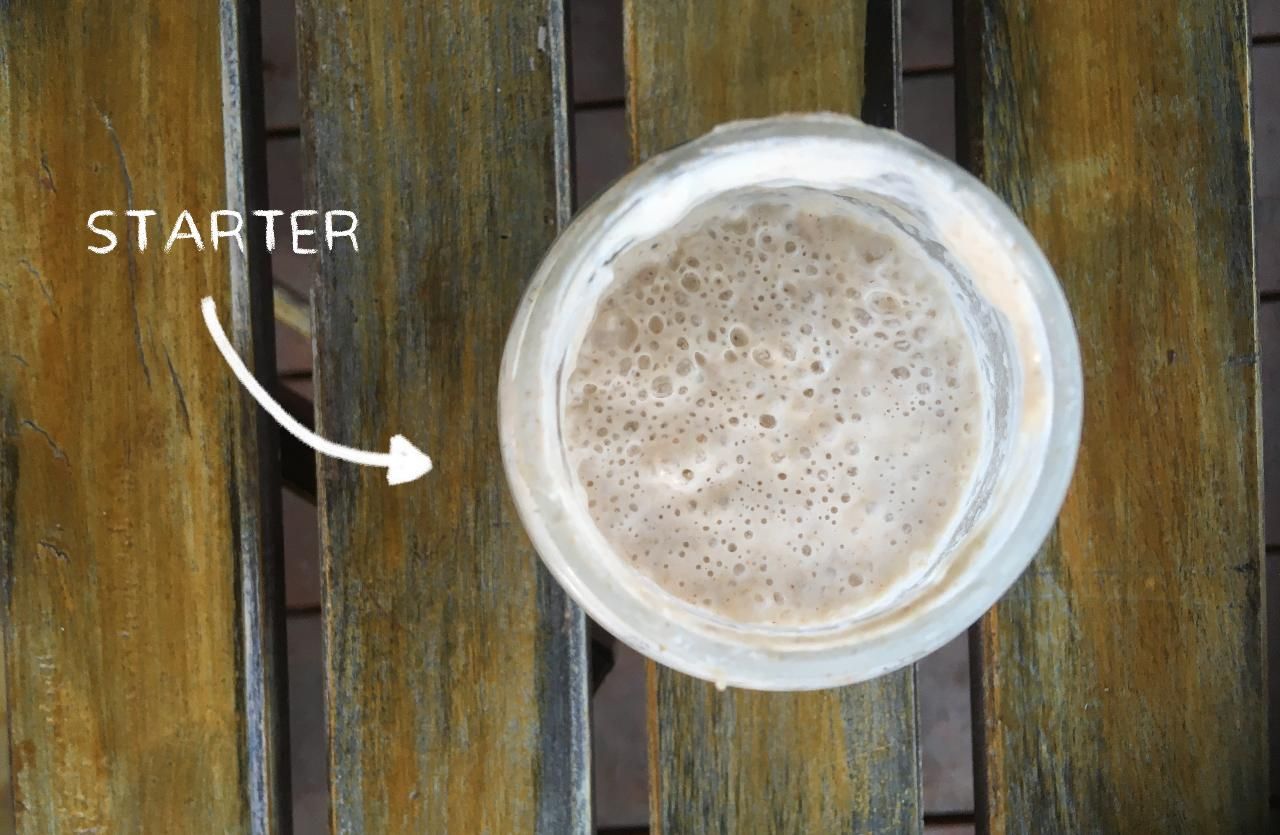
We start pretty basic with limited baking tools from what we have laying around. We did make sure to get two essential things. A few months ago we made a clay pizza oven (video here https://youtu.be/_SPIOpSwui0). This wood fired oven bakes very delicious pizzas and will be a crucial element for the bread. However, we don't have a way how to measure the temperature or regulate it. Hard to get a stable temperature, so it will be a bit of trial en error. Besides the oven we got a starter from a sourdough baker in Lisbon.
2
Weekly baking routine
Published 4yPublished over 4 years ago
We're aiming to have a conistent weekly baking routine. This makes it easier for feeding the starter and ourselves to plan around meals and buying bread. We will start simple by only baking two whole grain breads a week. When we reach a basic level we will start experimenting with different grains. Once we fully mastered our routine and have a stable output we will scale up production.
Until we reach that point this will be the weekly routine
🌾 Monday: Feed the starter
❄️ Tuesday: Starter in fridge
❄️ Wednesday: Starter in fridge
🍞 Thursday: Feed starter start prepare the dough
🔥 Friday: Bake and EAT the bread.
❄️ Saterday: Starter in fridge
❄️ Sunday: Starter in fridge

3
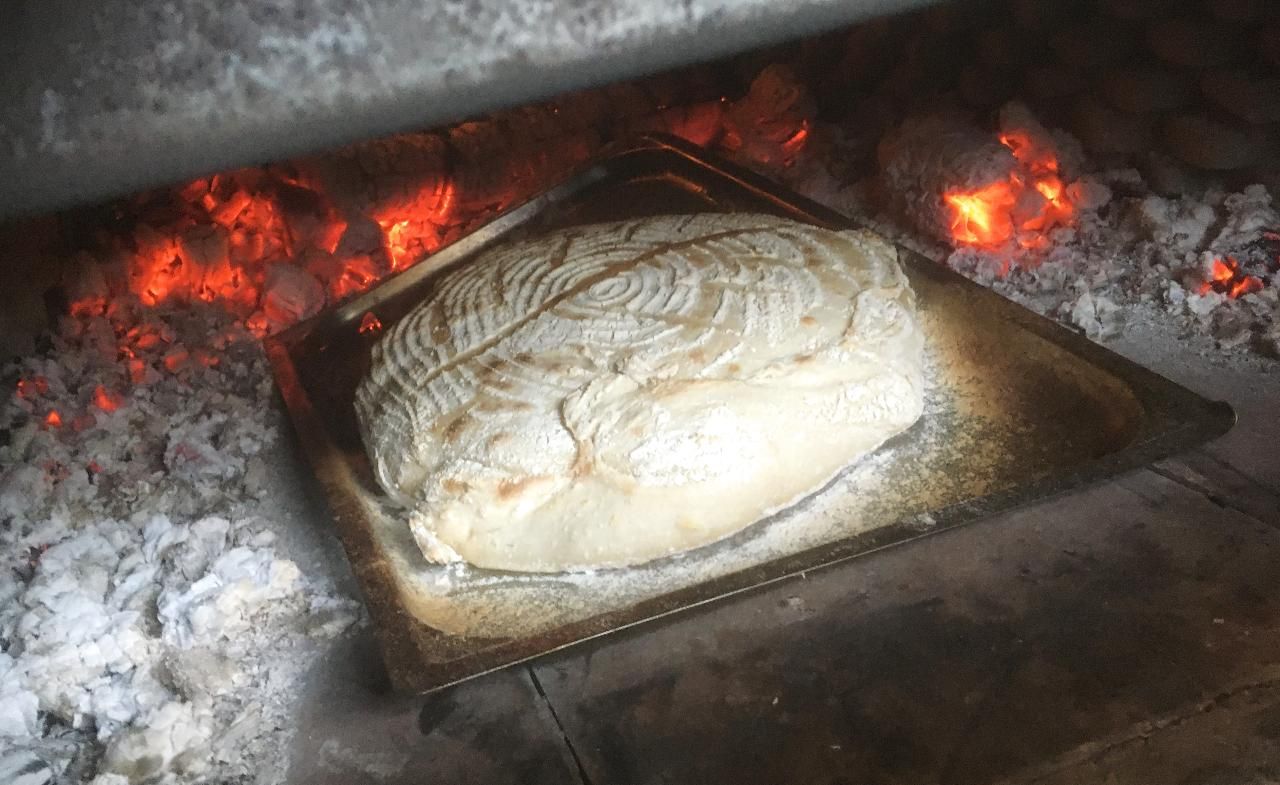
First Bread! Cripsy...
Published 4y. Edited 4yPublished over 4 years ago. Last edit over 4 years ago
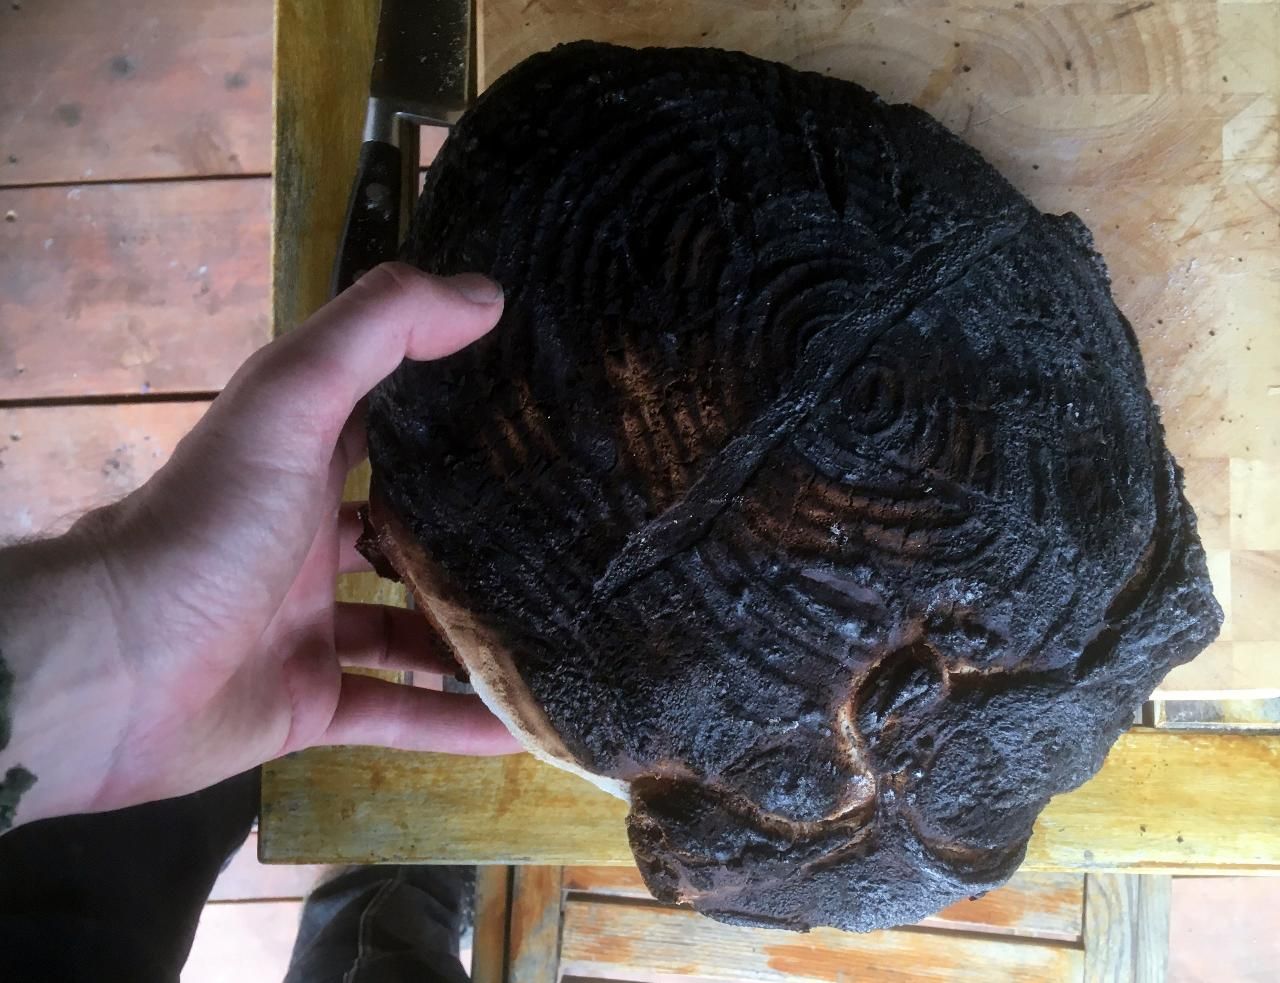
First baked breads! Made the sourdough and fired up the oven. I baked 1 bread in a metal tray and the other one on a metal plate. I put them on a tray because the tough was a bit to sticky.. Baked for 45min but the oven was way to hot 😅. Hard to measure the temperature without a thermometer.
Room for improvement next week(s)!
Review
+ The bread is crispy. very cripsy
+ The bread is edible
- Way to burned
- Lost its shape, to soft dough

4
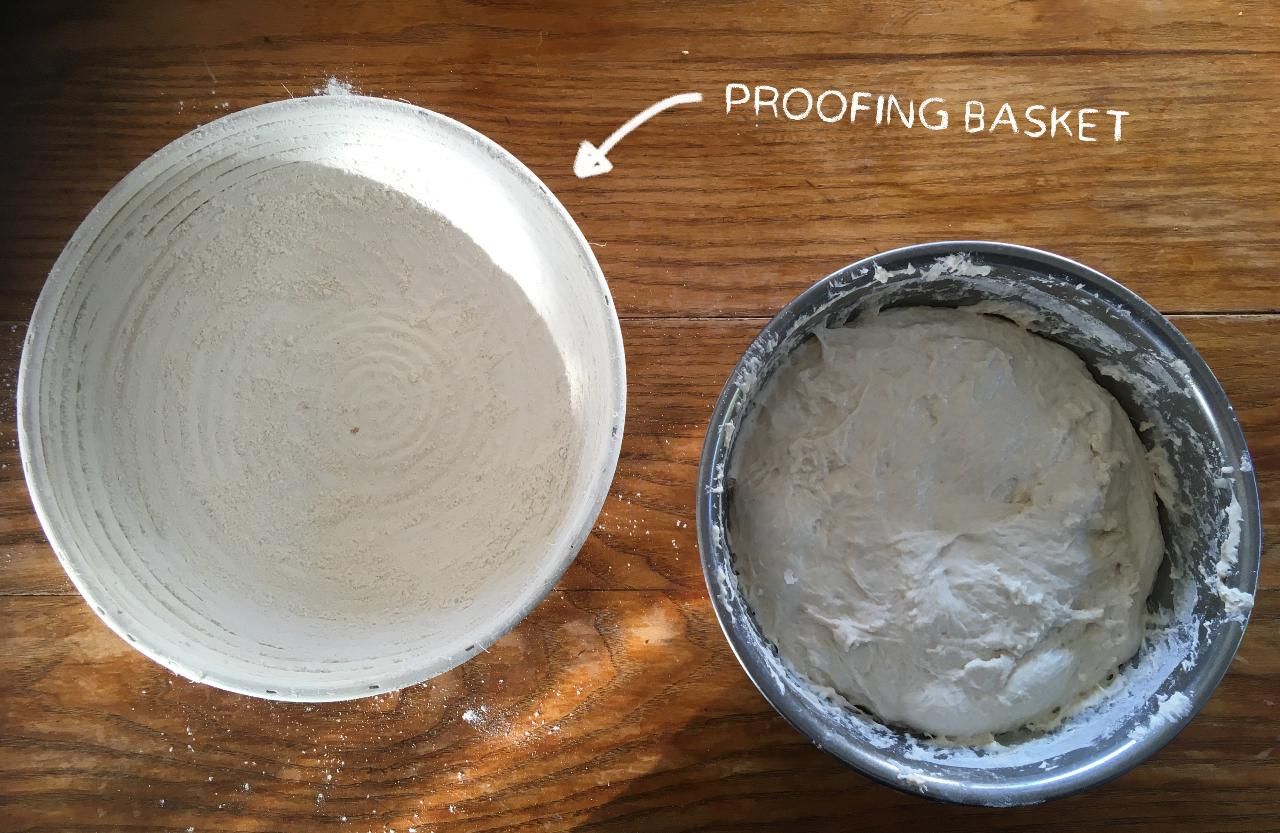
Proofing basket
Published 4yPublished over 4 years ago
We got a little proofing basket to try out after a friend recommending it. They are made from cane and prevent the bread from sticking to it when proofing. Besides that it also gives a cool striped look. Well let's see about that :)
5
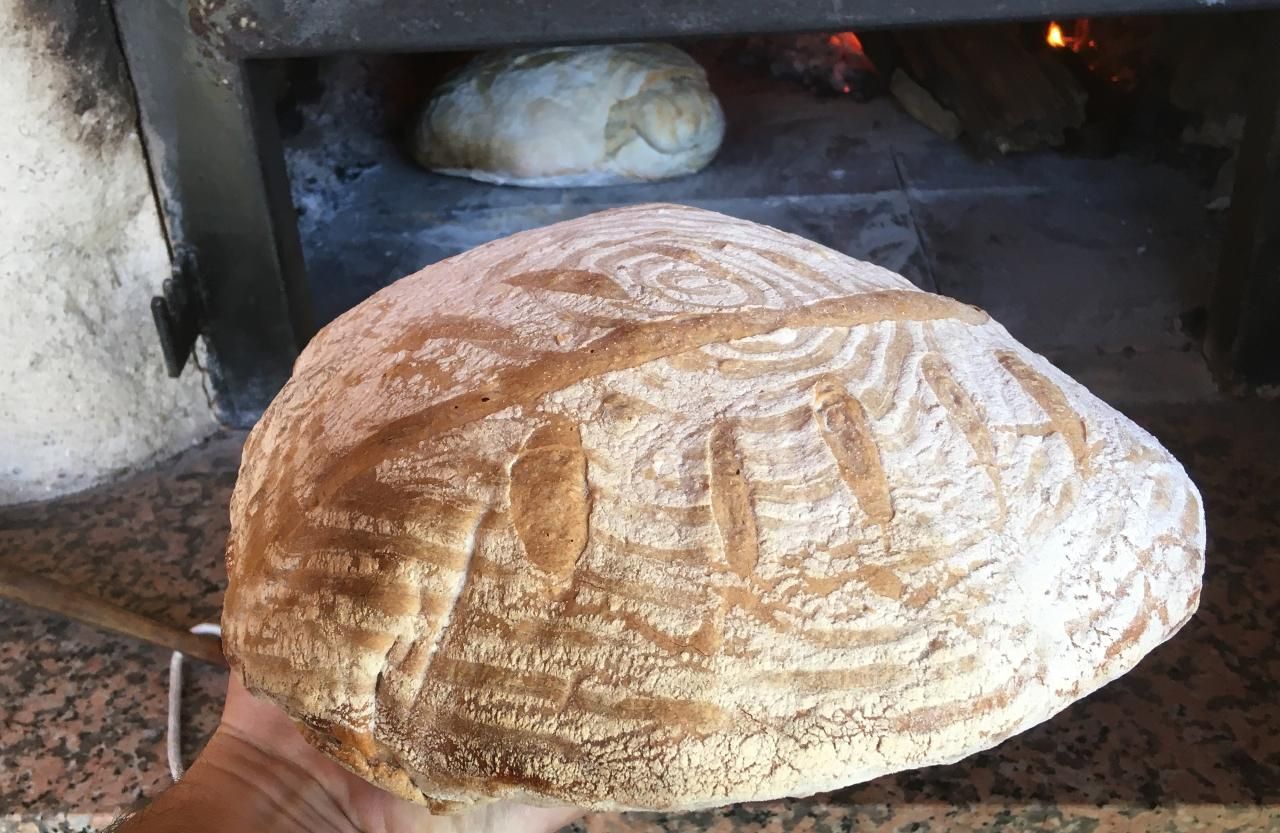
First good bread!
Published 4y. Edited 4yPublished over 4 years ago. Last edit over 4 years ago
Managed to get a good bread this time! The main difference is the baking process. Fired up the oven but took out the fire and amber when the bread went in. So it's baked only on the heat of the stones. It gives a very equal distributed heat. Downside is at the end of the bake the oven was cooled down a lot. So it would be hard to make another batch since the oven would need to be fired again. Next i’ll try to keep firing the oven with the door open. So we can do continues bakes. Making progress 💪

6
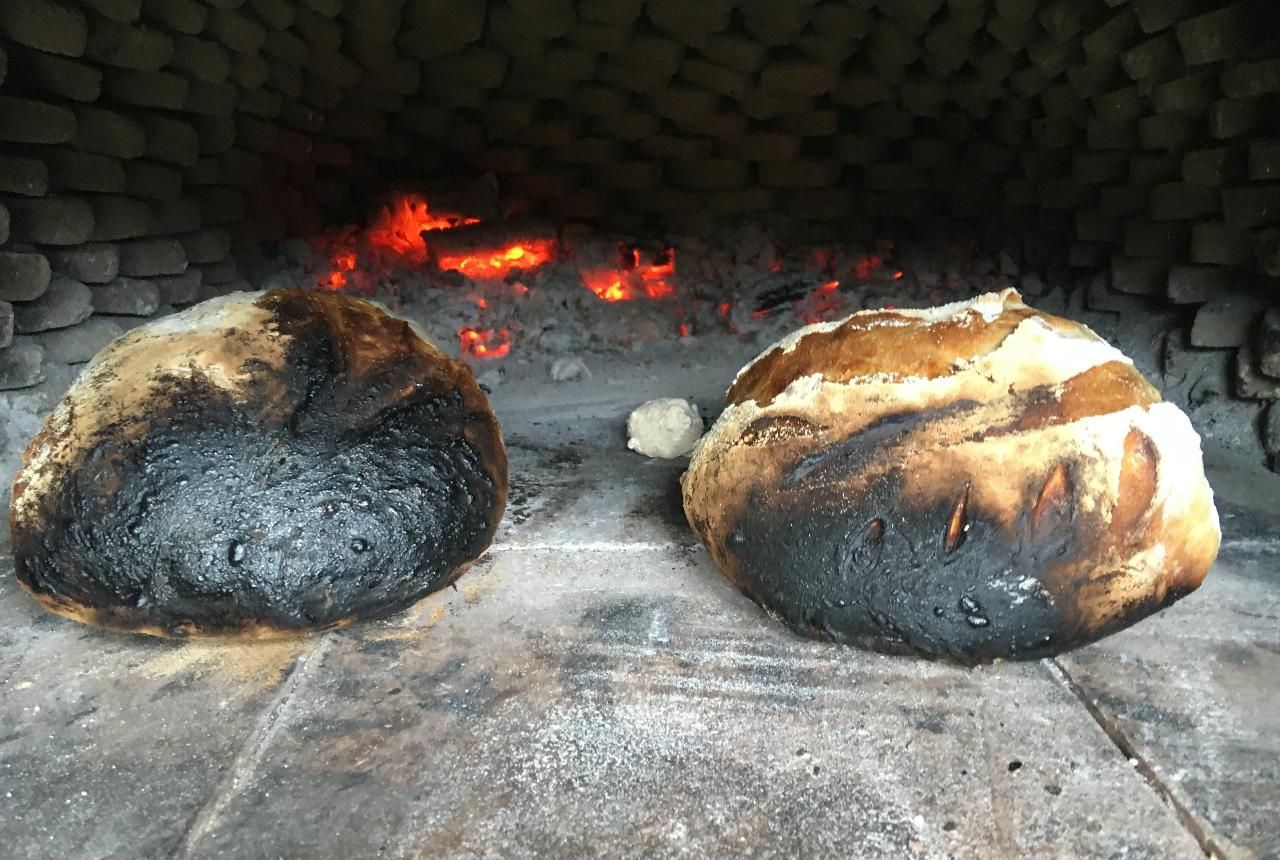
Problems with the baking 🔥
Published 4yPublished about 4 years ago
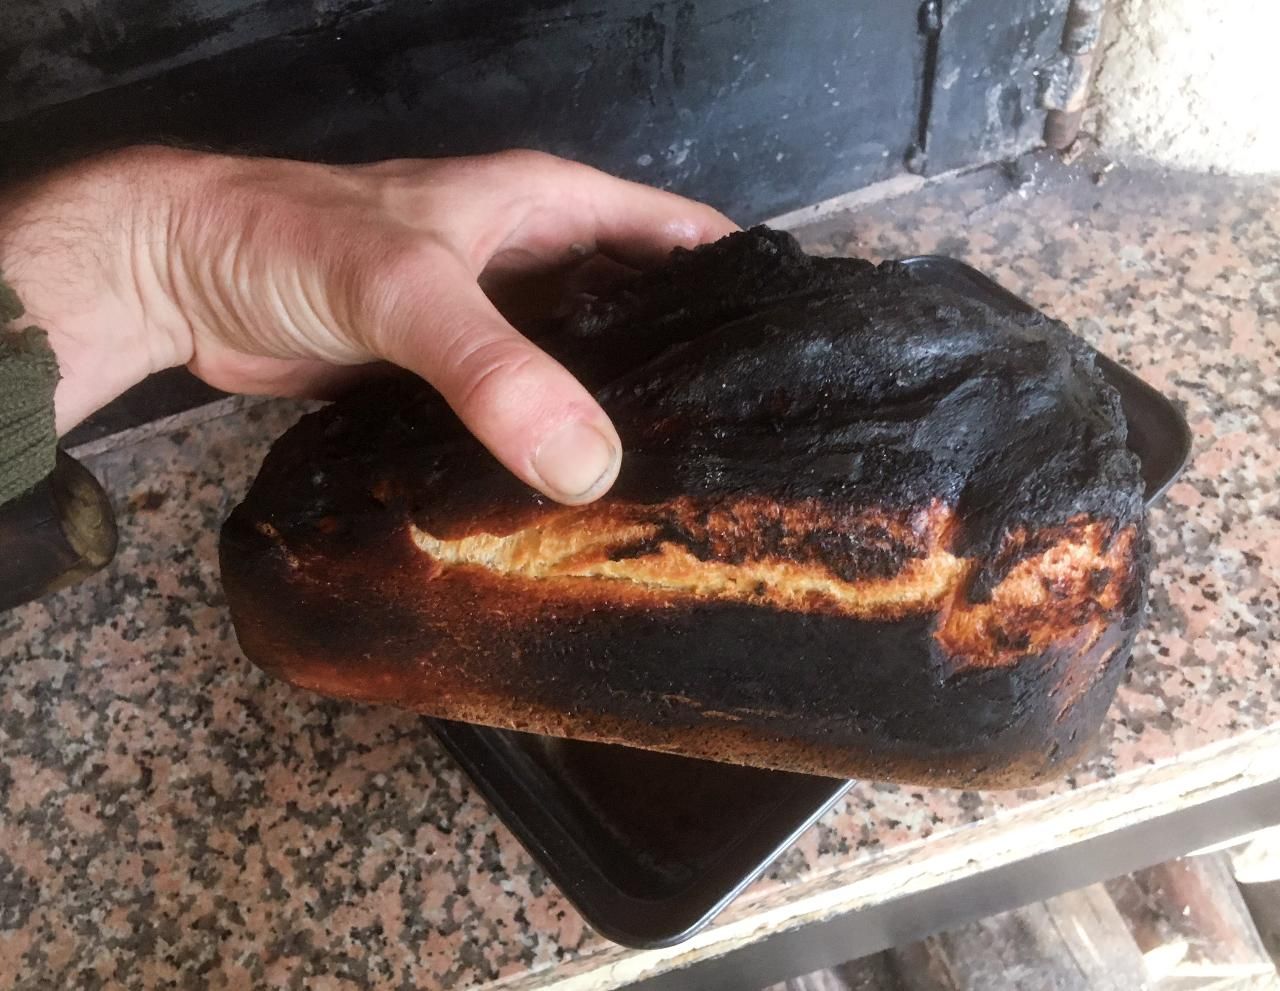
So far the baking has been going well. The dough is steady and we manage to prepare nice breads. However the main struggle is when we bake them. It's very challenging to get the temperature right.
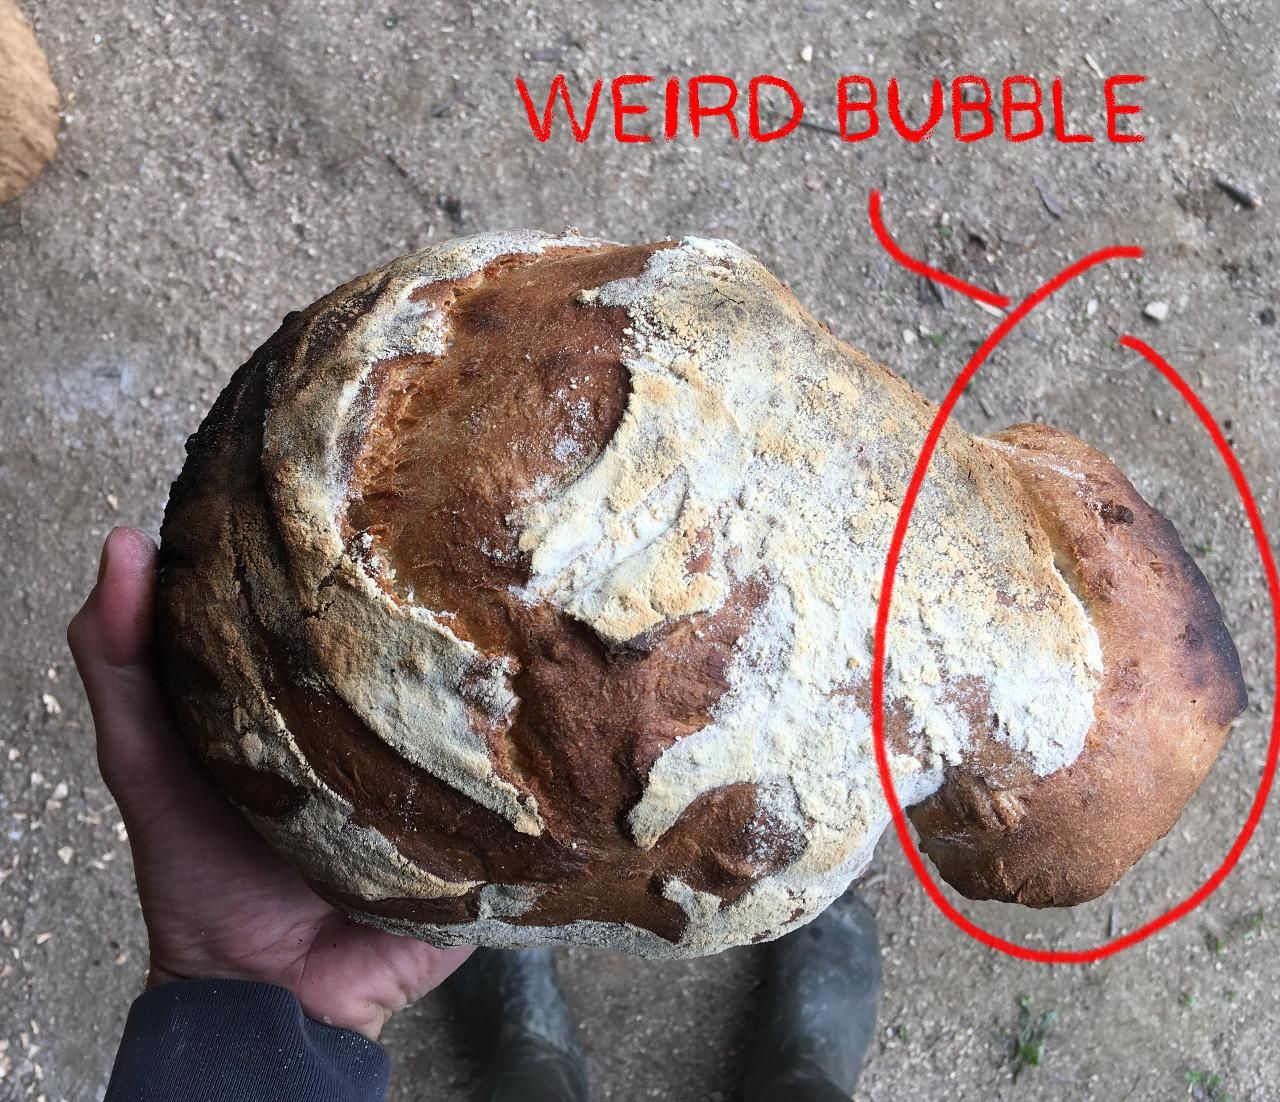
Attempt one (in pictures)
They quickly get burned on one side where the fire is. We avoid this my turning them around. Not ideal, takes time, but it somewhat works. However when we put them in the beginning the bread start to grow much faster on one side. But the dough is still to soft to turn around. Resulting into weird deformations. Would be good to find a way to distribute the heat more evenly


7
Sweet distraction- cinnamon roles
Published 4y. Edited 4yPublished about 4 years ago. Last edit about 4 years ago
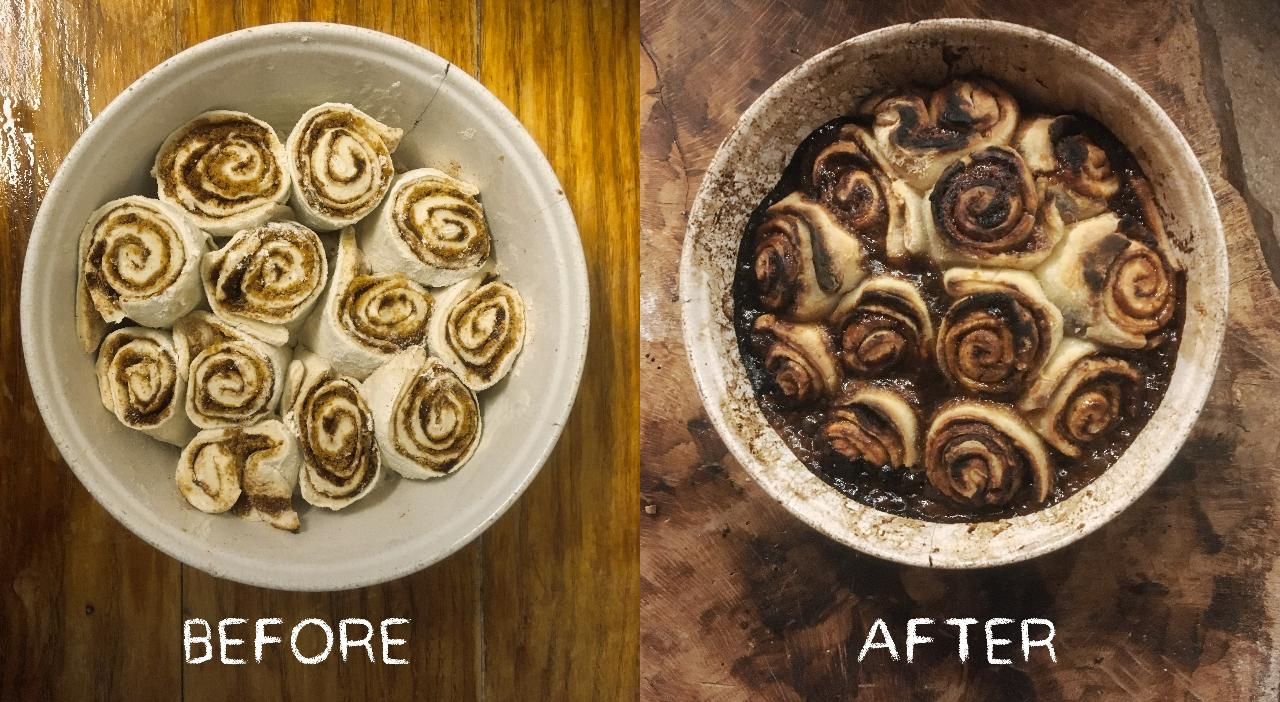
Ok. So the bread thing has it ups and downs and we realised it's going to be a long tweaking process before we nail it down. In order to keep it fun we had a few sweet distractions. Each bake we started making some additional things. Since the oven is on anyway. Here we made some cinnamon rolls. Very easy to make. The same bread dough is used and spread out, suger and cinnamon on top. Then rolled up like a salami and cutted into slices. which are put together. Nice for the chilly evenings :) Granola has also been a very good addition to make. Next week back to baking using some of the tips you guys posted. pans!
8
Baking with a pan (Dutch oven)
Published 4yPublished about 4 years ago
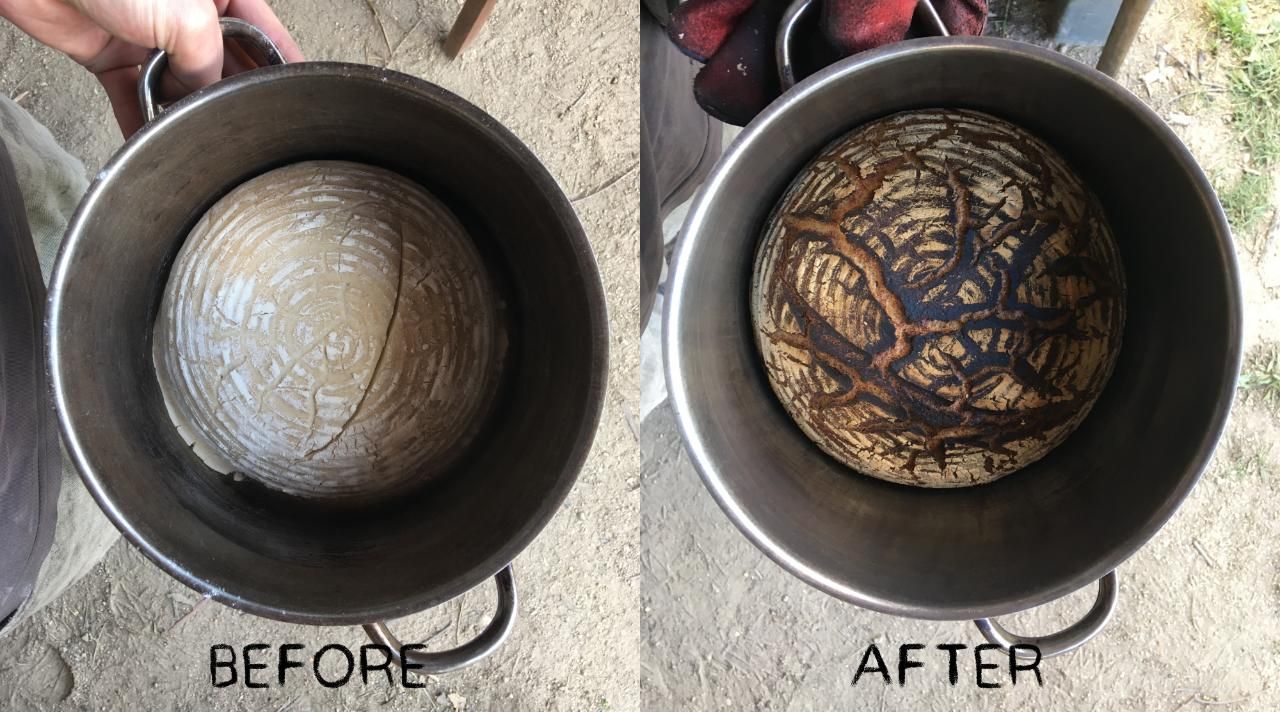
As you might have seen in Step 6, we had some problems with regulating the temperature in the oven. Some of you suggested to put a Pan in the oven (often called a Dutch oven).
We gave it a test.
It worked very well.
Upside: Much better regulated temperature and it keeps the moisture inside which makes the bread more cripsy on the outside and soft on the inside. Feels like a real bread.
Downside is that it takes up much more space so you can bake less bread at once and you need additional things, a fully metal pan + lid.
Next we will try to scale up a bit and bake more breads.

9
Scaling up!
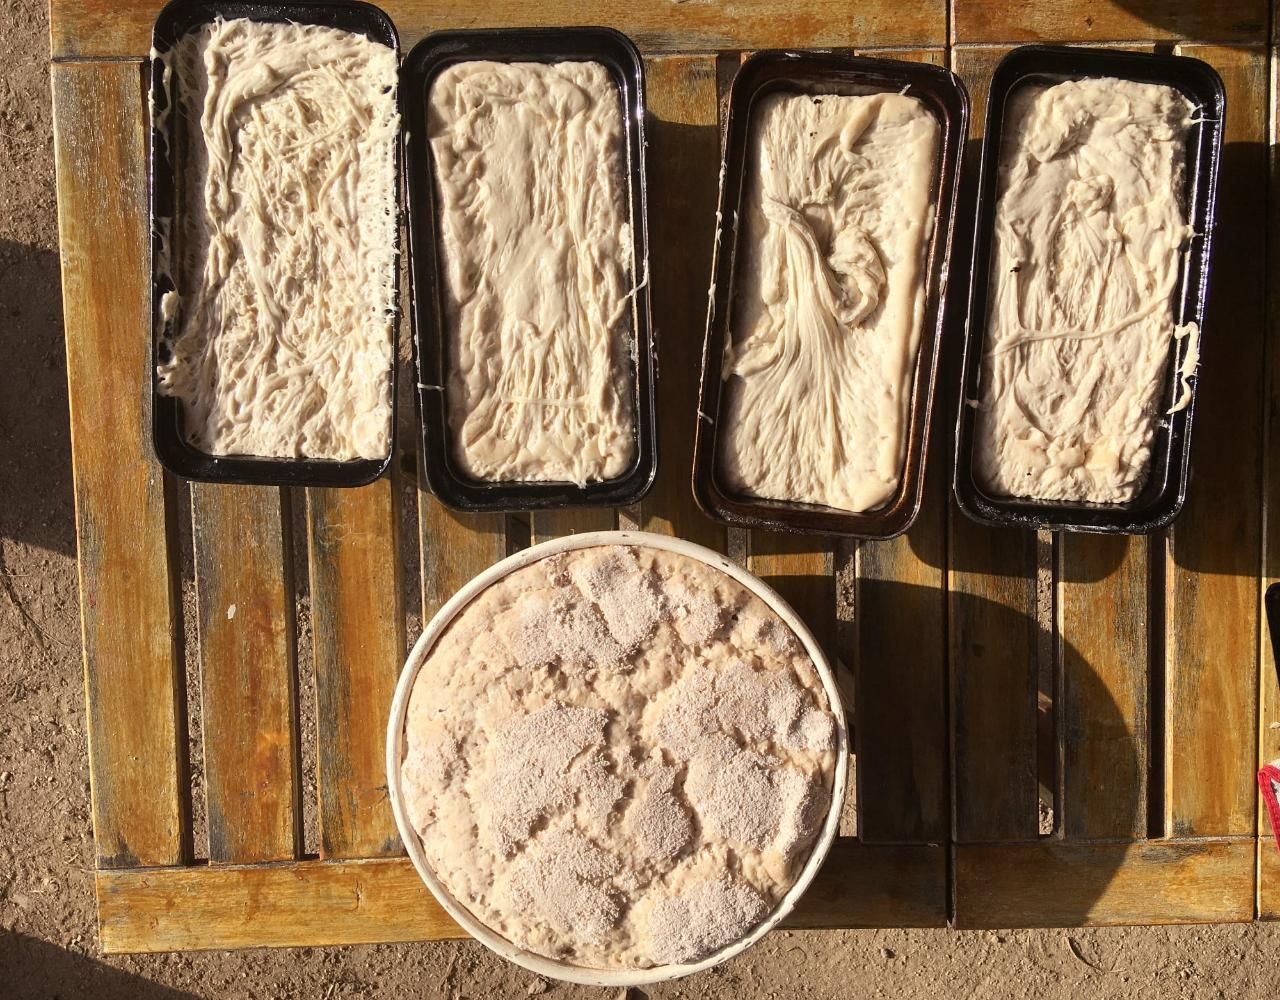
Published 4yPublished about 4 years ago
Putting the bread into a metal pan worked quite well to shield the heat. We still had some metal cake trays laying around and figured it would behave similair. So we took them all out, filled them with dough and put a metal tray on top. They are quite practical since it takes up much less space than having 4 different round pans. The breads turned out pretty good! But the baking process is still a bit clunky. Because even in the metal trays we still have to turn the breads around quite a lot due to all the heat (ambers) being in once side of the oven. To avoid burning. Baking process to be improved, but at least we have breads! :)
10
Crispy breads and happy people
Published 3yPublished almost 4 years ago
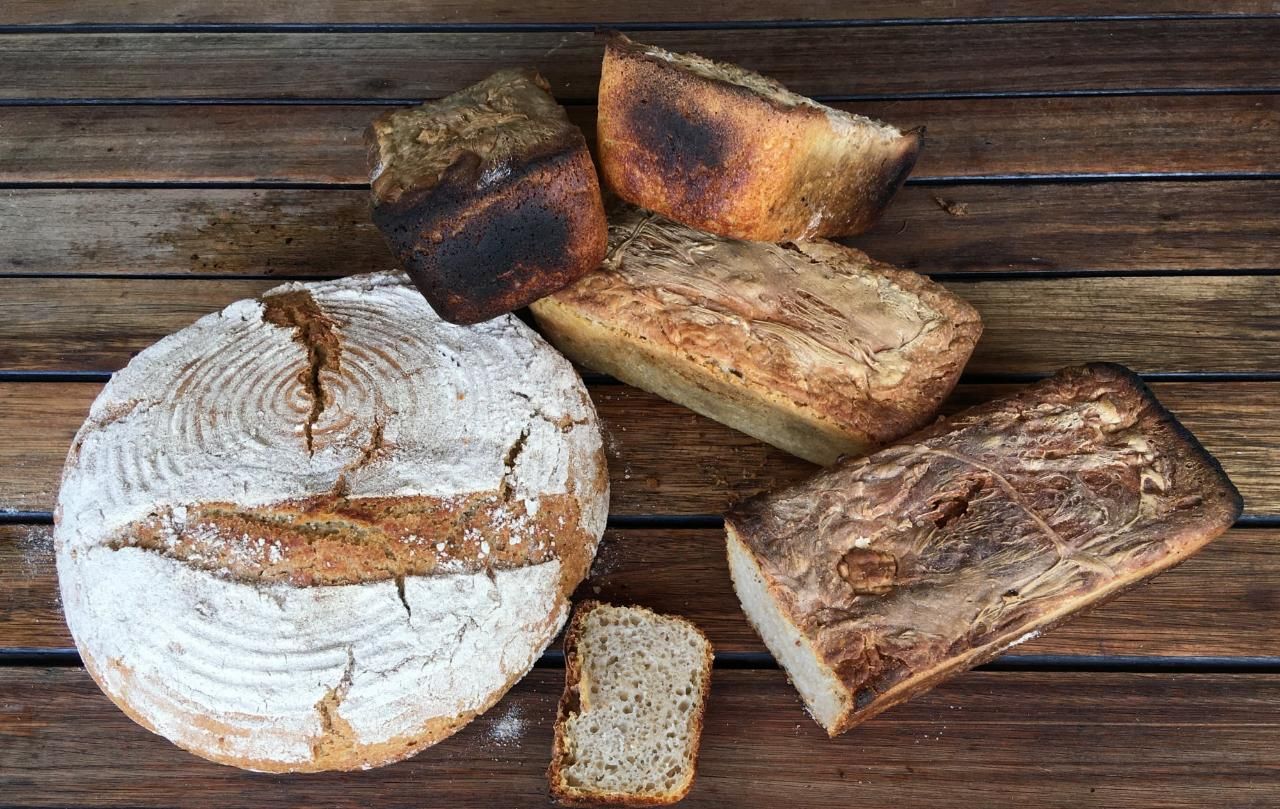
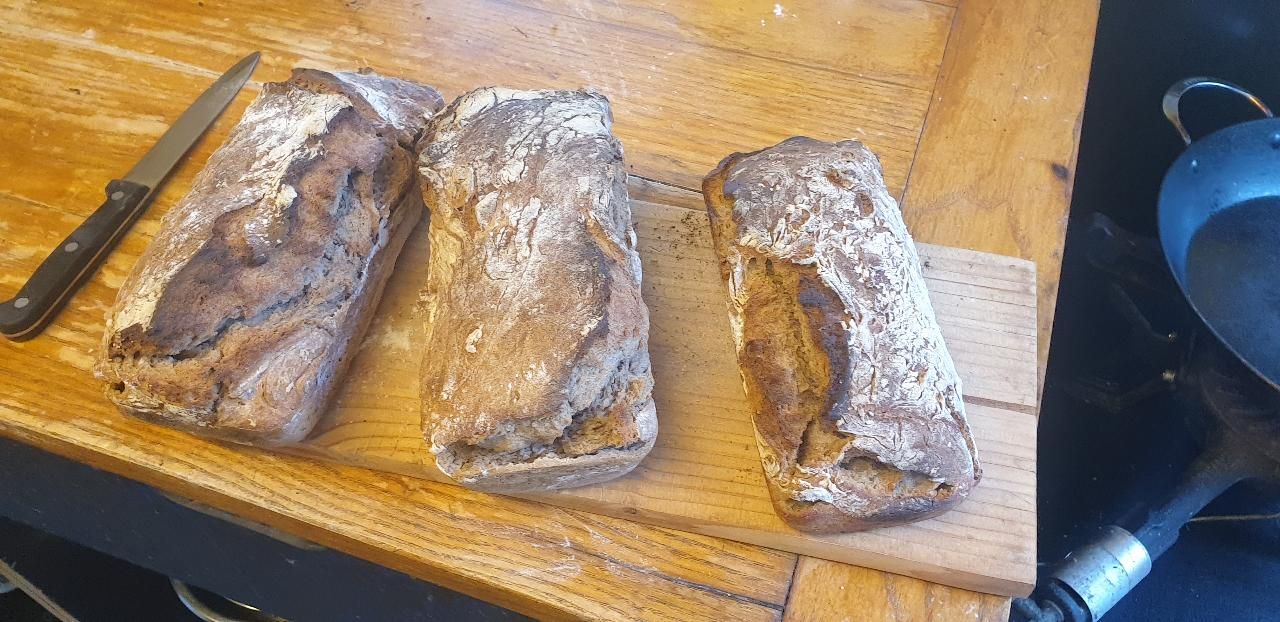
Our the bread baking process has developed again. We are still baking in the cake trays, since this gives the most capacity in the oven, for now we are baking about four breads every week. The breads turn out very well, not burned and fully baked. We tweaked the following aspects
- Heating the oven for a good 2,5 hours, making sure the whole thermal mass is properly heated.
- Taking out the fire and some of the ambers before baking, as to avoid too much direct heat.
- For the last half hour of heating the oven pushing the fire all the way to the back, so that the position where the breads will be in the oven will not have a glowing hot floor, thus burning the bottom of the bread.
- We add a pan/tray with boiling water to create steam.
Then we bake for about 45 to 55 minutes, resulting in nice crispy breads :)
In general for the bread baking process we would say it takes some level of intuition. Yet, we are now very satisfied with the results and are able to bake enough bread for a whole week. Next up would be to play more with the hydration levels of the bread, which was kept at a maximum of 70% up until now, adding seeds and using other types of flour. If you have any other funky suggestions to improve our breads let us know!
Keep an eye out for update 54 on Youtube, which features the bread baking process.
11
See our current process in video
Published 3yPublished almost 4 years ago
We made a little video where Ted will show you how we bake bread. How we make the dough, our starter, the ratios we use and fire the oven. It is in update #54 and starts at 15:57
12
Bread making calculator + tutorial
Published 2y. Edited 2yPublished about 2 years ago. Last edit about 2 years ago
From one week to an other, the amount of people in Kamp is constantly changing. And so do the temperature and humidity conditions.
The composition of the bread making team is also very unstable, depending on new arrivals and departures.
To face those issues, we built a bread making system made of 2 parts :
- A bread making calculator, in the form of a spreadsheet, where the amount of breads wanted and the conditions can be adapated in order to get automatically calculated quantities for every step of the process. (link attached)
- A bread making video tutorial so anyone jumping into the bread making team can have a look at it and can become autonomous as fast as possible.
We thought those tools could also be useful for you, whether you’re trying to build a community or you’re baking in a wood fire oven.
As said in the video, we are not professional bakers but we are now happy with the quality and the consistency of our breads. Your feedback and advices are more than welcome.
%20--%3e%3csvg%20version='1.1'%20id='Calque_1'%20xmlns='http://www.w3.org/2000/svg'%20xmlns:xlink='http://www.w3.org/1999/xlink'%20x='0px'%20y='0px'%20viewBox='0%200%2027.2%2027.8'%20style='enable-background:new%200%200%2027.2%2027.8;'%20xml:space='preserve'%3e%3ctitle%3eicon%20redirect%20new%3c/title%3e%3cg%3e%3cpath%20d='M27.2,26.5c-0.1-5-0.3-10-0.4-15c0-0.7-0.6-1.2-1.2-1.2s-1.2,0.6-1.2,1.2c0.1,4.6,0.3,9.1,0.4,13.7%20c-3.9-0.2-7.7-0.6-11.6-0.4c-3.3,0.2-6.7,0.5-10,0.4C2.8,19.5,2.7,13.7,2.5,8c2.9-0.1,5.8-0.8,8.6-0.7c1.6,0.1,1.6-2.4,0-2.5%20C7.8,4.6,4.5,5.7,1.2,5.5c-0.6,0-1,0.3-1.1,0.7C0,6.3,0,6.4,0,6.6c0,0,0,0.1,0,0.1c0,0,0,0,0,0.1c0.2,6.6,0.4,13.2,0.5,19.7%20c0,0.6,0.4,1.3,1.2,1.4c3.8,0.1,7.5-0.2,11.3-0.4c4.4-0.3,8.6,0.2,12.9,0.4c0.6,0,1-0.3,1.1-0.7C27.1,26.9,27.2,26.7,27.2,26.5z'/%3e%3cpath%20d='M12,12.6c-0.2,0.7,0.2,1.4,0.9,1.5c0.7,0.2,1.4-0.2,1.5-0.9v0c0.6-2.2,1.4-4.5,3.1-6c1.3-1.2,3-1.9,4.7-2.7%20c-0.4,1.3-0.8,2.6-1.4,3.8c-0.6,1.5,1.8,2.1,2.4,0.7c0.8-1.9,1.5-3.9,2-5.9c0-0.1,0-0.2,0-0.3c0.3-0.6,0.1-1.5-0.7-1.8%20C22.3,0.4,20,0,17.7,0c-0.7,0-1.2,0.6-1.2,1.2s0.6,1.2,1.2,1.2c0.9,0,1.7,0.1,2.6,0.2c-1.7,0.8-3.4,1.7-4.8,3%20C13.6,7.6,12.7,10.1,12,12.6z'/%3e%3c/g%3e%3c/svg%3e)
%20--%3e%3csvg%20version='1.1'%20id='Layer_1'%20xmlns='http://www.w3.org/2000/svg'%20xmlns:xlink='http://www.w3.org/1999/xlink'%20x='0px'%20y='0px'%20viewBox='0%200%2064%2063'%20style='enable-background:new%200%200%2064%2063;'%20xml:space='preserve'%3e%3cstyle%20type='text/css'%3e%20.st0{fill:%2320B7EB;}%20.st1{fill:%23E9475A;}%20.st2{fill:%23FECE4E;}%20%3c/style%3e%3cdesc%3eCreated%20with%20Sketch.%3c/desc%3e%3cg%20id='Page-1'%3e%3cg%20id='OA-Logo-Black-Background'%3e%3cpath%20id='Shape'%20class='st0'%20d='M14.1,30.1c-1.5-0.8-8.6-3.8-14.1-7.8c1.8-3.4,3.1-5.6,5-9.1c2.7,1.1,1.9,0.5,4.6,1.7%20c0.8,0.4,10.1,4.5,13.8,6.2c2.4,1.1,4.7,2.2,7,3.3L43,30.5l8.1,3.9c4,2,7.2,3.5,11.3,5.5c0.5,0.3-3.7,9.4-3.7,9.4%20c-1.7-0.6-3.9-1.8-5.5-2.5c-4.7-2.1-9-3.9-13.7-6c-4-1.8-6.7-2.9-10.8-4.5C25,34.9,17.1,31.6,14.1,30.1z'/%3e%3cpath%20id='Shape_1_'%20class='st1'%20d='M12.1,54.9c-0.8,0.6-1.6,1.2-2.5,1.6c-0.4-0.5-0.9-1-1.3-1.5c-0.3-1.2-2.3-4.9-2.7-6.2%20c-0.1-0.4-0.7-2.2-0.8-2.6c0,0,5-3.4,8.2-5.9c3.2-2.6,6.2-5,9.3-7.5c1.4-1.1,3.9-2.5,5.3-3.5c2.5-1.7,13-9.1,15.6-10.5%20c5.4-3.3,11.1-6.3,16.8-9c1.7,3.5,1.8,3,3.8,6.9c0,0-17.8,13.5-22.7,17.1c-3.8,2.8-7.5,5.7-11.3,8.5c-1.7,1.3-3.5,2.4-5.2,3.7'/%3e%3cpath%20id='Shape_2_'%20class='st2'%20d='M20.8,2.9l-0.2-0.8C25,0,31.2-0.3,31.4,0.2c0.4,1.1,0.9,2.2,1.2,3.4c1.4,4.4,2.7,8.7,4,13.1%20c0.4,1.4,2.8,10,2.9,10.5c0.5,2.8,1.2,5.6,1.6,8.4c0.8,4.7,1.4,8.6,2.3,13.3c0.6,3.1,1.3,6.3,2.3,11.3c0,0-5.8,1.4-7.5,1.8%20c-0.8,0.2-1.5,0.4-2.4,0.6c-0.3-1.1-0.2-1.2-0.5-2.1c-0.9-3.7-1.8-7.3-2.6-11c-1.5-6.4-3-12.9-4.4-19.3%20c-1.2-5.4-2.6-10.7-4.4-15.9c-1-3.1-1.8-6.3-2.7-9.5C21.1,3.8,21,3.8,20.8,2.9z'/%3e%3c/g%3e%3c/g%3e%3c/svg%3e)