
Building a house in an old pig trailer
Updated 1yUpdated about 1 year ago
Construction
In Progress
RenovationBuildingRecycled
More Information


%20--%3e%3csvg%20version='1.1'%20id='Layer_1'%20xmlns='http://www.w3.org/2000/svg'%20xmlns:xlink='http://www.w3.org/1999/xlink'%20x='0px'%20y='0px'%20viewBox='0%200%2064%2063'%20style='enable-background:new%200%200%2064%2063;'%20xml:space='preserve'%3e%3cstyle%20type='text/css'%3e%20.st0{fill:%23231F20;}%20%3c/style%3e%3cdesc%3eCreated%20with%20Sketch.%3c/desc%3e%3cg%20id='Page-1'%3e%3cg%20id='OA-Logo-Black-Background'%3e%3cpath%20id='Shape'%20class='st0'%20d='M14.1,30.1c-1.5-0.8-8.6-3.8-14.1-7.8c1.8-3.4,3.1-5.6,5-9.1c2.7,1.1,1.9,0.5,4.6,1.7%20c0.8,0.4,10.1,4.5,13.8,6.2c2.4,1.1,4.7,2.2,7,3.3L43,30.5l8.1,3.9c4,2,7.2,3.5,11.3,5.5c0.5,0.3-3.7,9.4-3.7,9.4%20c-1.7-0.6-3.9-1.8-5.5-2.5c-4.7-2.1-9-3.9-13.7-6c-4-1.8-6.7-2.9-10.8-4.5C25,34.9,17.1,31.6,14.1,30.1z'/%3e%3cpath%20id='Shape_1_'%20class='st0'%20d='M12.1,54.9c-0.8,0.6-1.6,1.2-2.5,1.6c-0.4-0.5-0.9-1-1.3-1.5c-0.3-1.2-2.3-4.9-2.7-6.2%20c-0.1-0.4-0.7-2.2-0.8-2.6c0,0,5-3.4,8.2-5.9c3.2-2.6,6.2-5,9.3-7.5c1.4-1.1,3.9-2.5,5.3-3.5c2.5-1.7,13-9.1,15.6-10.5%20c5.4-3.3,11.1-6.3,16.8-9c1.7,3.5,1.8,3,3.8,6.9c0,0-17.8,13.5-22.7,17.1c-3.8,2.8-7.5,5.7-11.3,8.5c-1.7,1.3-3.5,2.4-5.2,3.7'/%3e%3cpath%20id='Shape_2_'%20class='st0'%20d='M20.8,2.9l-0.2-0.8C25,0,31.2-0.3,31.4,0.2c0.4,1.1,0.9,2.2,1.2,3.4c1.4,4.4,2.7,8.7,4,13.1%20c0.4,1.4,2.8,10,2.9,10.5c0.5,2.8,1.2,5.6,1.6,8.4c0.8,4.7,1.4,8.6,2.3,13.3c0.6,3.1,1.3,6.3,2.3,11.3c0,0-5.8,1.4-7.5,1.8%20c-0.8,0.2-1.5,0.4-2.4,0.6c-0.3-1.1-0.2-1.2-0.5-2.1c-0.9-3.7-1.8-7.3-2.6-11c-1.5-6.4-3-12.9-4.4-19.3%20c-1.2-5.4-2.6-10.7-4.4-15.9c-1-3.1-1.8-6.3-2.7-9.5C21.1,3.8,21,3.8,20.8,2.9z'/%3e%3c/g%3e%3c/g%3e%3c/svg%3e)


1

Searching for a base trailer
We found a guy online that sells trailers, trucks, parts, tires, storage boxes, old circus trucks and a bunch of other things. me and @acoira dropped by for a visit. I think his business is: “ sell big things coming from the road”. Below some picture of the things he sells. Was good to have a look at the trailers, big and small. He had a few big truck trailers around but we are aiming for a smaller size (+/- 6 meter long like a 20 ft container) Mainly because it should be large enough for what we want, and it’s hard to get it on our land and make the small turns to our land on the dirt road with a big (13M) trailer. Although he mentioned he could also chop the trailer in half and weld it back together again on our land..wasn’t aware that was a possibility. He also mentioned he could reduce or add axels. Or even swamp them, replace the good ones with old rough ones (since we wouldn’t drive it on the road) to make it cheaper. It seem like we could easily find a good base trailer here to build on top. However we are also curious to build into an existing trailer. Could be a freezer, animal transport, shipping container etc. Main reason is that we can recycle more and dont have to build from “scratch”. So we are going to visit another place :)
 Loading...
 Loading...Loading...
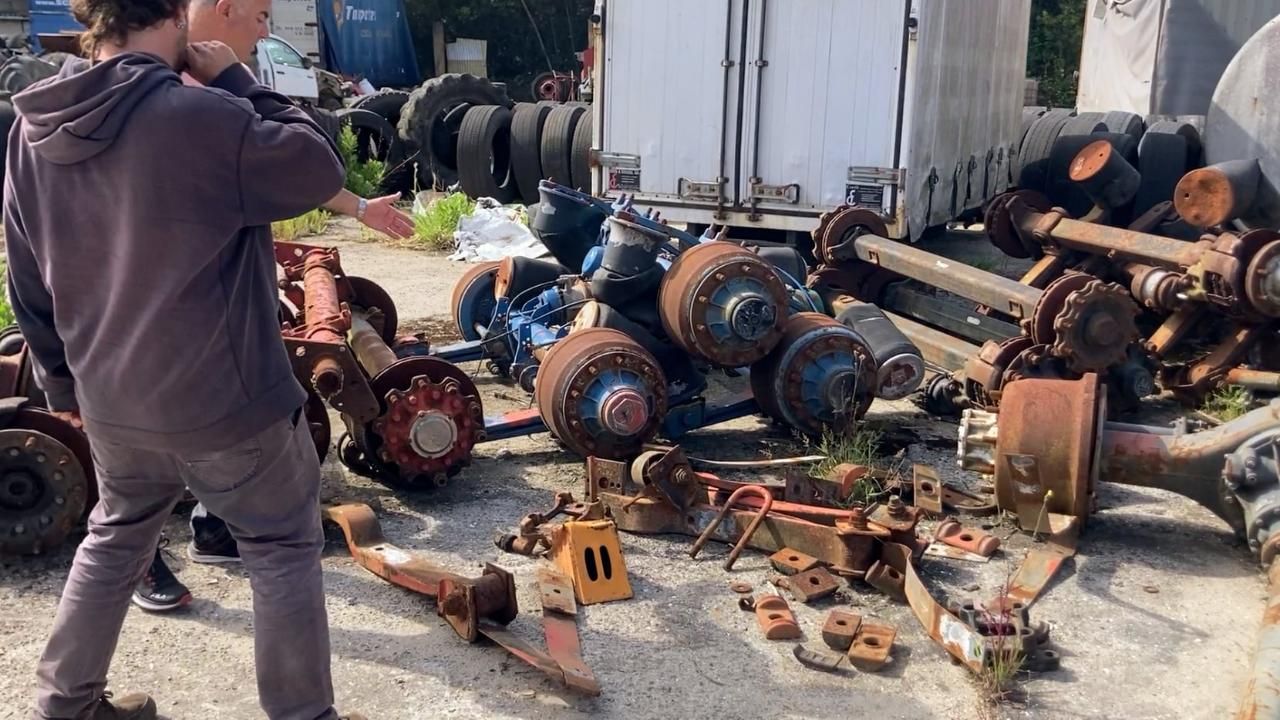 Loading...
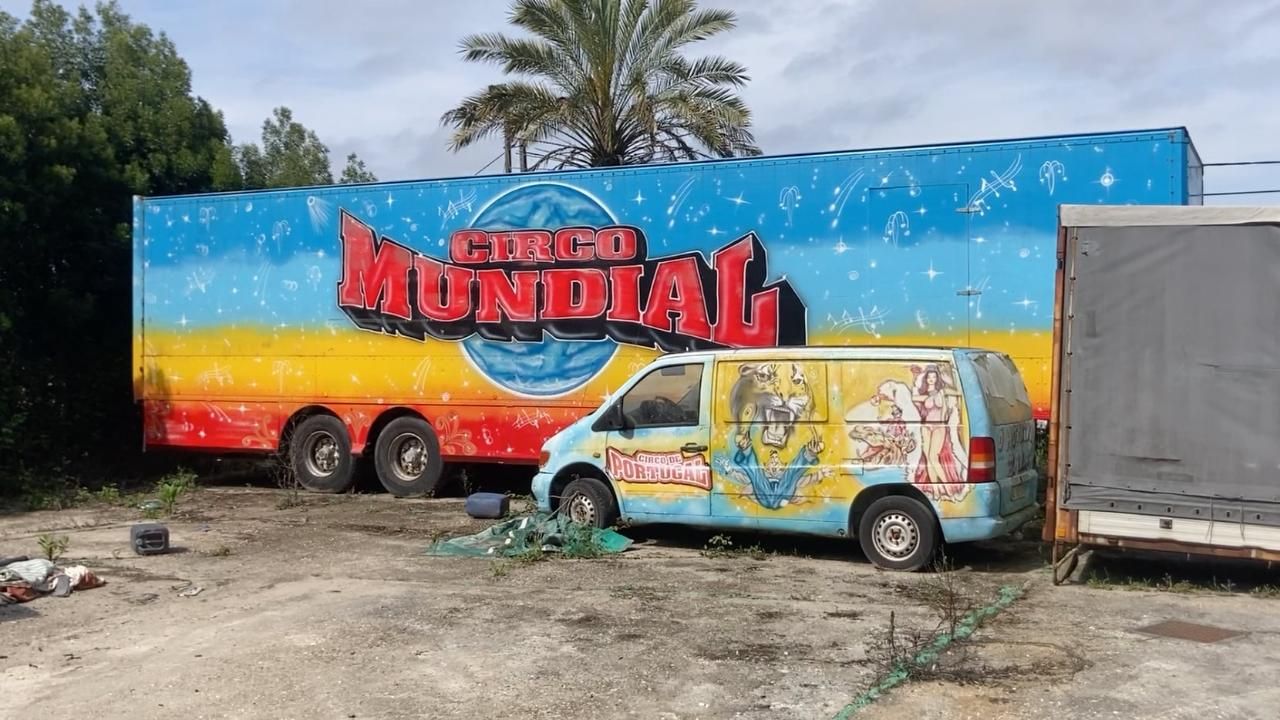 Loading...
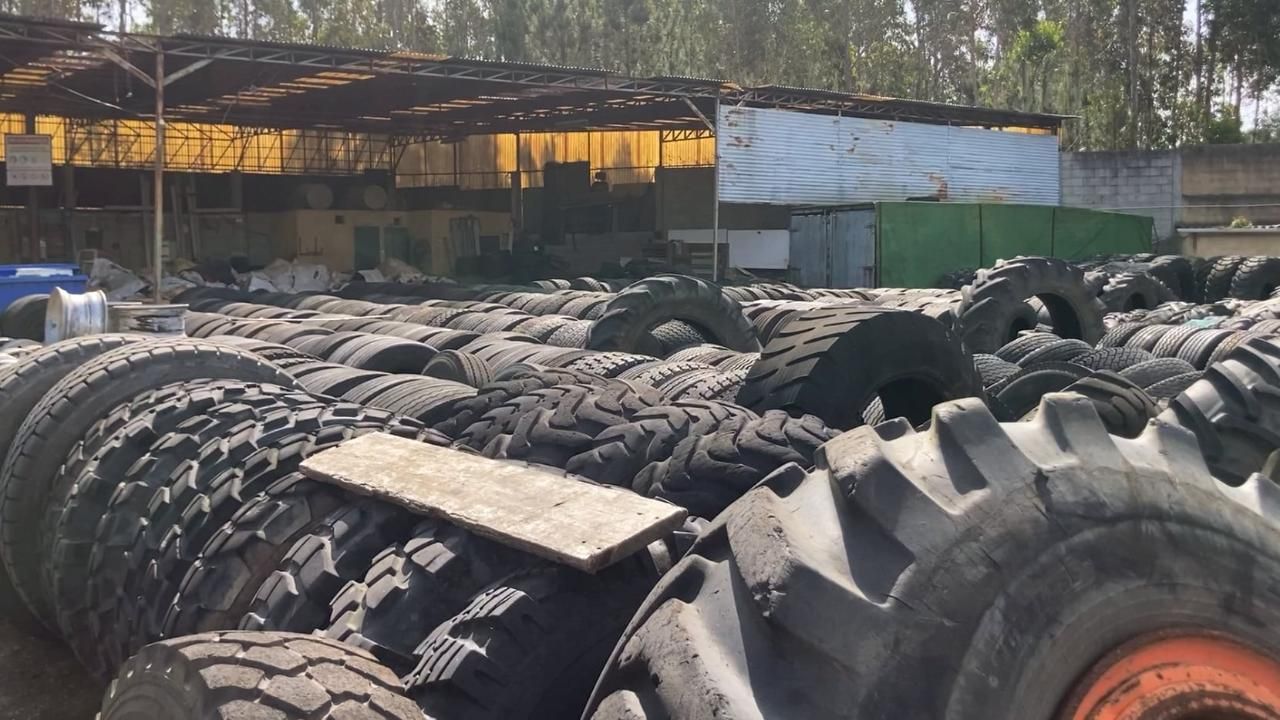 Loading...
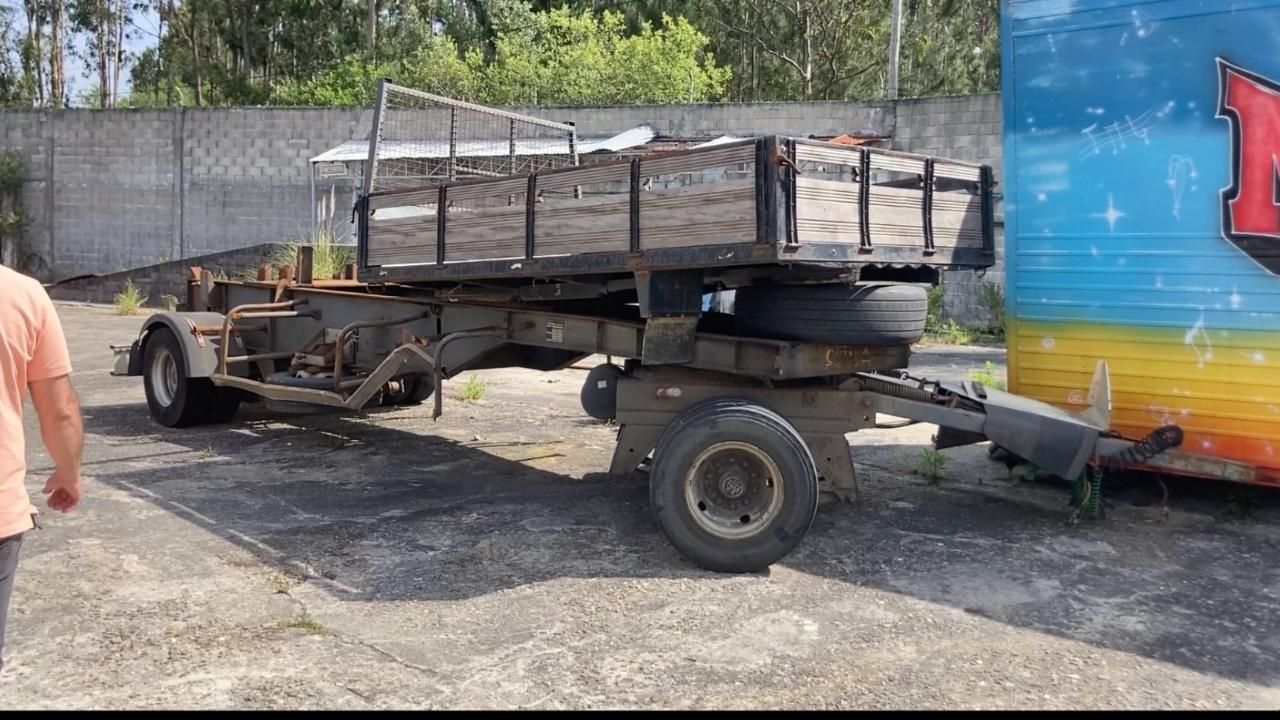
2
Finding way, way more trailers.
Seems like we found the holy grail of trailers in Portugal! This place has hundreds of old trailers and trucks laying around. It’s like being in a candy store. Some of them are completely stripped for parts, others have been around for +20 years and some seem quite new. We walked around for the day and explored all the trailers. Next we need to choose what we want. This will be hard and we might ask you for some help!
Loading...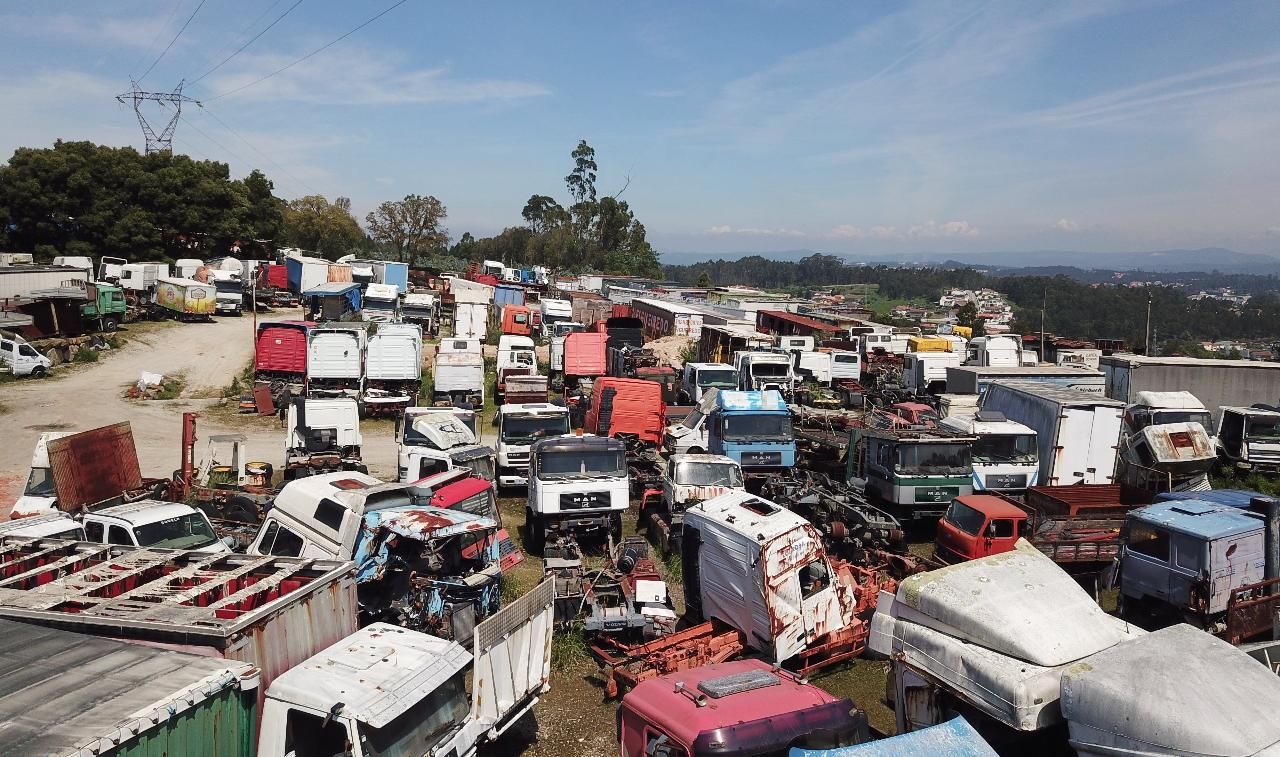 Loading...Loading...
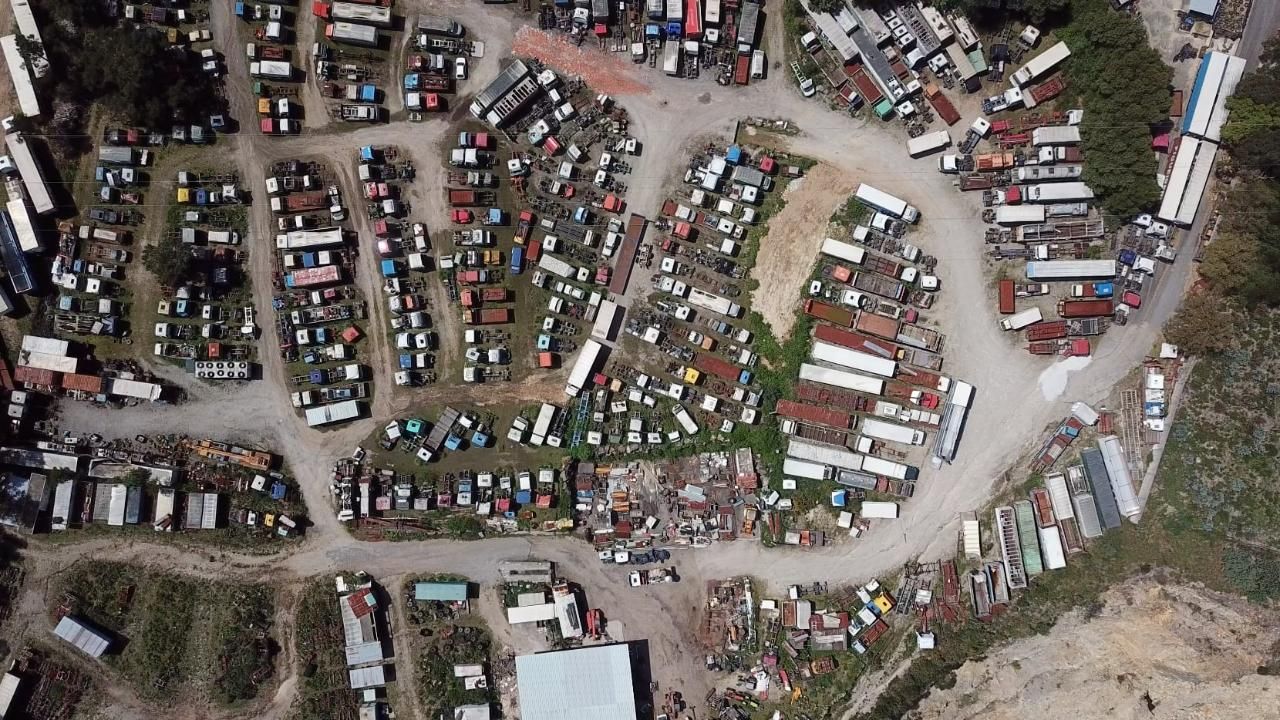 Loading...
 Loading...
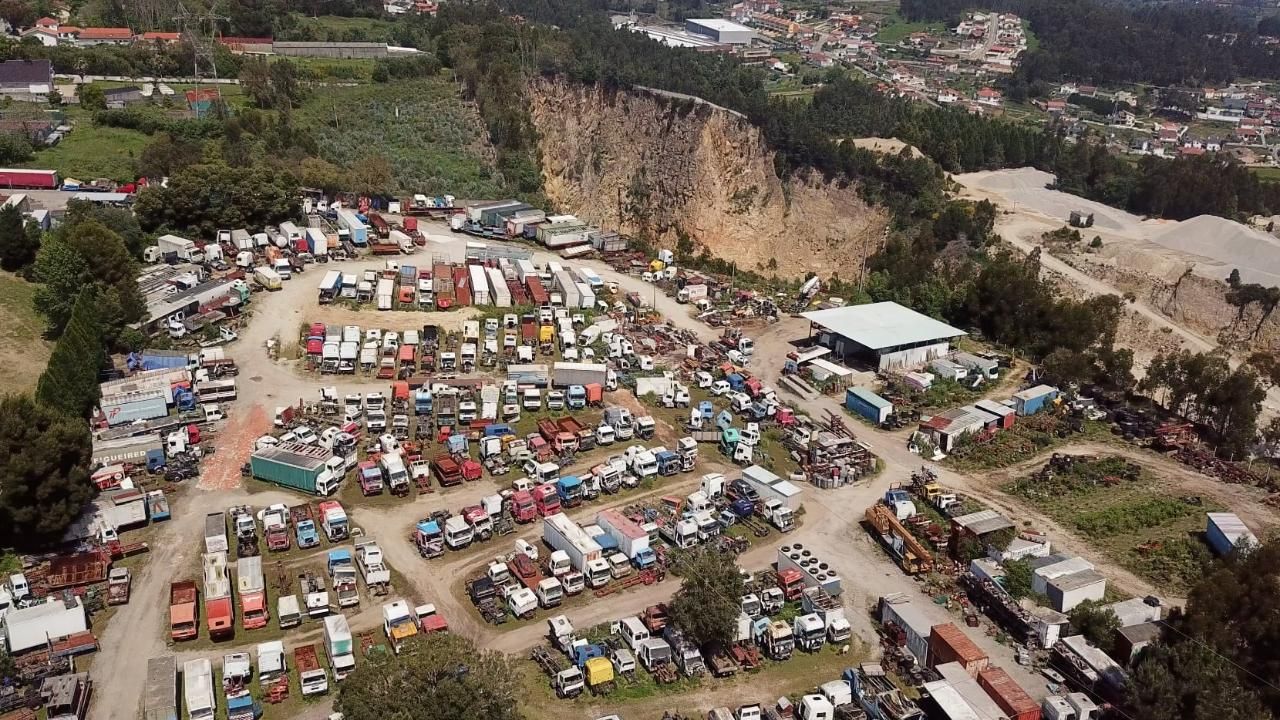 Loading...
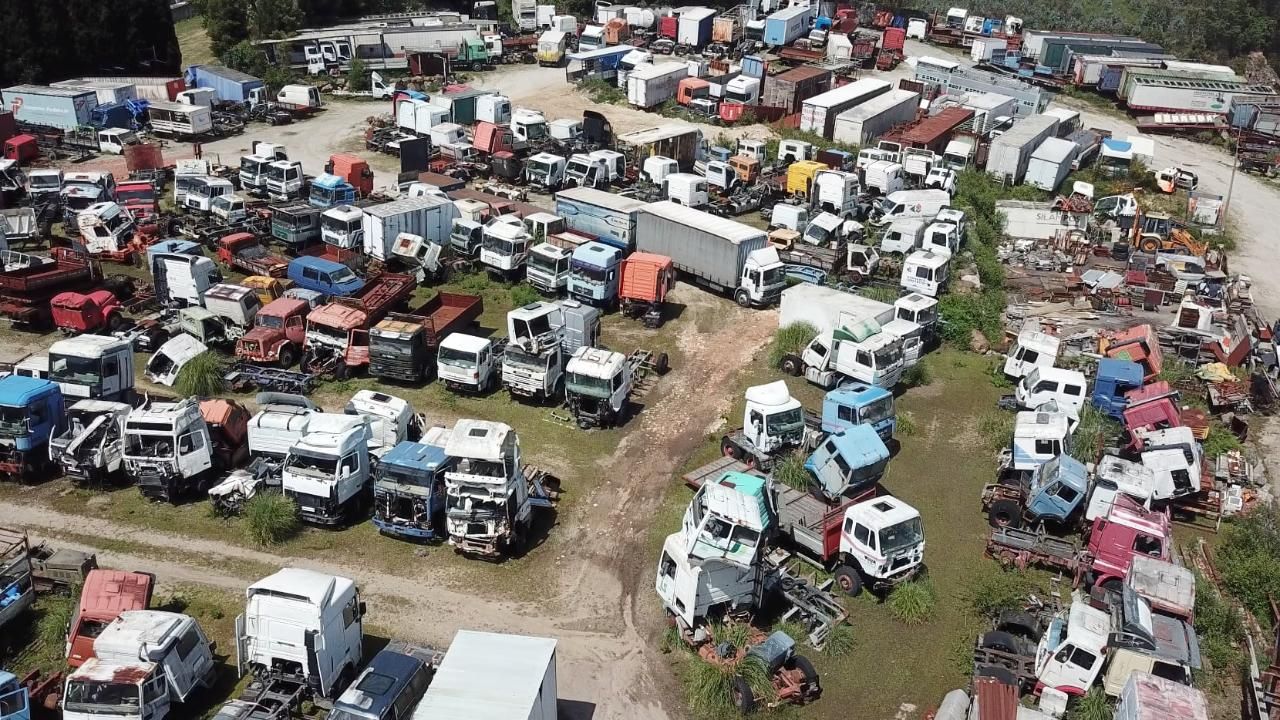
3
Choose which trailer we go for
We couldn't choose which trailer to go for. Each has their pro and con.
So we are doing a Patreon vote with the 5 different options.
We choose whatever comes out
Vote here: https://www.patreon.com/posts/vote-what-house-83196257
Loading...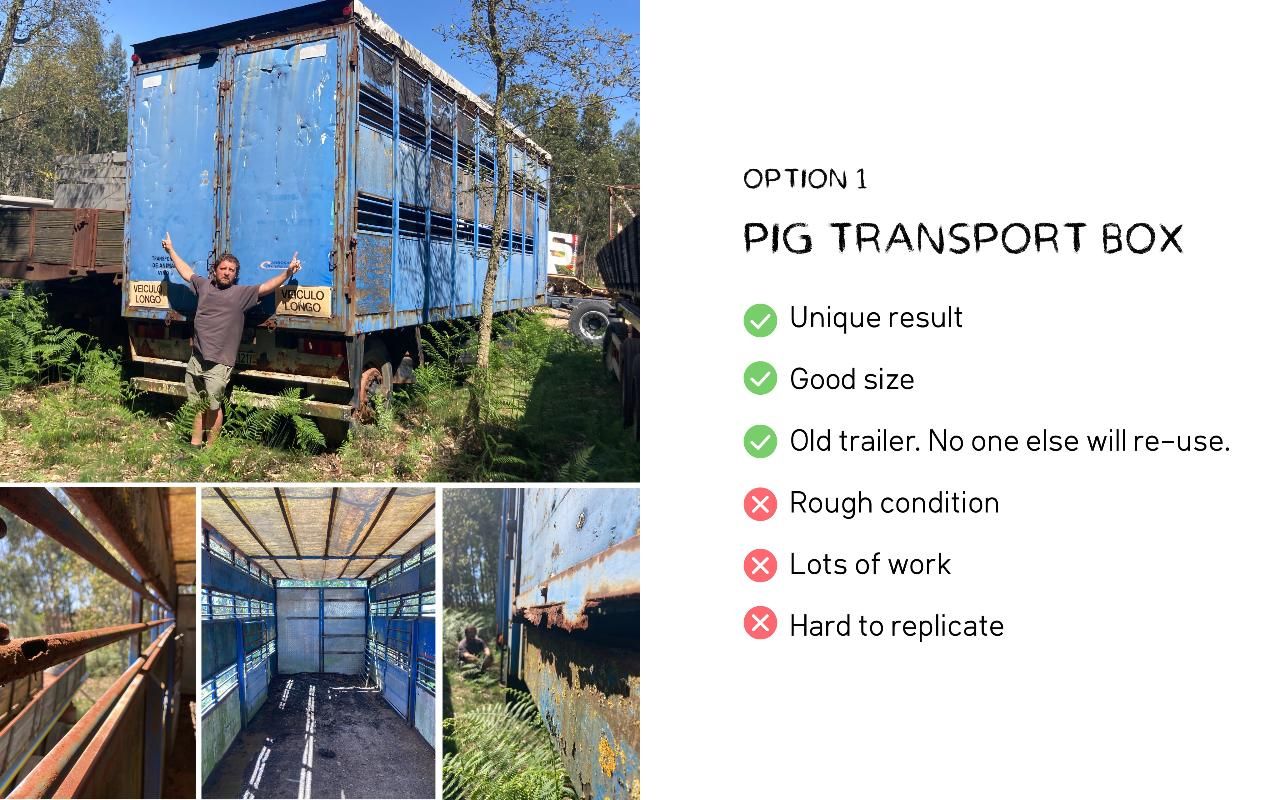 Loading...Loading...
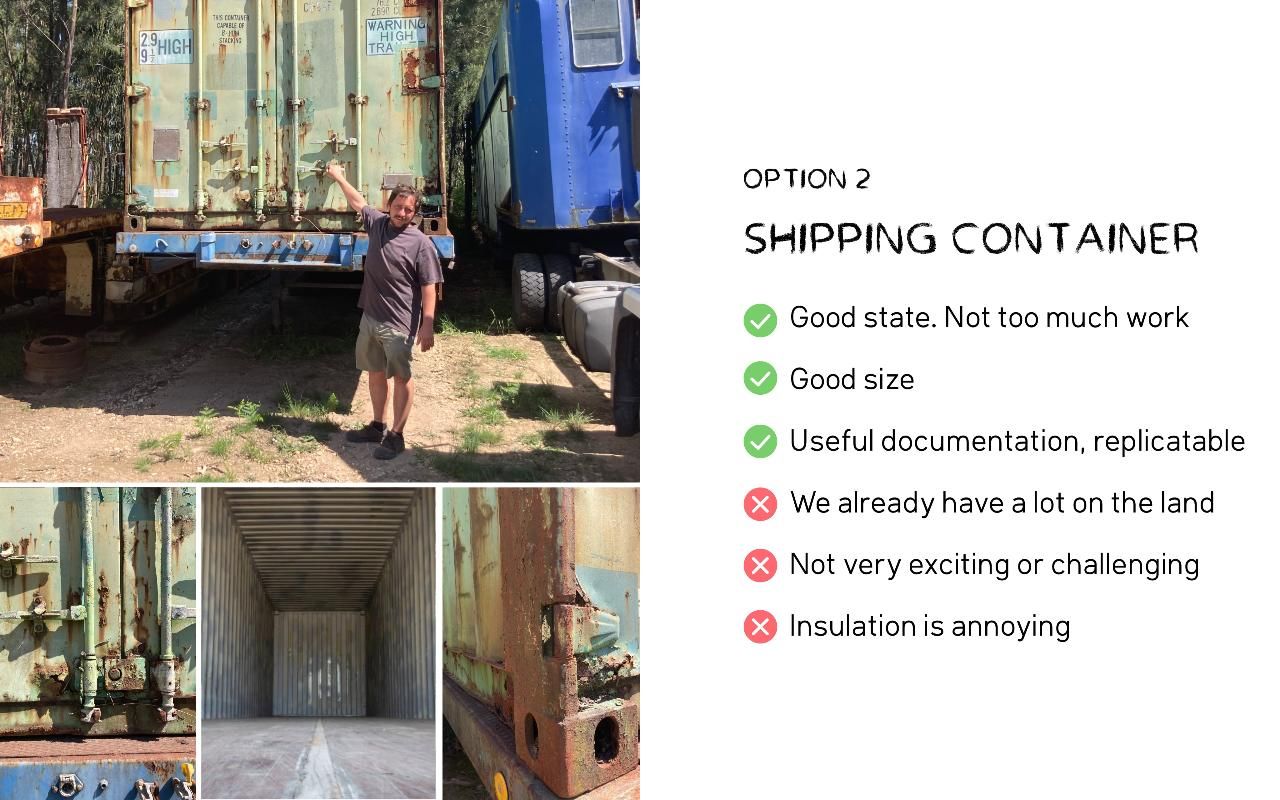 Loading...
 Loading...
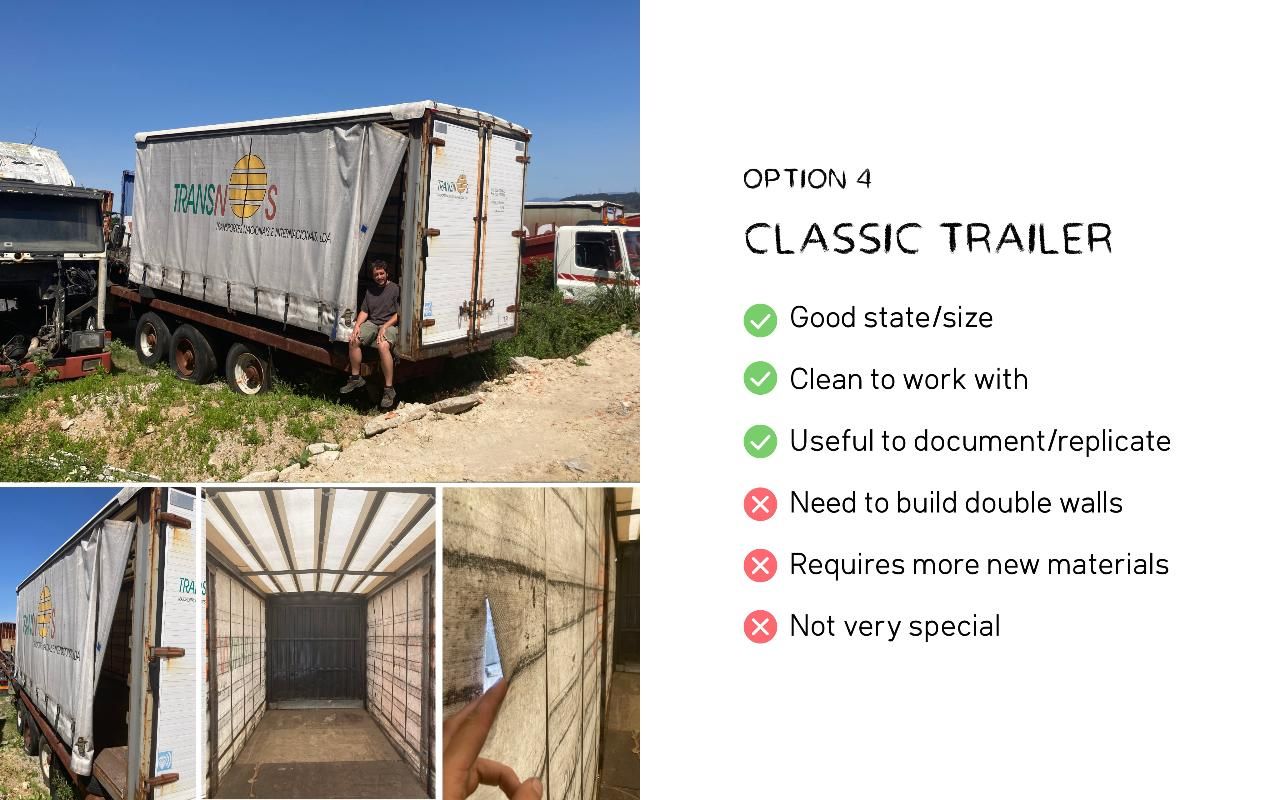 Loading...
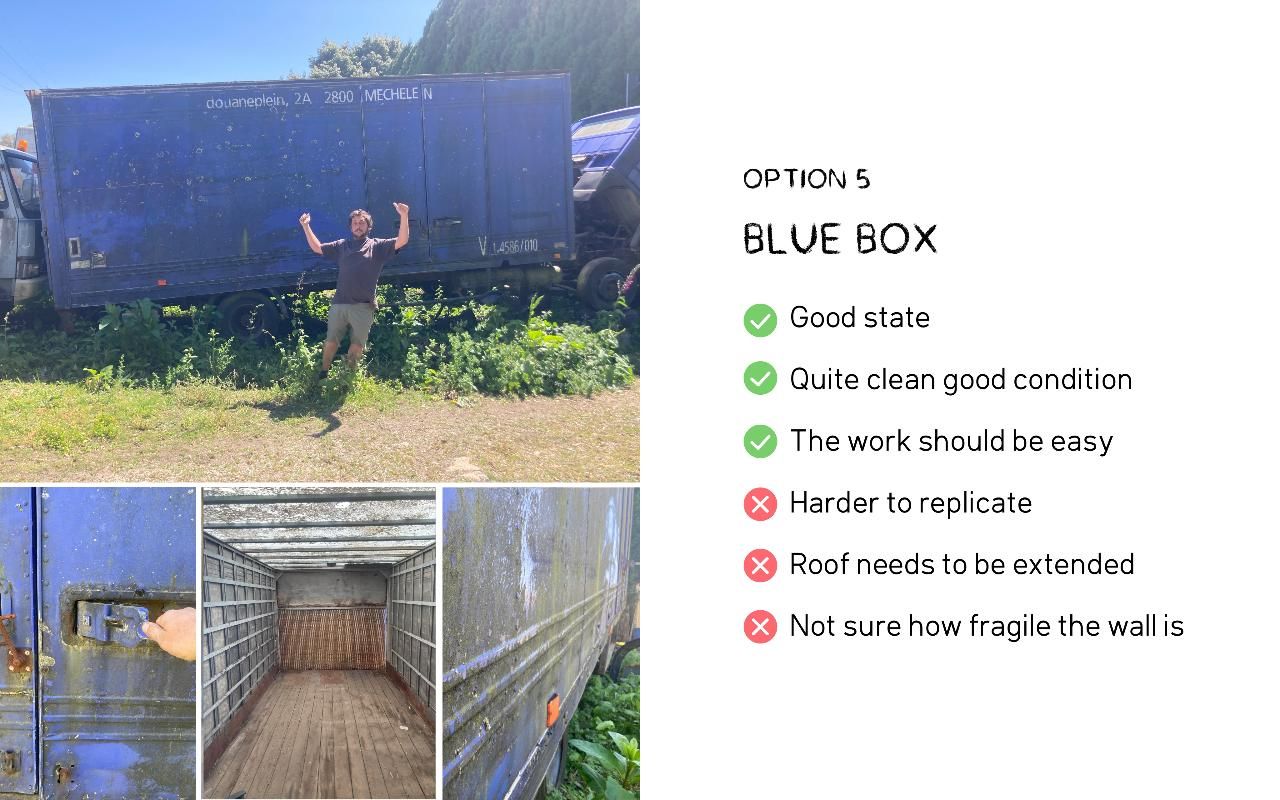
4
Pig trailer it is 🐷
Created 2yCreated over 2 years ago
So winner of the vote was the beautiful high quality blue pig trailer. A lot of work to be done on this one but it should be fun :)
Next would be to give it a good inspection and start making a plan for it
Loading...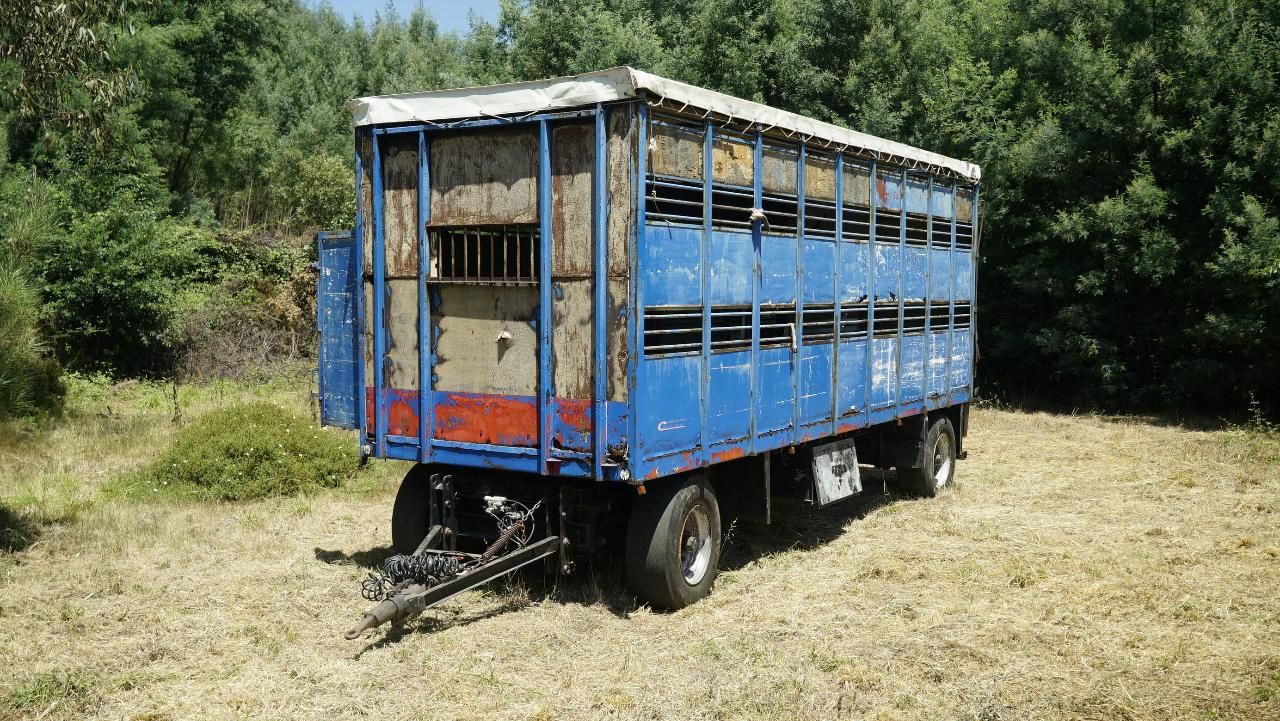 Loading...Loading...
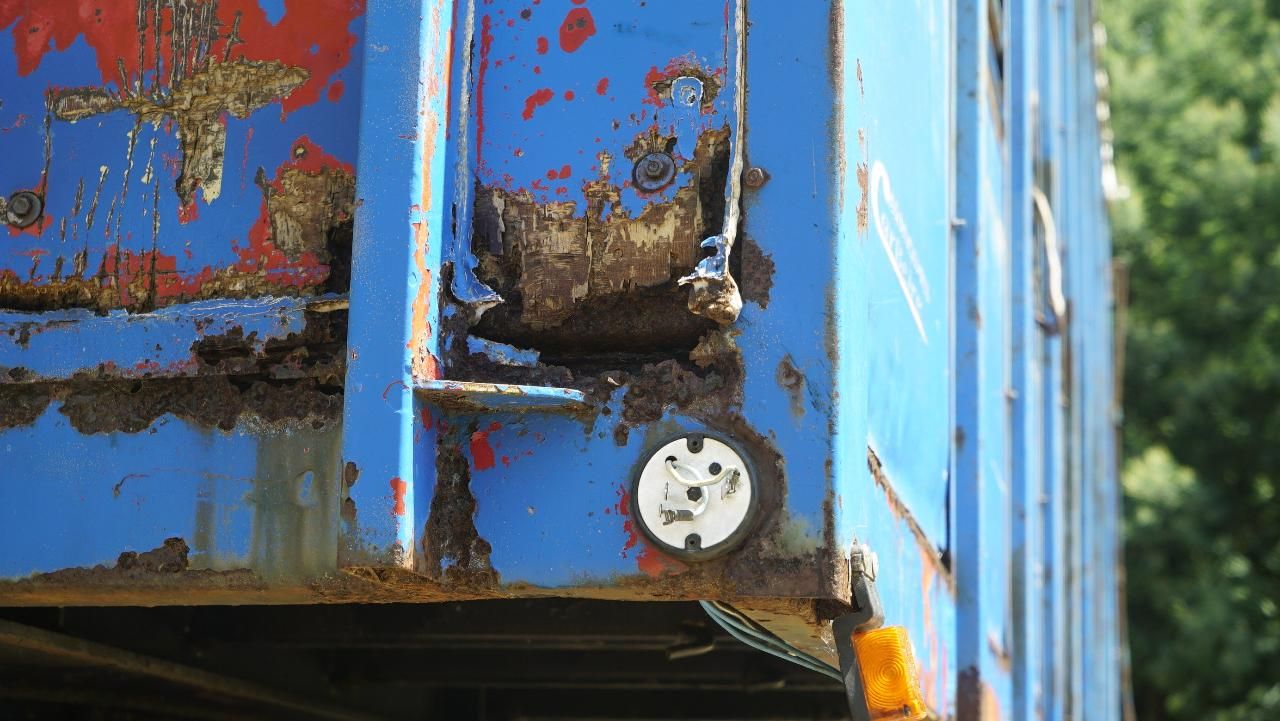 Loading...
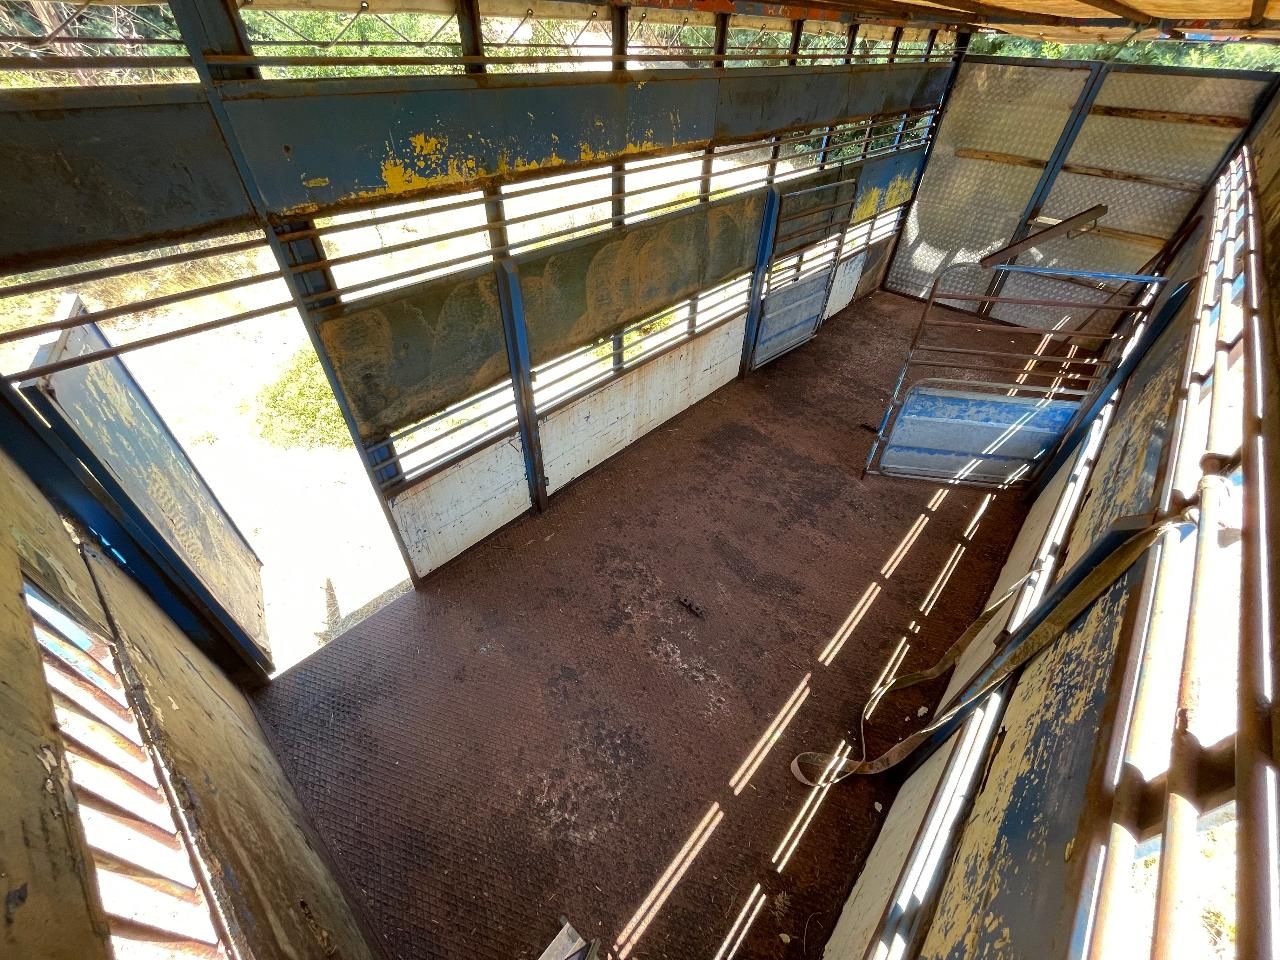 Loading...
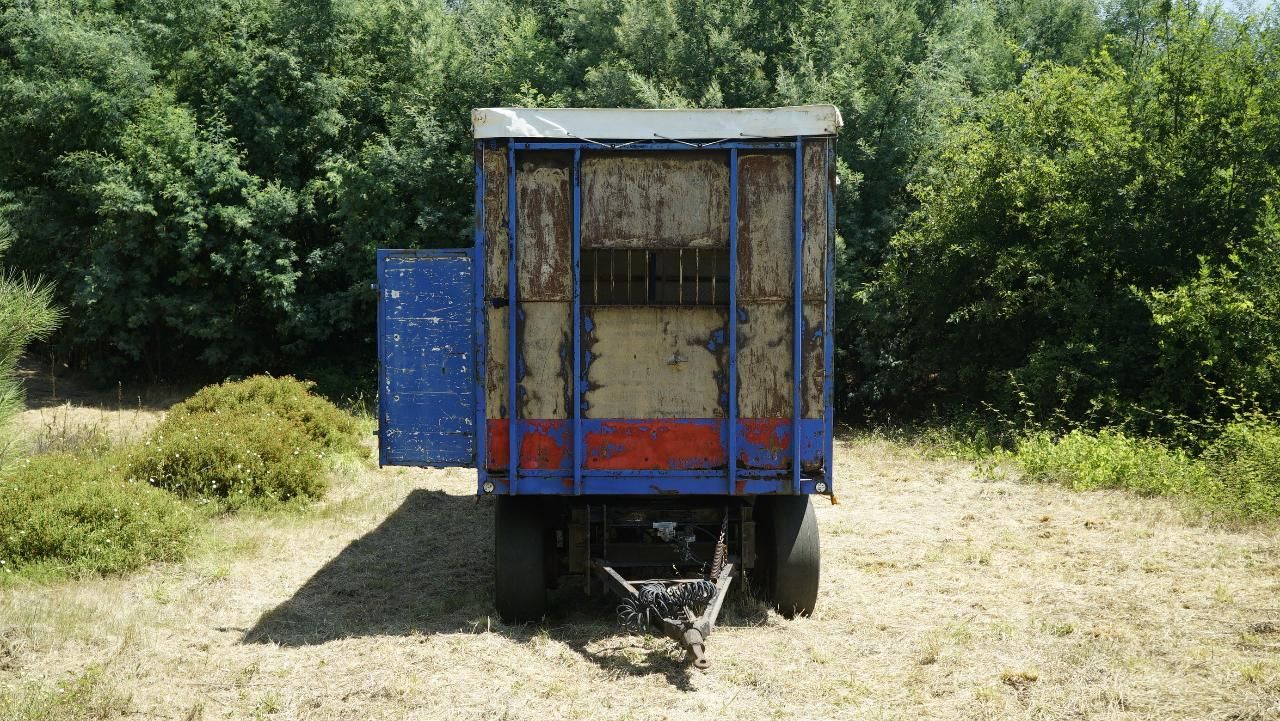 Loading...
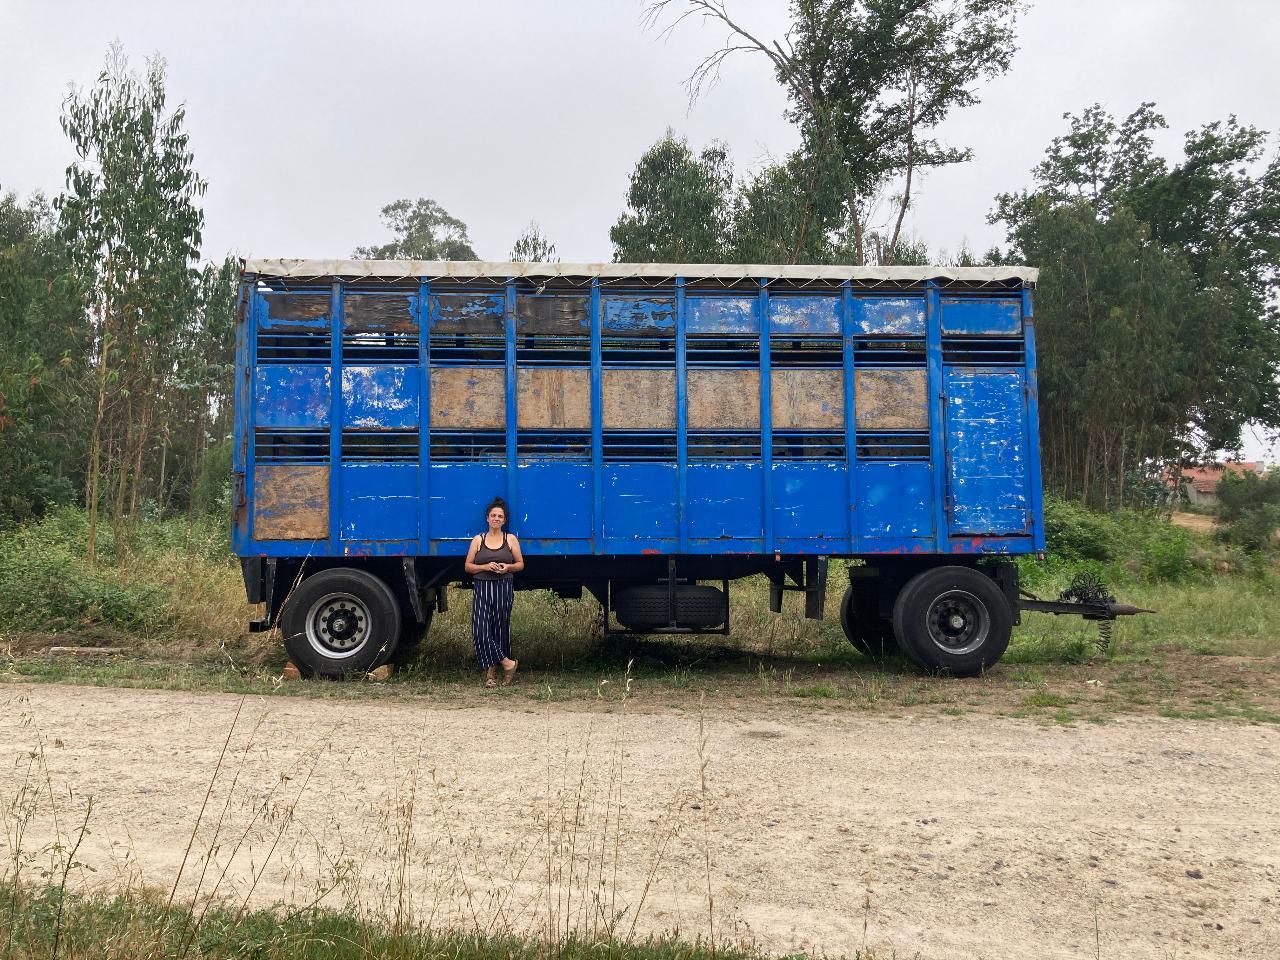
5
First impresions and ideas
The pig trailer is here and the location where it will stay for the first part of it's new life.
Before building can start there is quiet some work to be done: The panels on the sides are beyond restoration and need to go off. Than the rest off the structure can be cleaned of rust, welded if necessary and painted to make it will survive many more years. And off coarse a design has to be made.
These are the main preferences for the design:
- The trailer has to stay moveable
- It need's a bedroom, living room and a very basic kitchen (At least water and a sink). The toilet, shower and big kitchen are already on the land so not necessary for this house.
- There has to be a lot of storage, also for personal precious things you don't use on a daily base.
- It needs good ventilation, insulation and protection against the sun.
- The materials used are mostly recycled
See here the first ideation sketch for the interior. First thing now is to decide how big the bedroom should be and where the kitchen comes. And we want to find good materials to recycle:
- What is good recycled Material for isolation? We found recycled textile (Soprema Pavatex, not very local but a good product it seems)
- What would be a good recycled material for the roof and walls? Especially for the roof it's a big challenge to find the good stuff
Loading...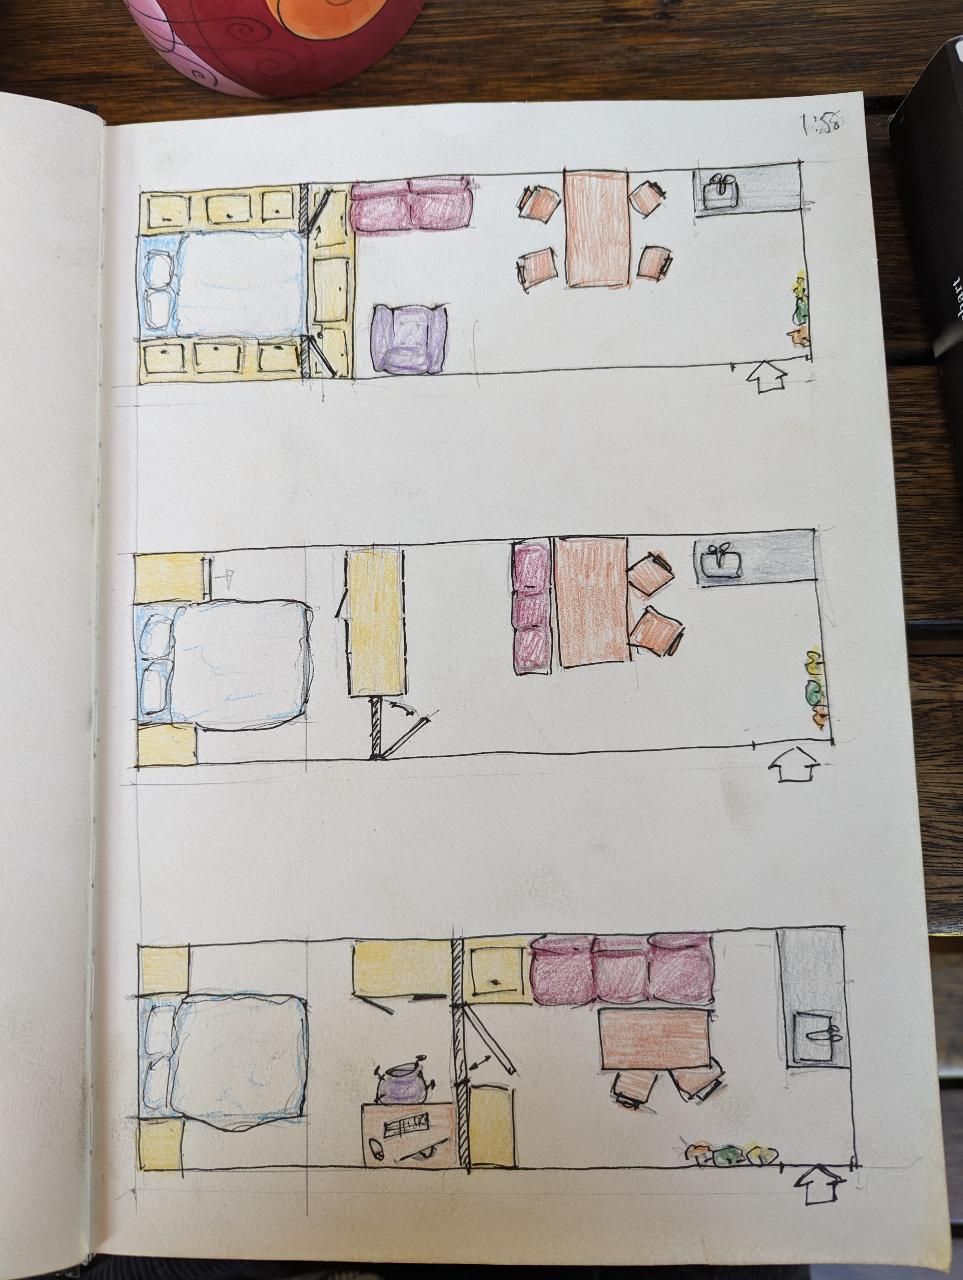
6
Stripping and cleaning it up
Created 2yCreated over 2 years ago
Started to take of all the bad parts from the trailer. Metal that was to rusty, some floor boards and the wooden panels on the side. Once that was all out we welded some rusty open holes so they are closed again and repainted it back into its blue color. Now we know that final dimensions of the trailer and can make a plan on how to build a house in there
Loading...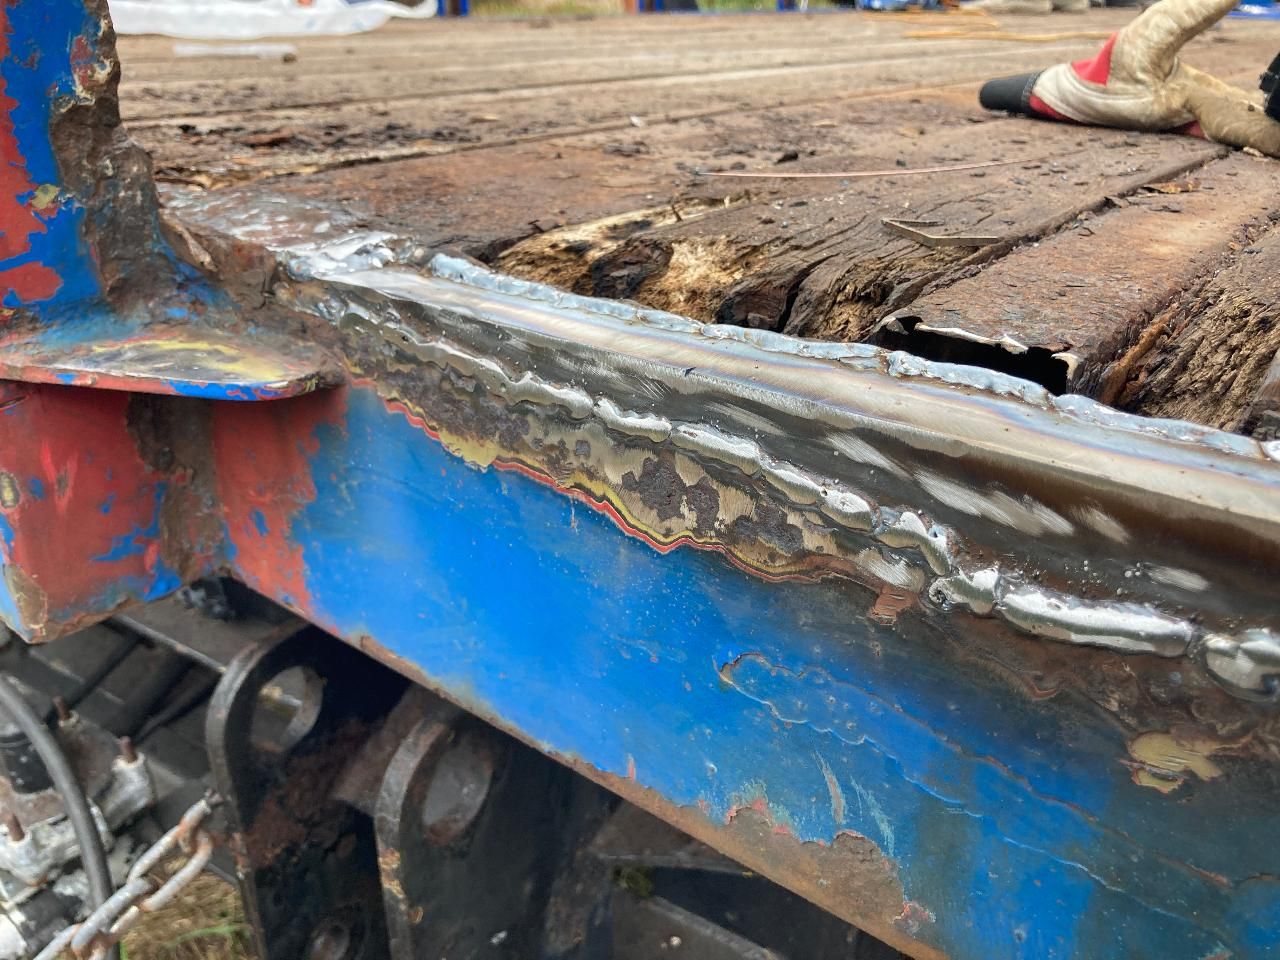 Loading...Loading...
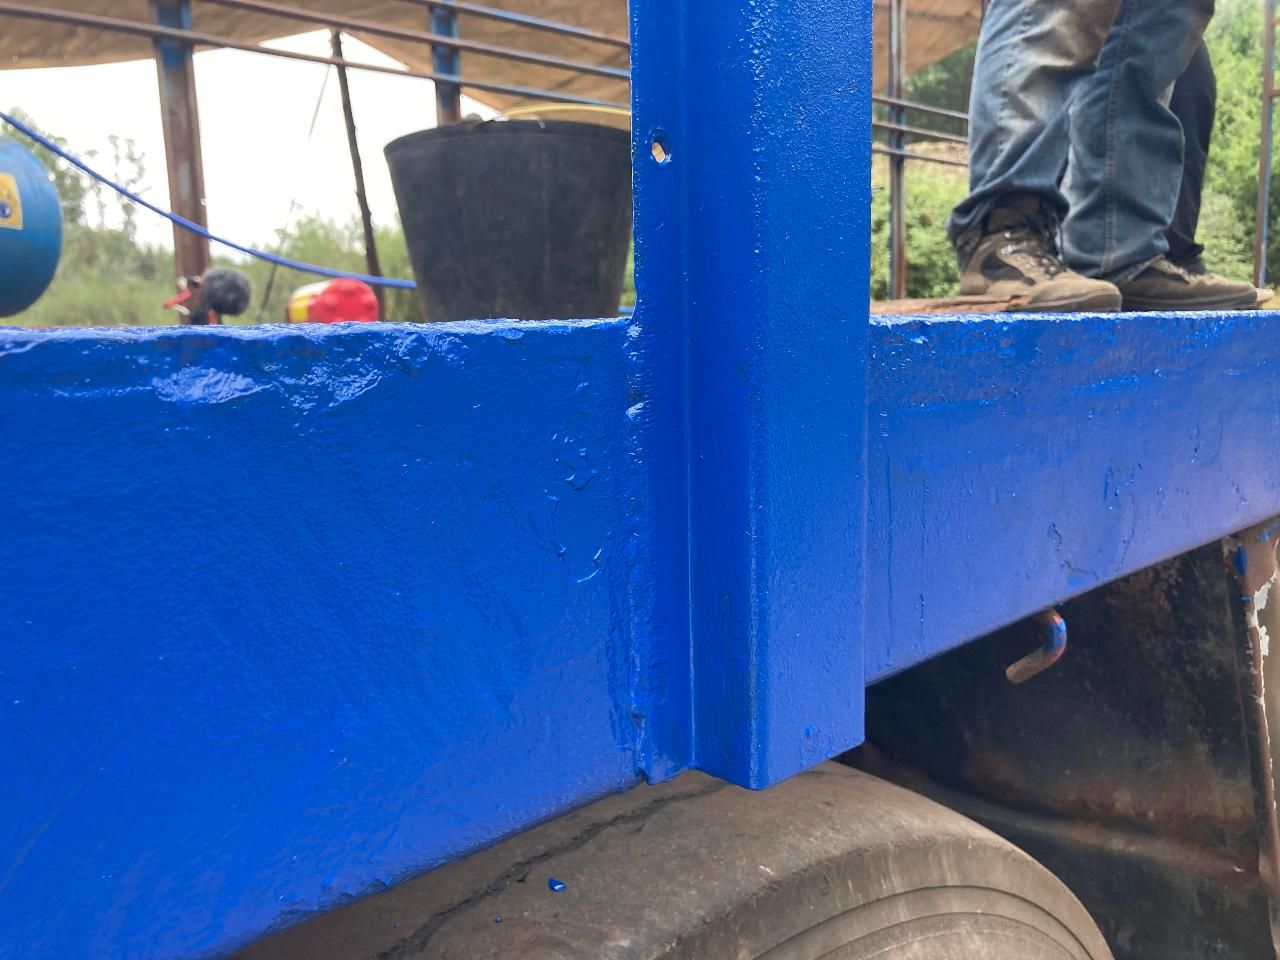 Loading...
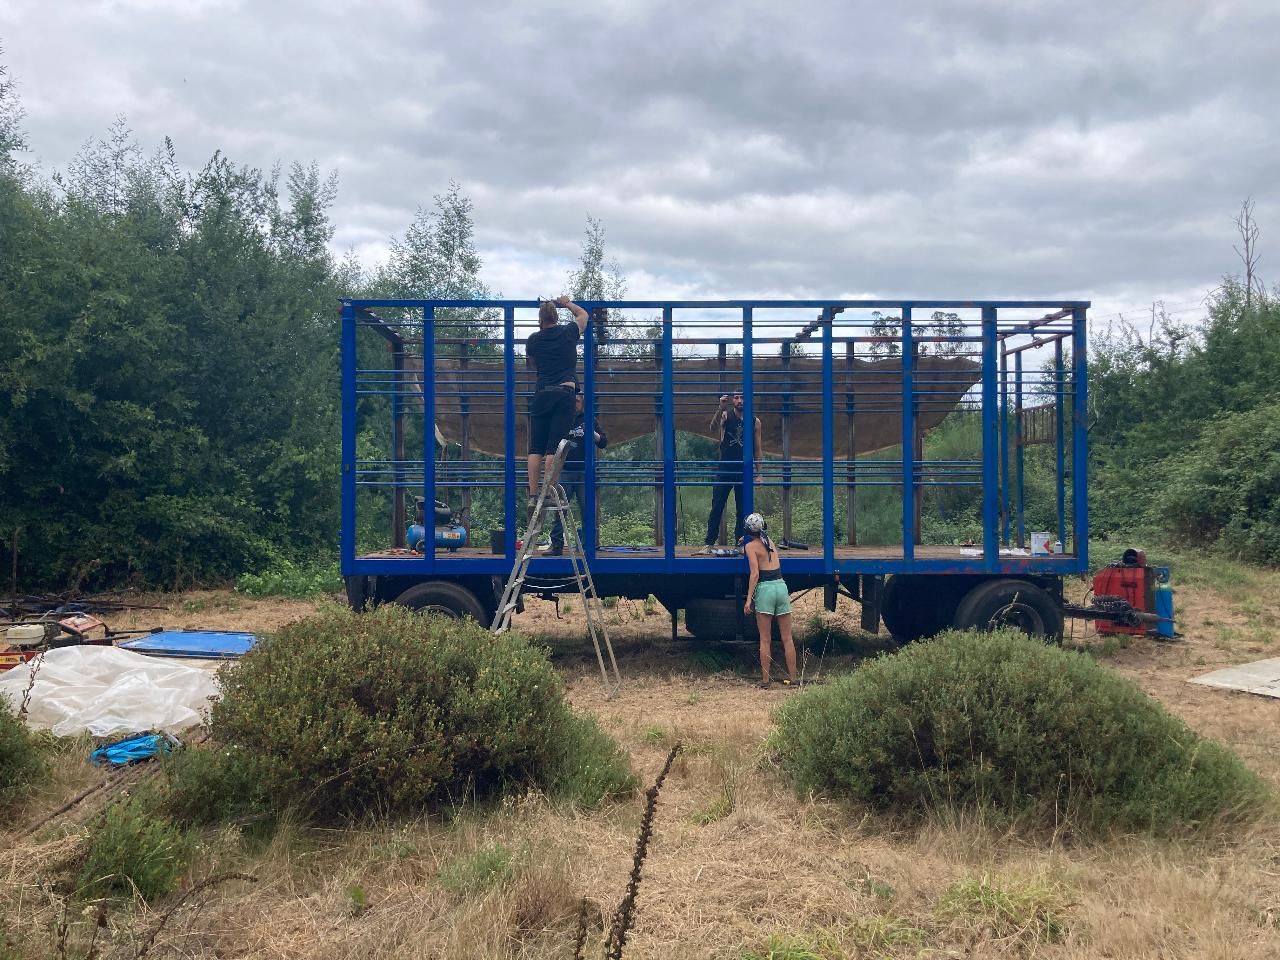 Loading...
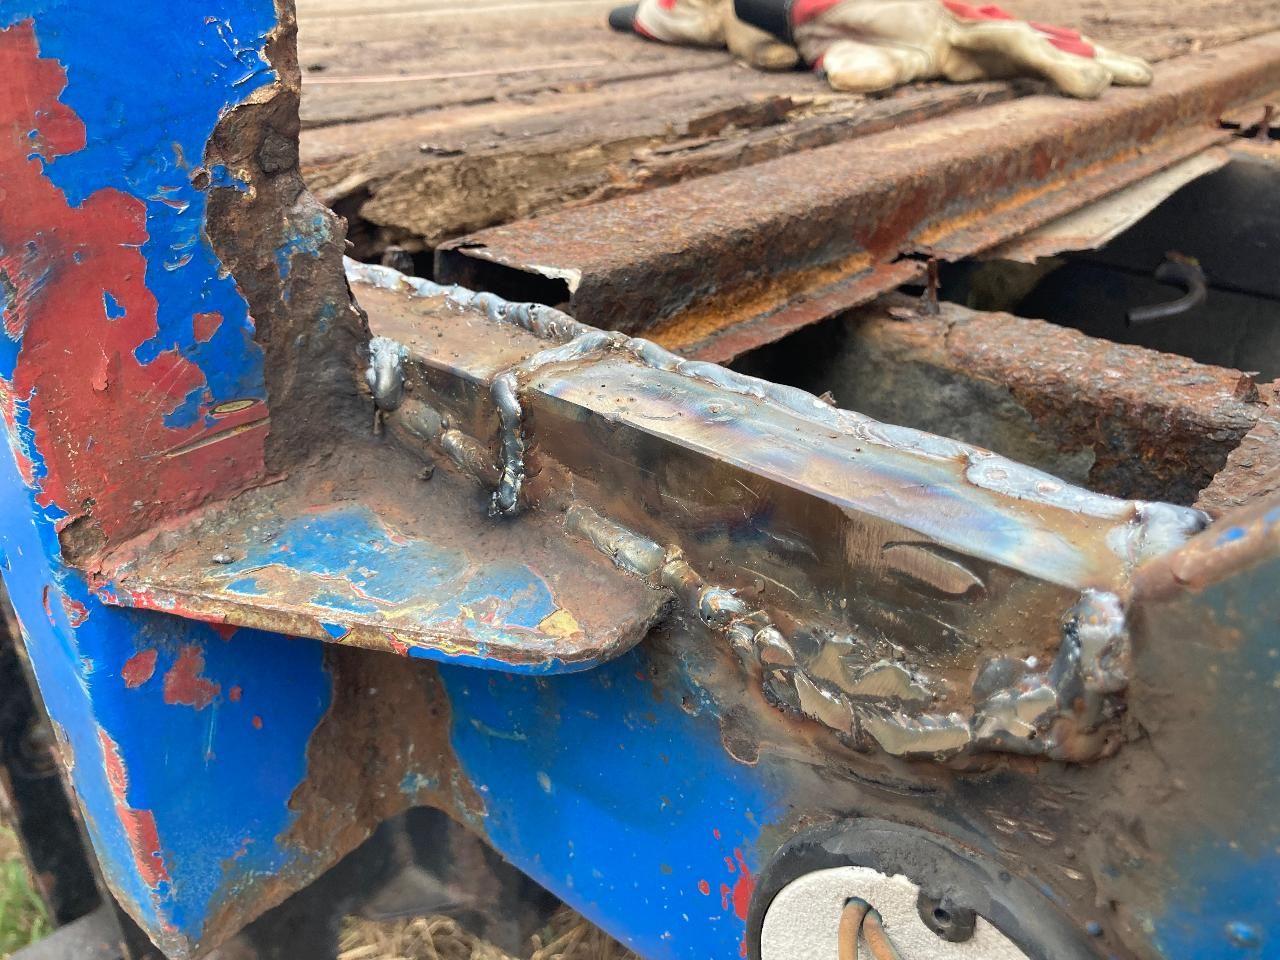
7
Finding materials
Because the trailer is recycled we also want to use recycled materials for the construction. Not that easy, but we found one guy with a scrapyard. Mostly machines, but also some other stuff: HPL Panels, aluminum rolling shutters, PIR insulation, sheet metal, multiplex, very crusty OSB and nice steel stairs. And than we found a window factory close by that sells old windows. Enough to design with. We also took expanded cork in consideration but decided that we want to try something new.
We decided to use the HPL for the outside, because of the colors and the extreme durability. The floor will be the PIR with multiplex and an old gym floor in a solid sandwich. All recycled, and no extra wood needed. For the walls we take recycled textile insulation in a wood construction. Easy to build, but the downside is that it needs some foils to be durable. The roof will be wood with textile insulation, and metal sheet on top so it can be almost horizontal.
Loading...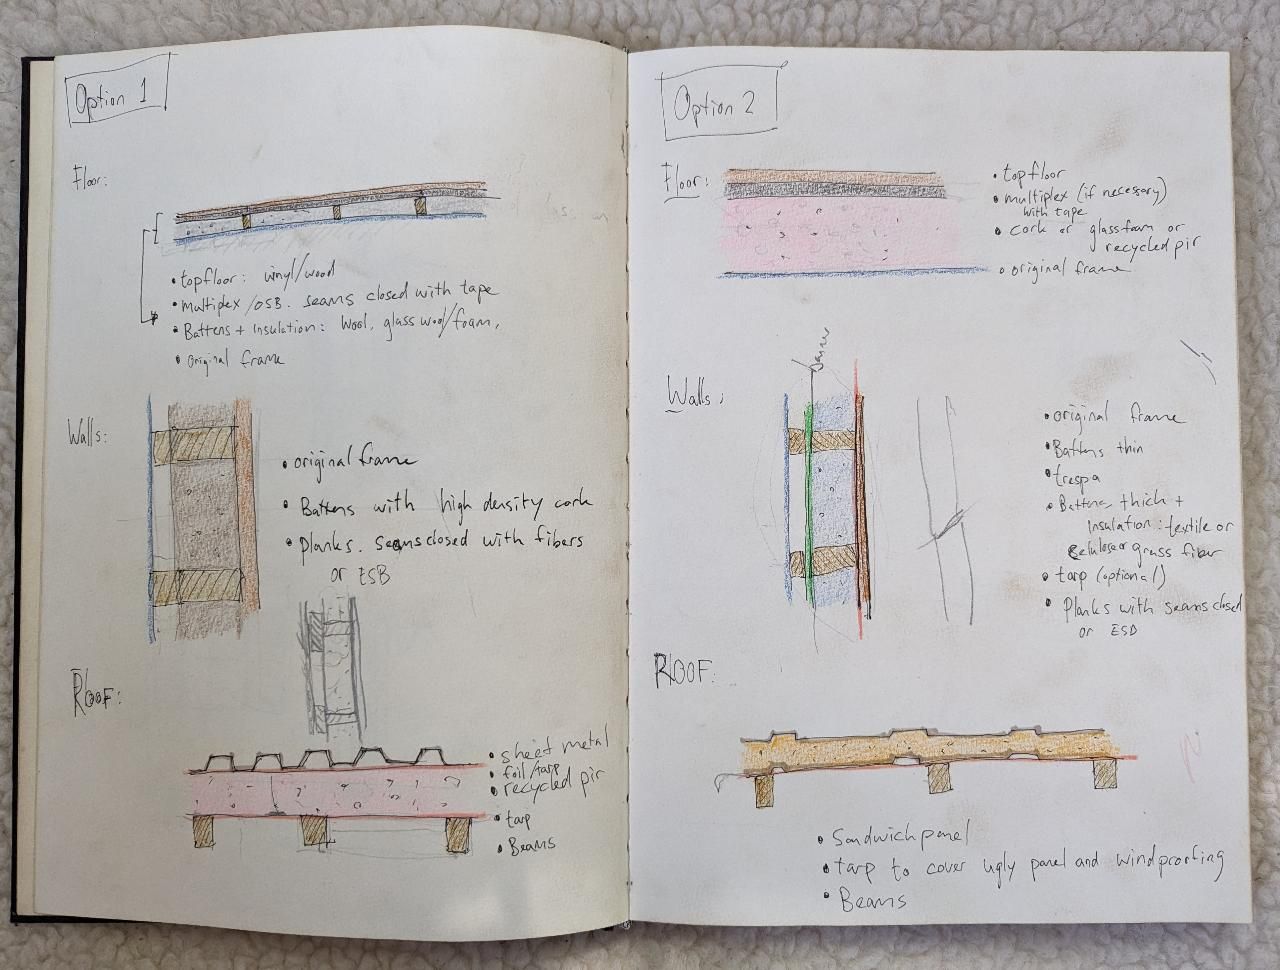 Loading...Loading...
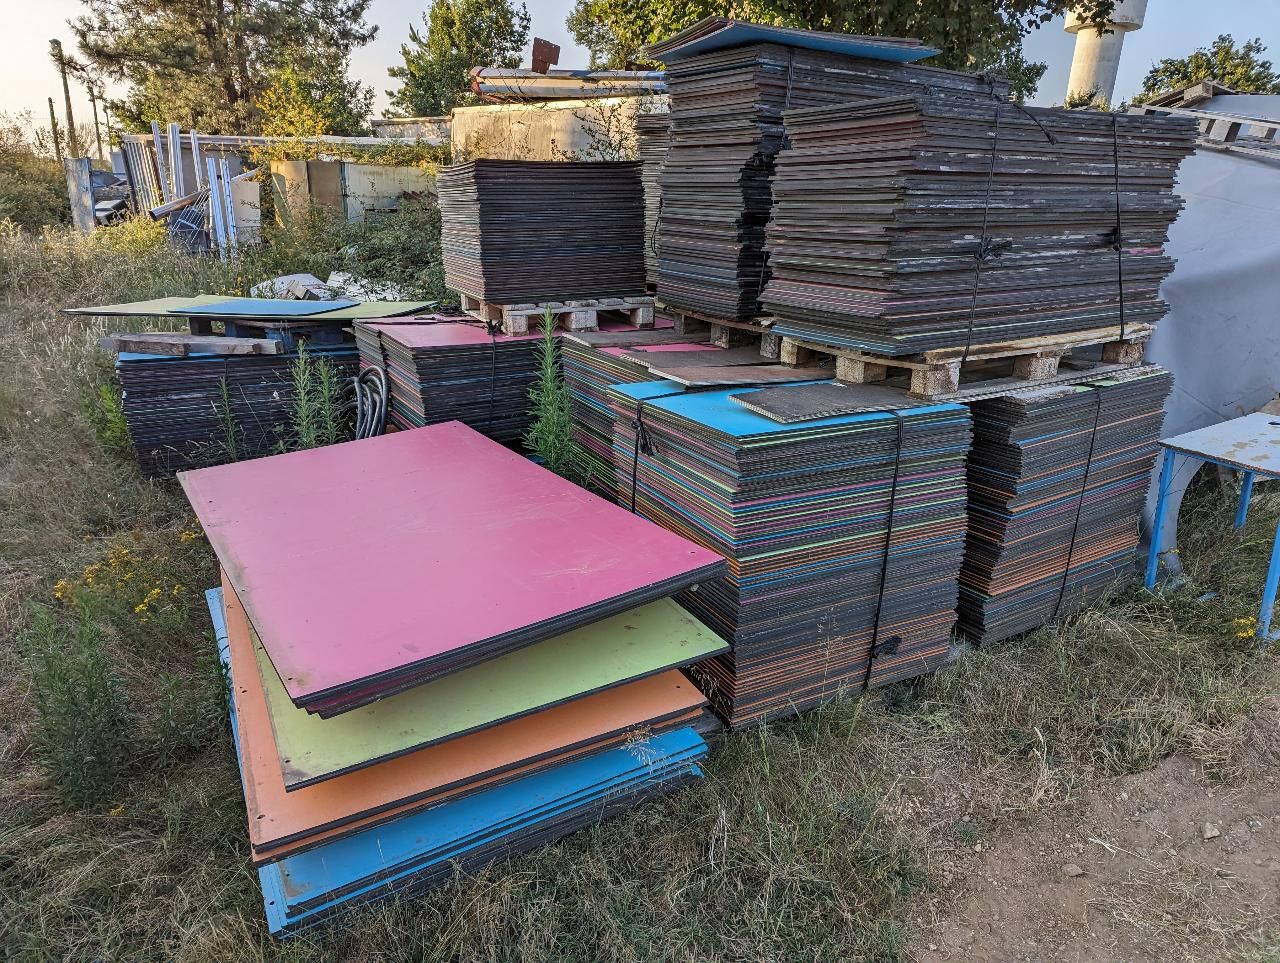 Loading...
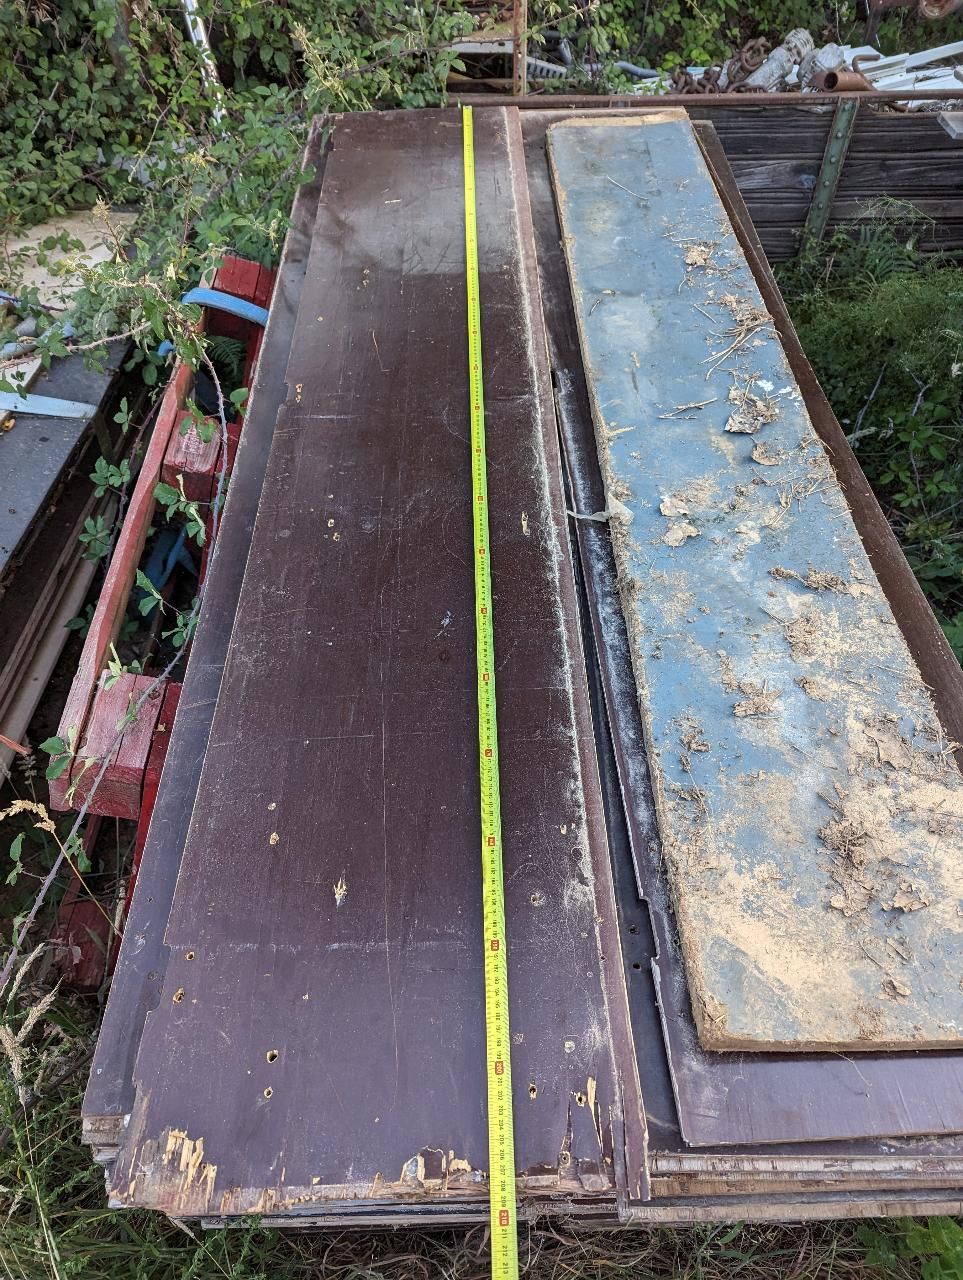 Loading...
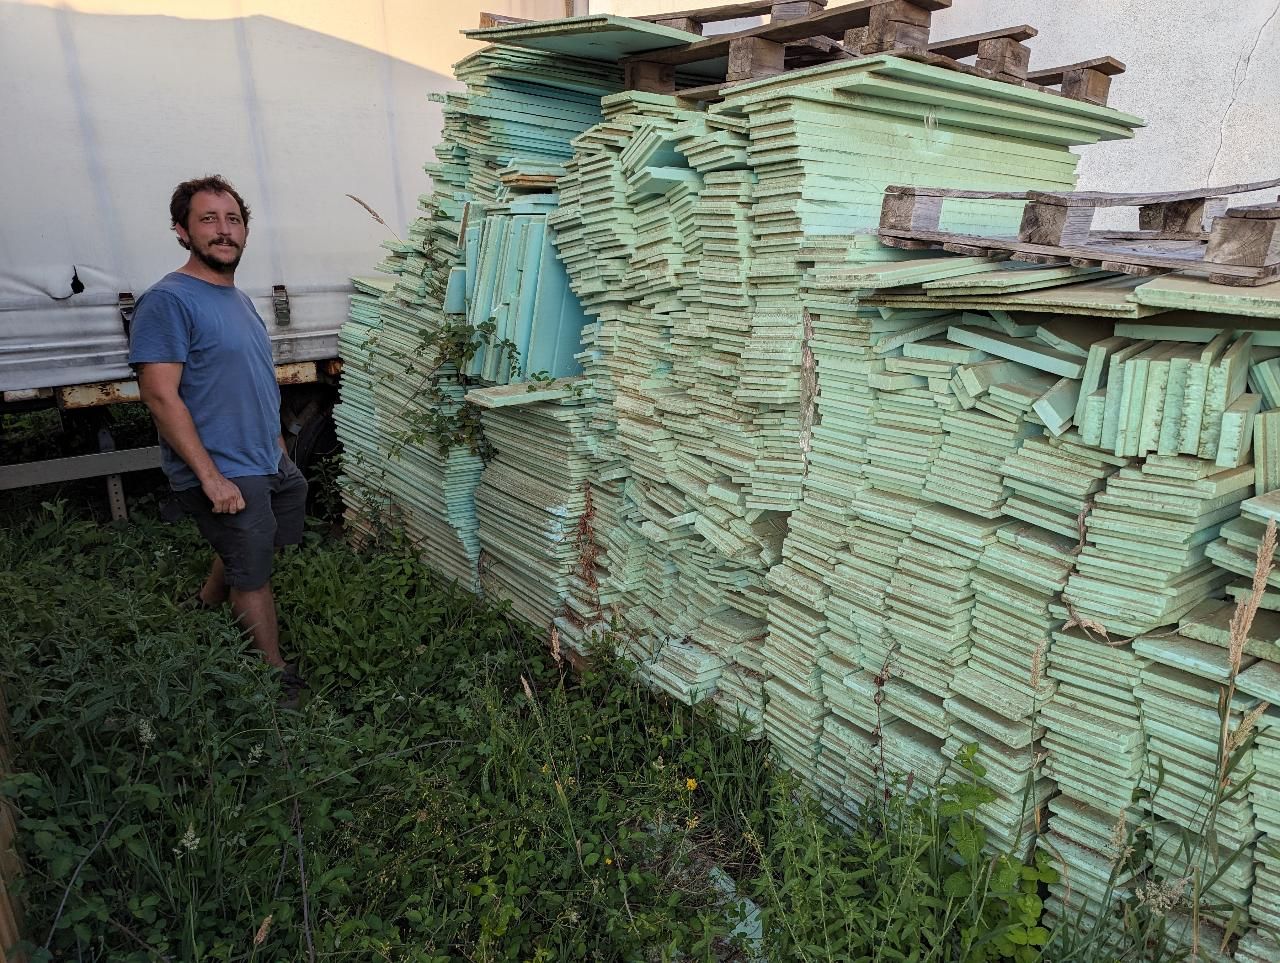 Loading...
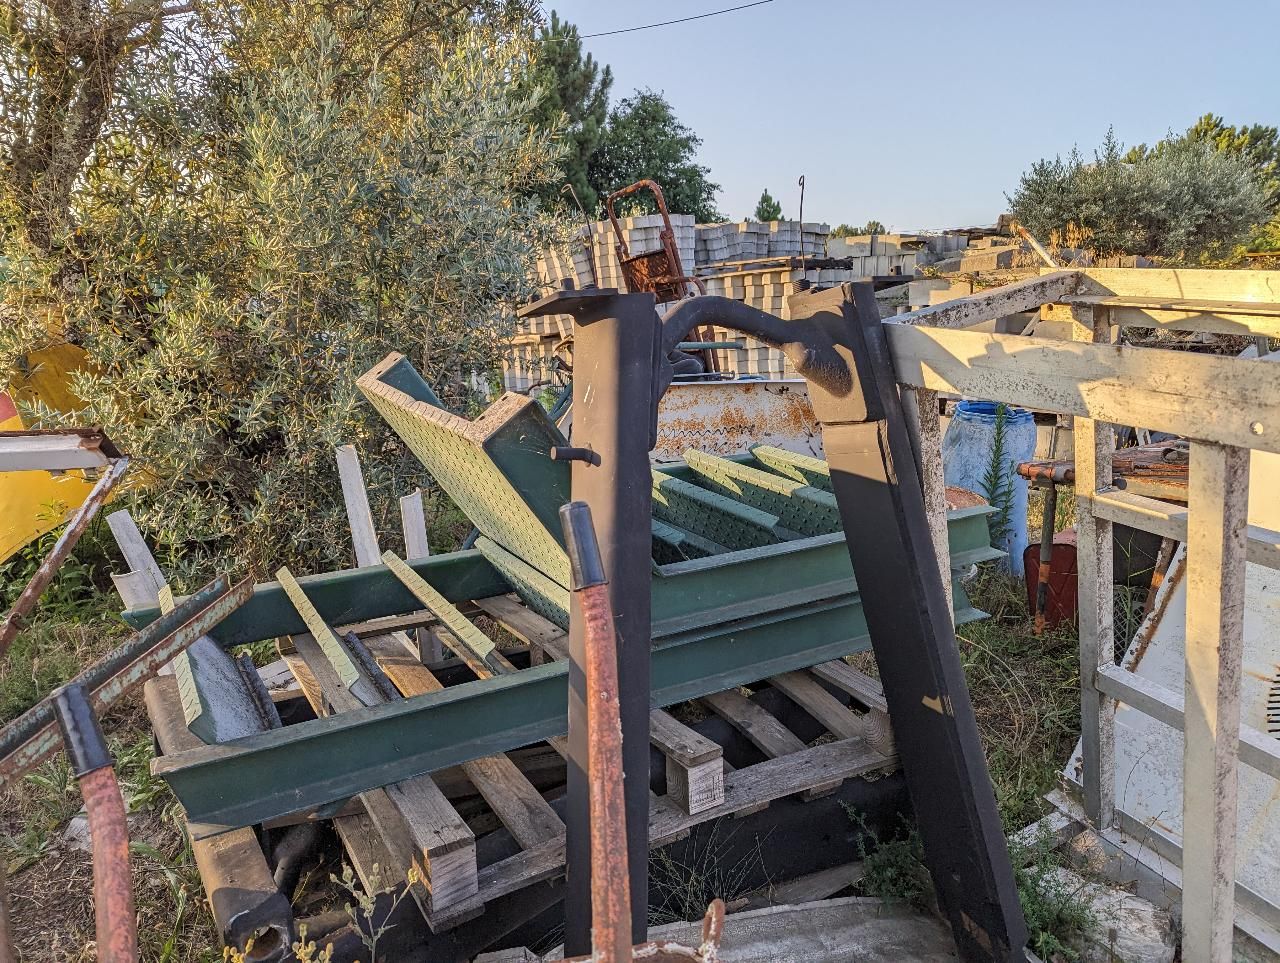
8
Vote for the outside color
Created 2yCreated over 2 years ago
As you saw above we found a stack of HPL/Trespa for the outside walls. But the colors are a bit intense. So we made a few color options to choose from. And we leave it up to our Patreons to vote and choose! So join on Patreon and decide the color of the pig trailer! We choose whatever comes out.
vote here: https://www.patreon.com/one_army
Loading...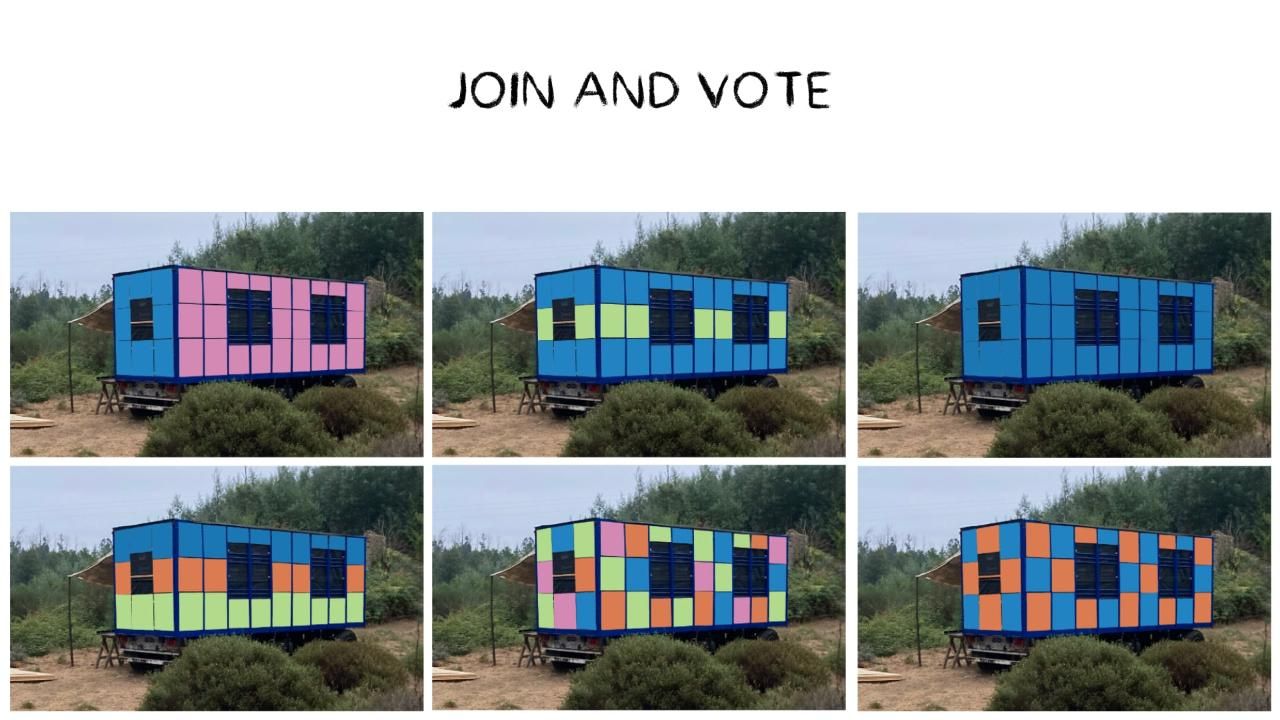 Loading...Loading...
 Loading...
9
Construction and esthetics of the walls
Created 2yCreated over 2 years ago
A big question we had for the design was: Where to put the outside wall cladding? And what do we desire/are the consequences?
The best option is to put insulation and timber on the inside of the steel. Otherwise it's very difficult to insulate with the steel working as a thermal bridge. An esthetic wish we decided on, is that at least some of the original construction is visible. That left us two options:
Everything on the inside:
PRO
-Easy to make
-Efficient use of material
-Original structure visible
CON
-Maintenance almost impossible in the future
-More steel exposed to water
Exterior wall in between steel, rest on the inside:
PRO
-Easy maintenance in the future
-Steel construction well protected
-Looks more tidy
CON
-Time consuming to make
-More difficult to put windows in
-Less off the original structure visible
-More cut-off pieces/waste
In the pictures there is a segment of the walls with window, and a section view showing how the timber frame is placed in the steel frame
Loading... Loading...Loading...
 Loading...
10
Floor
Created 2yCreated over 2 years ago
The trailerfloor is made of metal profiles with wooden boards in between and two heavy beams belonging to the base of the trailer. On the sides of the trailer it was to rotten to use, so this we took out as. The floor was a bit crooked, the boards at some places a bit higher (+/- 1cm). But on average pretty straight. We had two options for the floor:
Wood construction with insulation in between, underfloor and topfloor:
+Very sturdy and stable
+No suprises: super straight
+Less dependend on trailer floor
-More wood and screws needed
-More work to make
Insulation on trailer floor, underfloor and topfloor:
+Very easy to make
+Less wood needed
+Better insulation: less chinks
-Less stable, maybe moving a bit when walking on it
-Depending on durability trailer floor
-Only possible with pressure-resistant insulation
We could get second hand PIR panels, so decided upon the last option. To be able to maintain it or replace it, the floor is made in between the walls.
Loading... Loading...Loading...
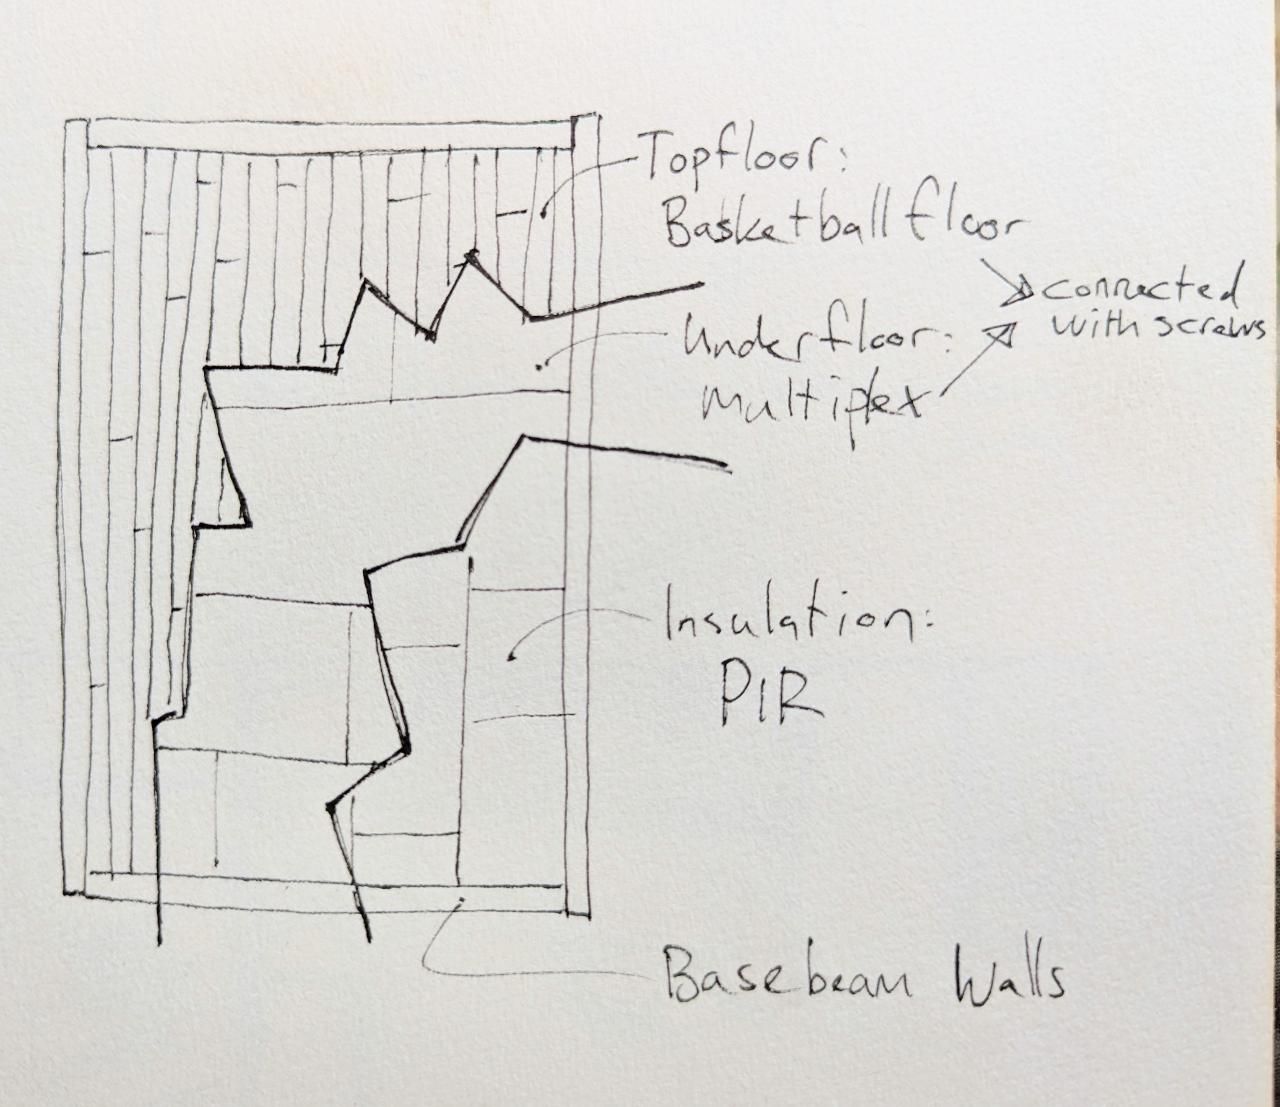
11
Layers of the walls
Created 2yCreated about 2 years ago
We want to use HPL/Trespa in combination with an insulation of recycled textile. To make it easy to maintain, and for the looks we put the trespa outside, in between the metal beams (dark blue).
The trespa is a vapour barier, so to prevent condensation of warm, humid air inside the wall we decided to use a plastic foil one the inside. To protect the insulation on the outside from getting wet (the trespa has some holes and water has sneaky ways of traveling) we used a vapour open, water repellent foil on the outside.
The final sandwich looks like this:
1: trespa/hpl in between frame of the trailer
2: horizontal battens, red cedar
3: foil, water repellent vapour open
4: OSB panel, 9mm, just for a little extra stability of the walls and insulation
5: wooden beams, 50x75mm pine + recycled textile insulation 80mm
6: foil, vapour barrier
7: wooden planks, old basketball floor, inside of the wall
Loading...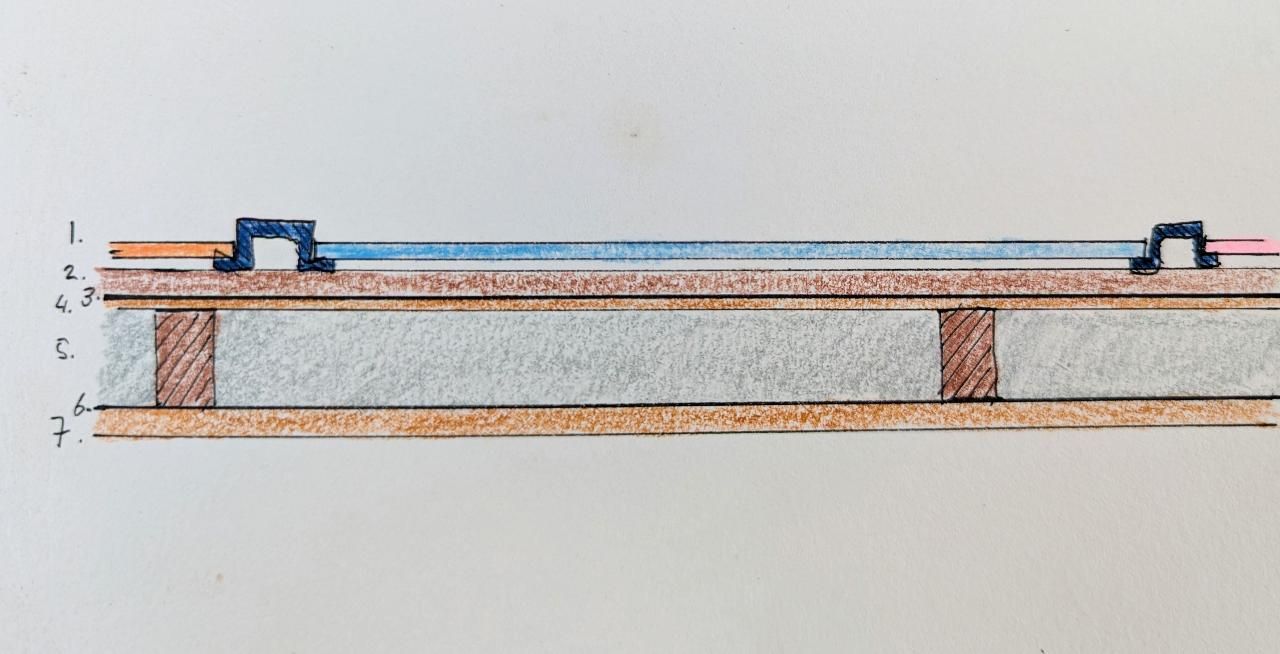
12
Making of the roof (step 1 to step 3)
We have now the wall and the floor, it is now time to make our pig trailer water proof.
Here is the video where you can see the process happening:
https://www.youtube.com/watch?v=NR9HMQFj1vo
First we install rafters and our ceiling.
We are re-using old basketball court floor planks and installing those planks on top of our rafters.
When the roof is covered, we put a vapor barrier (big black plastic tarp) to protect the coming insolation.
So it goes:
1.Rafters
2.Basketball court floor planks
3.Vapor barrier
Loading...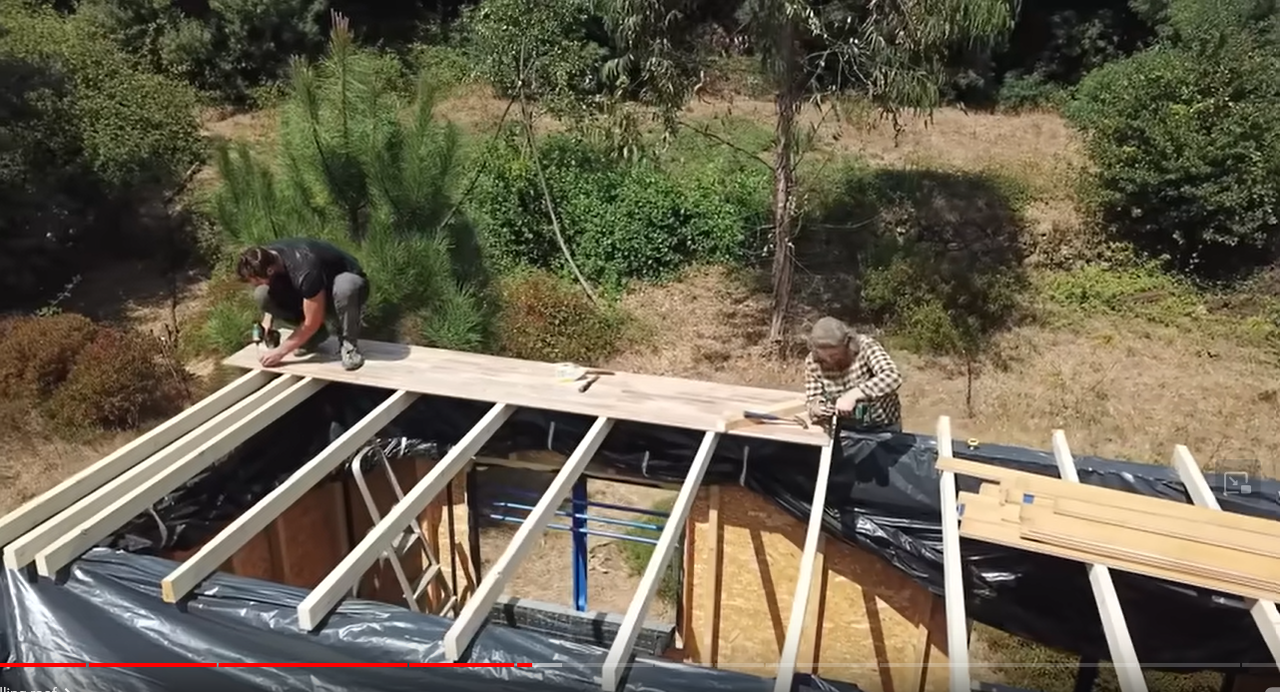 Loading...Loading...
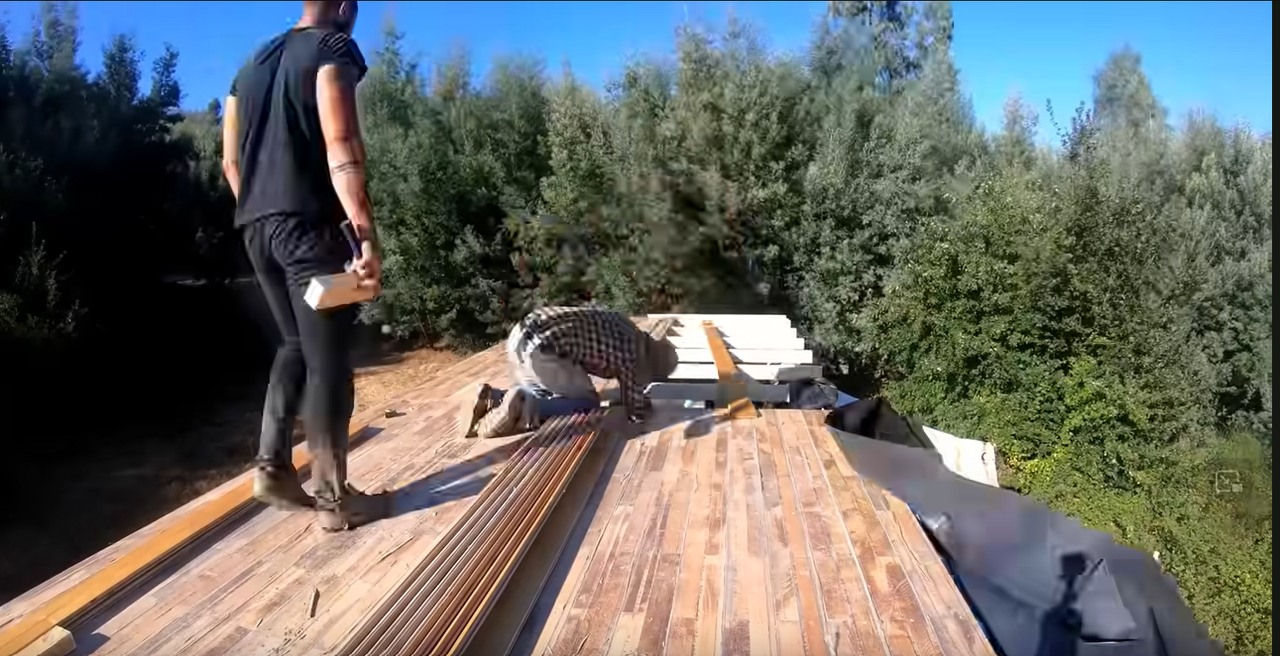 Loading...
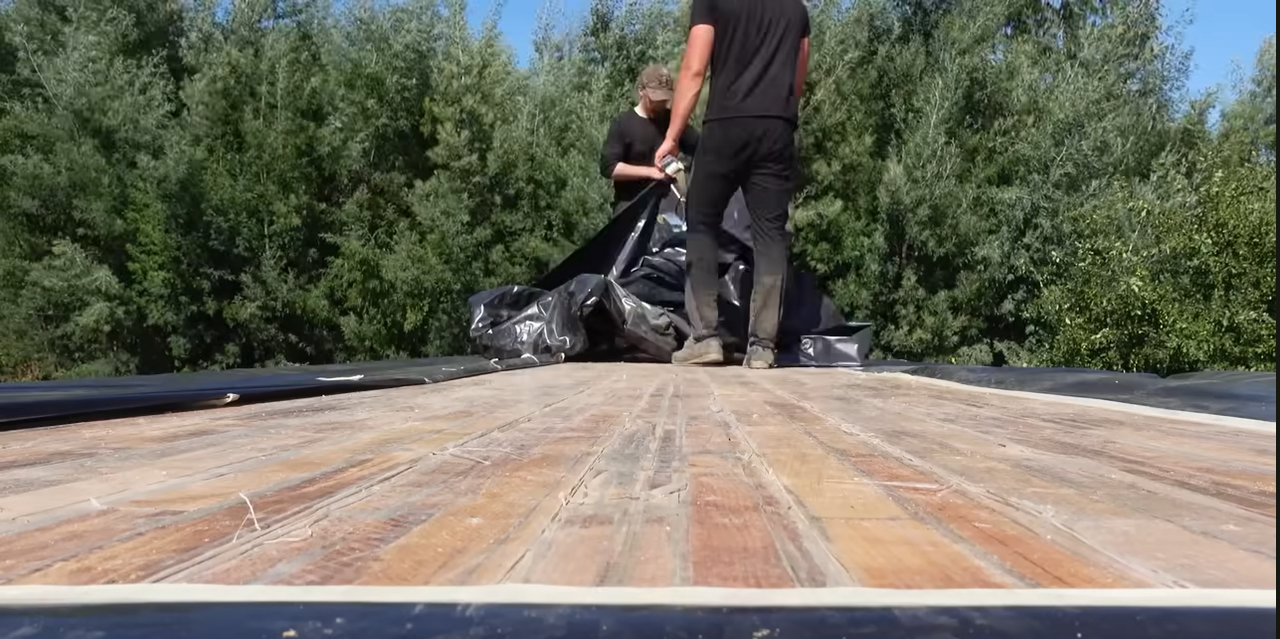 Loading...
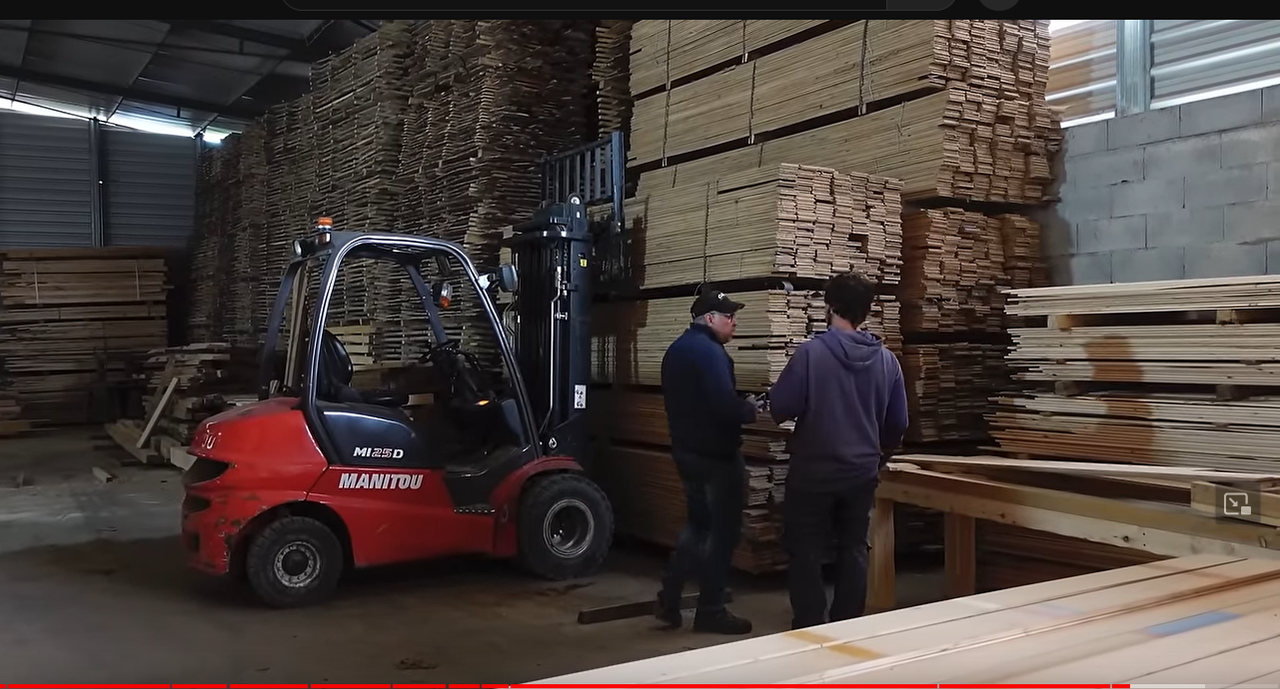
13
Making the roof (step 4 to step 6)
After putting the vapor barrier, we are creating a structure out of wood to welcome the insolation and to have a support for the anti-rain tarp and the corrugated roof.
On top of the basketball planks, we create a frame the size of our insolation's panels. We are using here a new form of insolation: recycled fabric shredded and put back together, forming rectangles. Recycled, so very nice, but not entirely recycled material (some new component are holding the shredded piece together) and absolutely needs to be placed out of the rain. Nice to work with, although the cutting of the insolation was sometimes very approximative due to the texture of the material, still managable.
After the placement of the insolation comes a layer of anti-rain tarp. Once stapled, watch to step only on the wood structure to keep the integrity of the tarp:)
So it goes:
4. Structure insolation tailored
5. Insolation Panels (we put 2 layers)
6. Cover with anti-rain
Loading...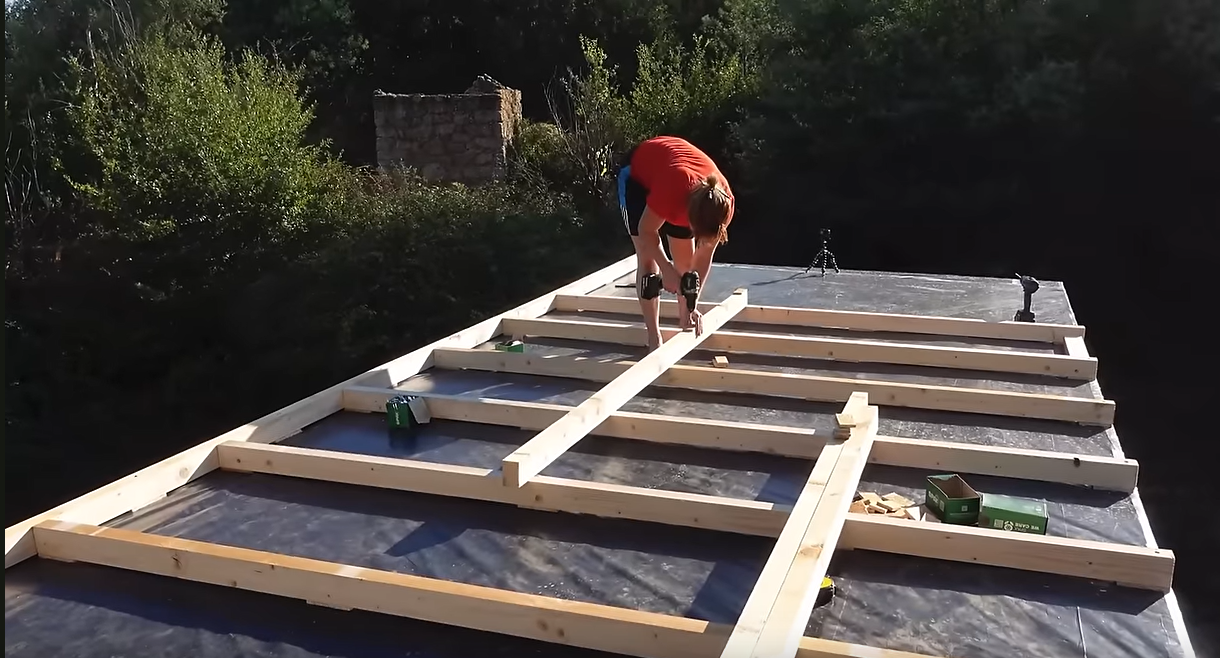 Loading...Loading...
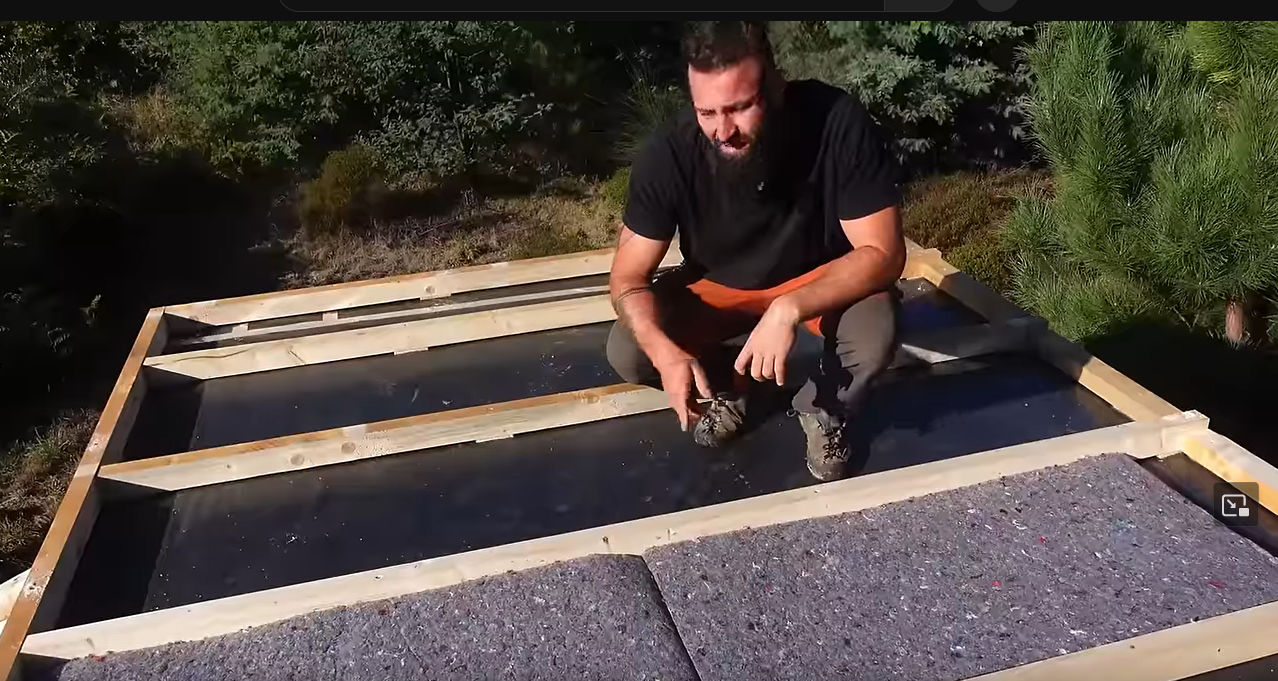 Loading...
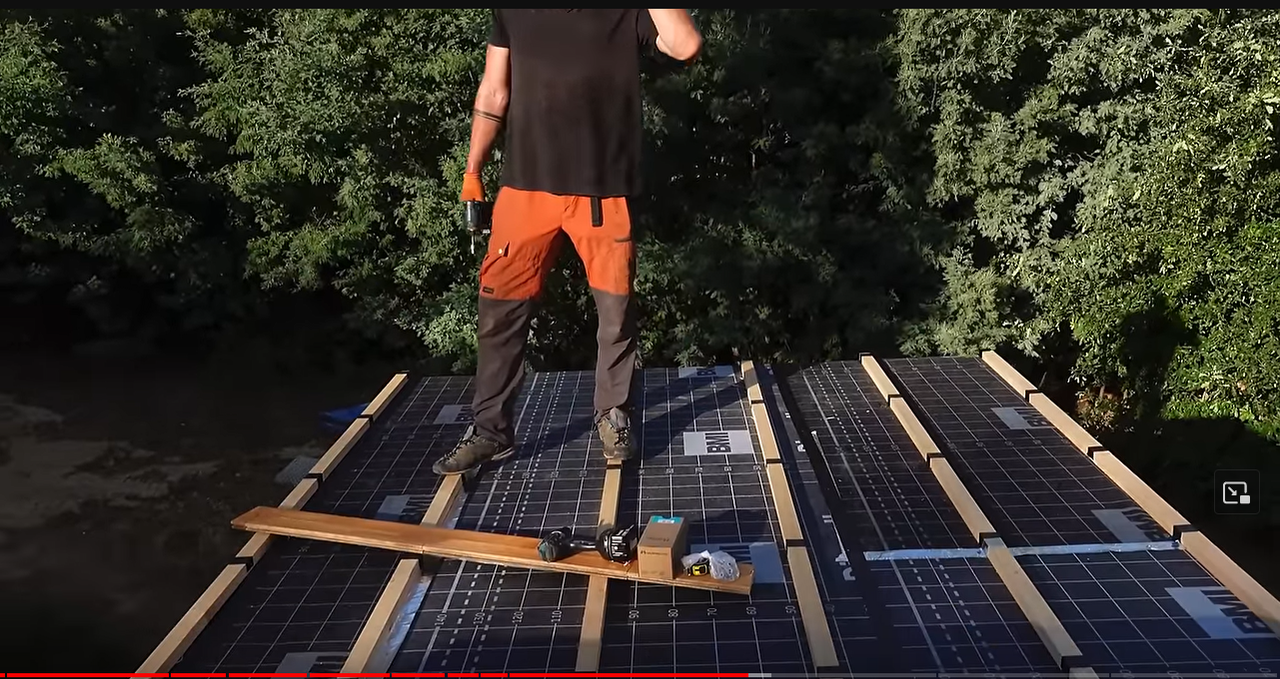 Loading...
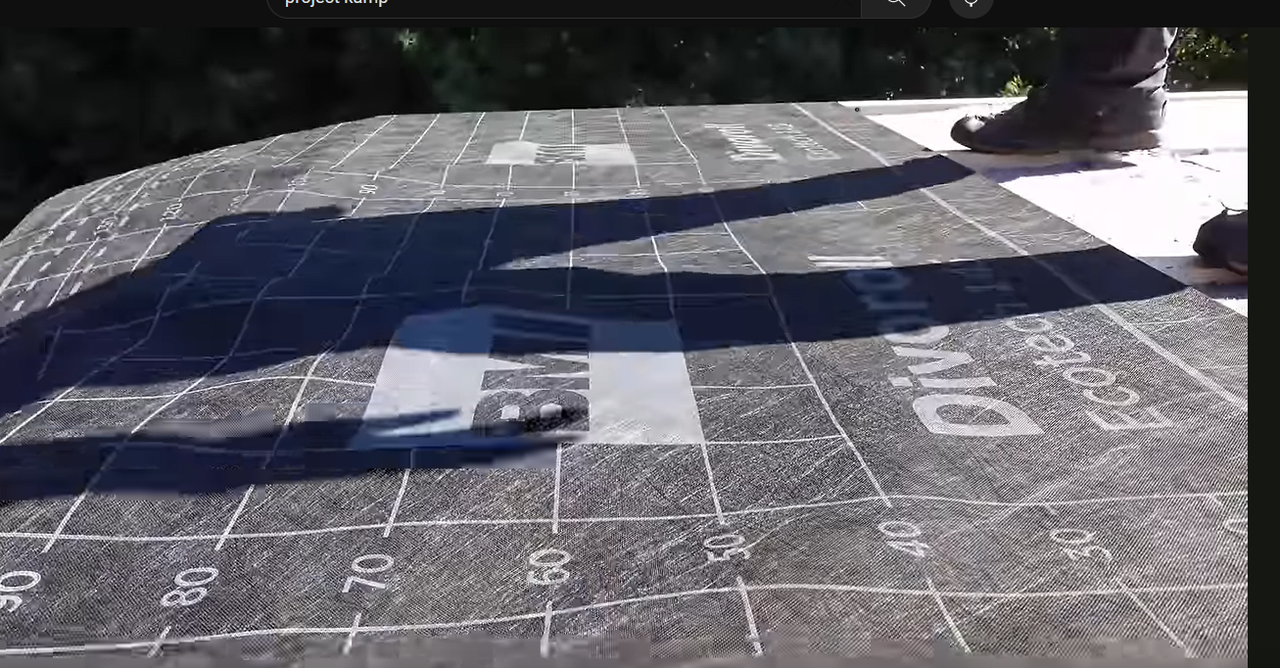
14
Making of the roof (step 7)
Created 1yCreated over 1 year ago
We are on the roof, trying not to walk on the insolation (a struggle). it is time for the next step:
7.The corrugated roof.
We went to get ours directly at the factory. They had some leftovers that people weren't buying... Not really re-using but close. They call it sandwich sheet because it is 2 corrugated metal sheet and an expansive foam in-between. They cut it to size on-site (10cm longer than the rafters on each side so 20cm more). Installing them while trying to step on the right place without damaging the anti-rain tarp was a fun challenge...
Loading... Loading...Loading...
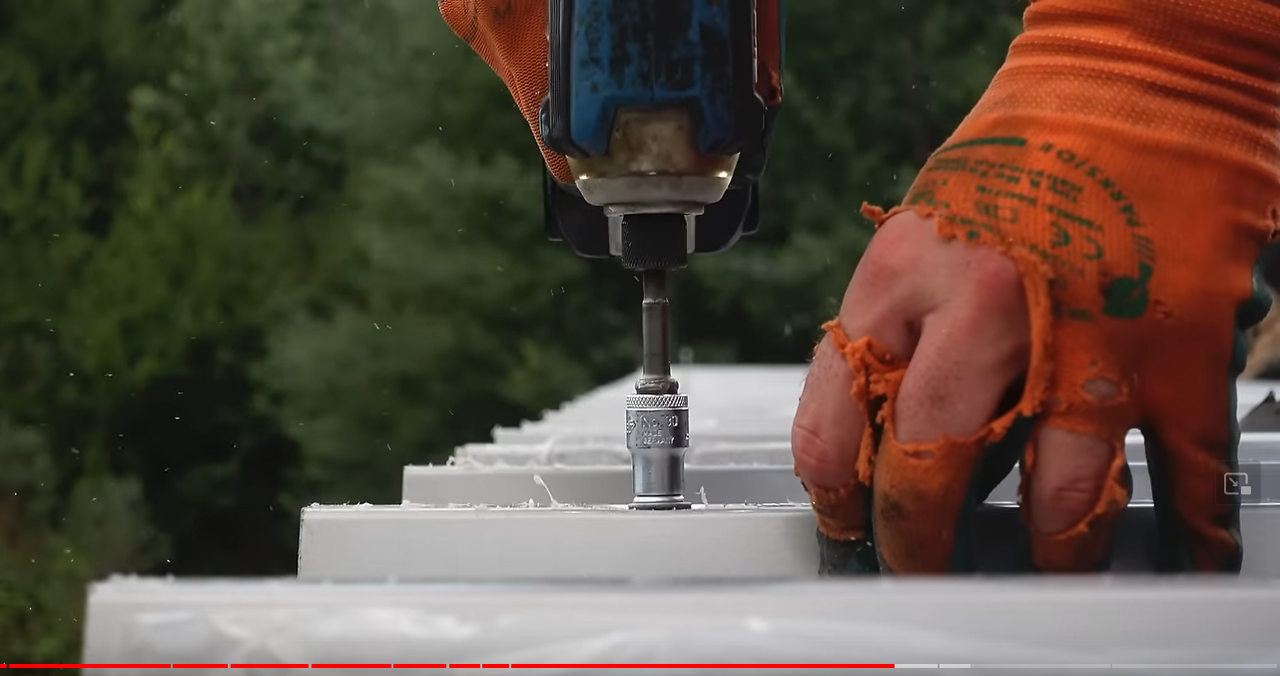 Loading...
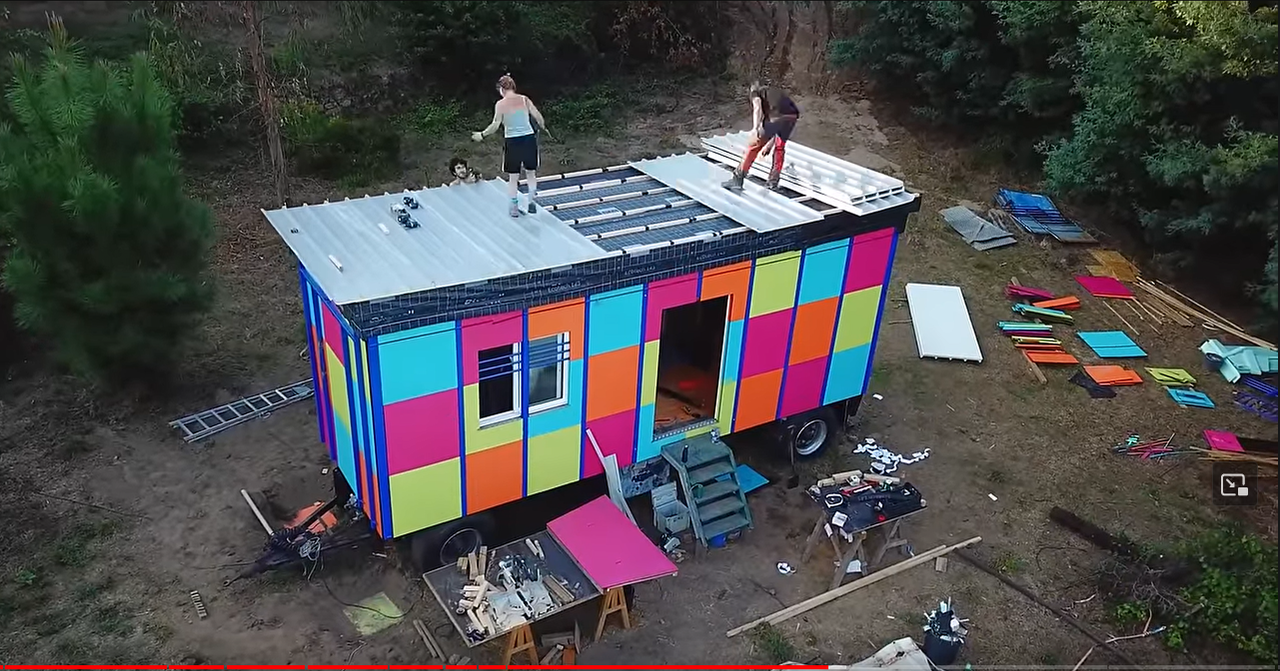
15
The siding of the roof
Created 1yCreated over 1 year ago
In the factory, they provided a sheet to cover the exposed foam. But we still had some anti-rain tarp exposed on the thickness of the rafters. We decided to cover them with wood. Also because we had some leftover from another project. We didn't have enough lenght though, and the pieces we had were very irregular. We ended up cutting the wood in it width. This allowed us to have enough wood to finish, but it also made the rain drop fall along the fibers of the wood which is much nicer. Kind of like "shingles".
On the bottom edge of our shingles, we made a 45 degree angle cut to allow the rain drop to fall with more ease instead of damping back up the wood. Drop stop?
Loading...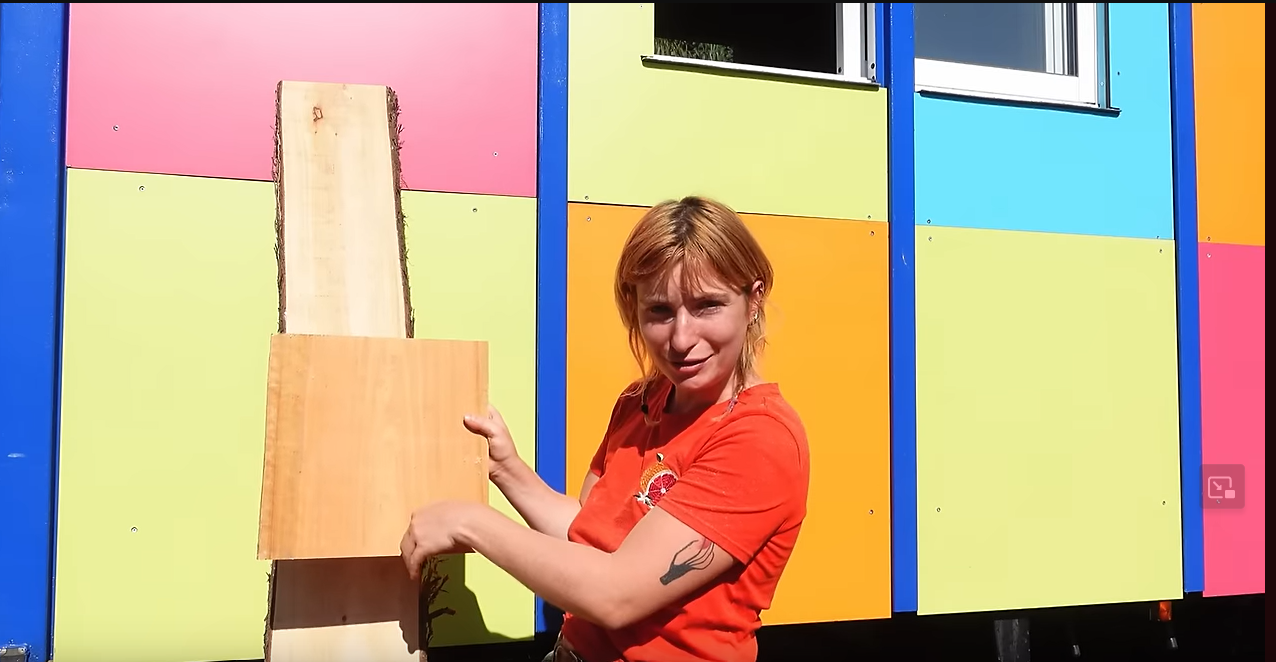 Loading...Loading...
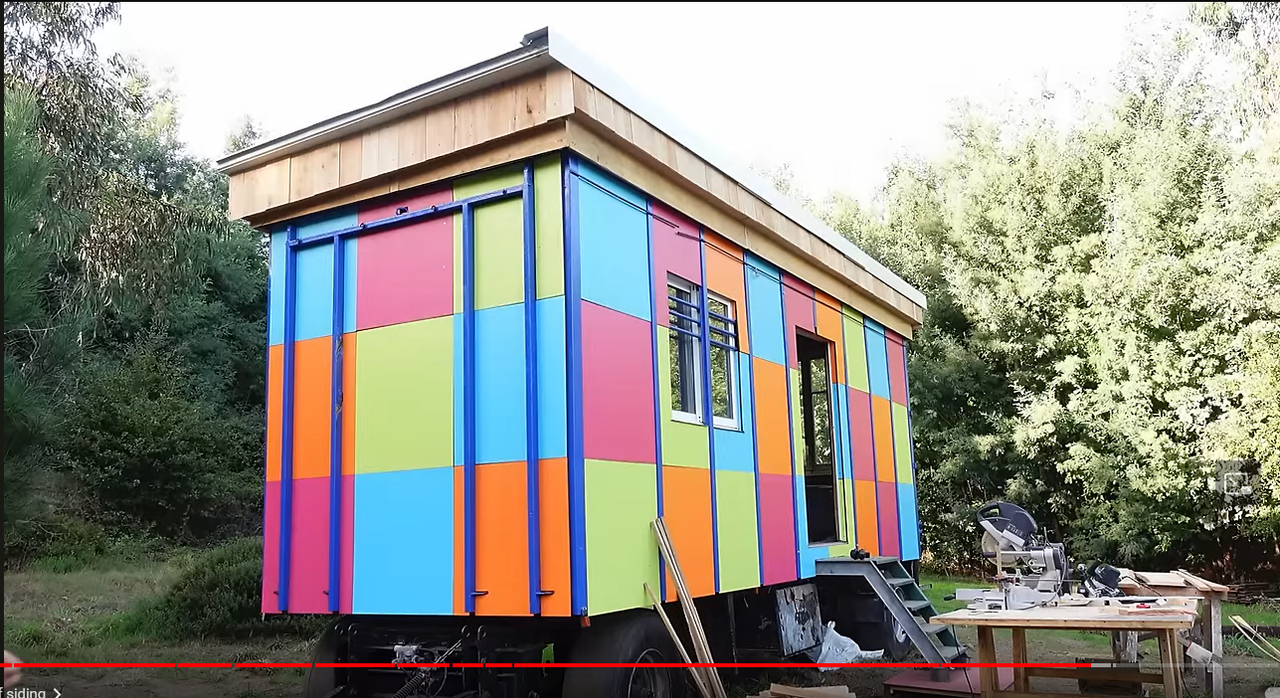 Loading...
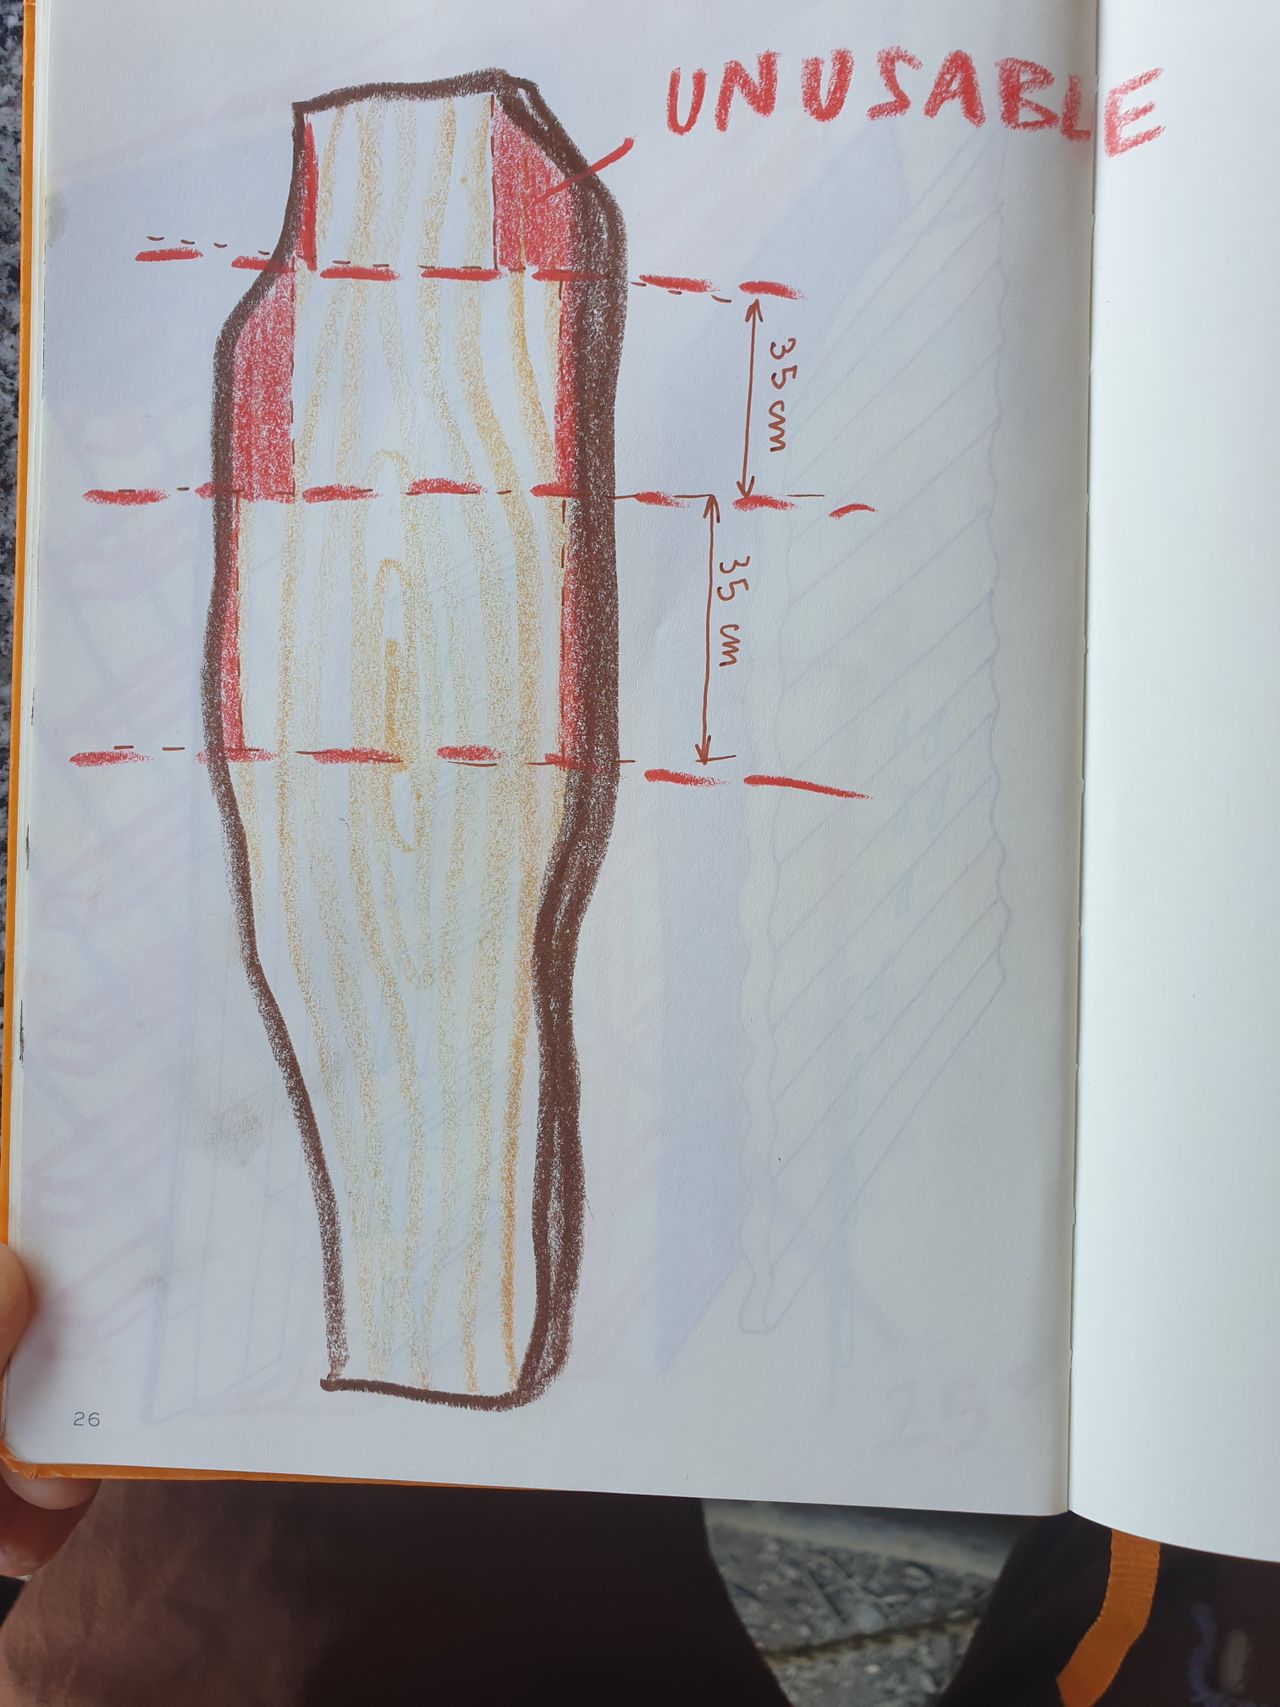 Loading...
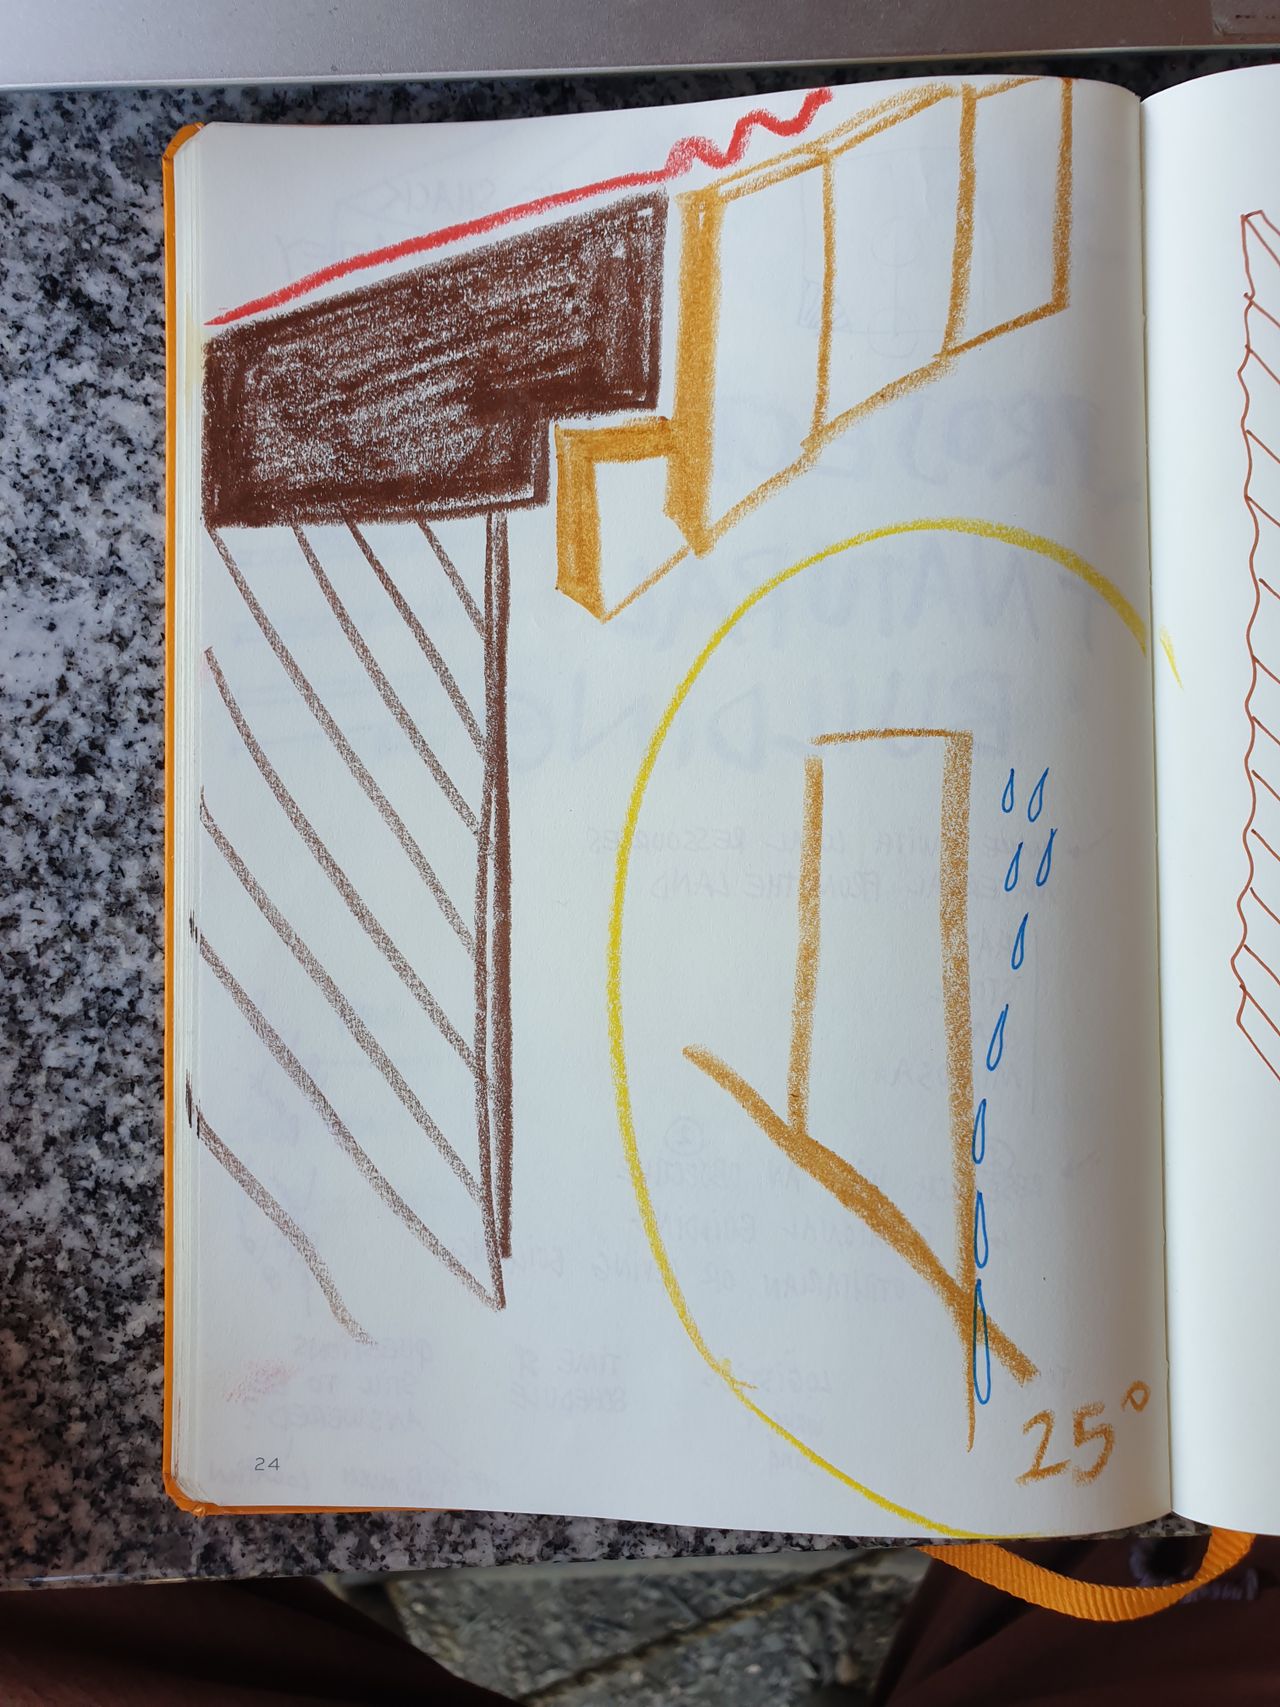
16
Cosy interior with wood mosaic
For the wall, we insulated it with the same fabric insulation as the roof and protected it with a black plastic tarp. To hide this ugly tarp, we used the same basketball court wood as the roof and the floor, but this time it was planed for a different look.
One characteristic of the level 2 house is that it has two different rooms. For this, we decided to use a sliding door to save space, so we needed a sturdy structure to hold this type of door.
Afterward, we covered the bedroom side of the structure with planed basketball court wood again, but vertically this time! We covered the unattractive back side of the basketball court wood with all the wooden leftovers from the year, creating a sort of mosaic.
After this long and dedicated job, we could finally install the second-hand door.
Loading... Loading...Loading...
 Loading...
%20--%3e%3csvg%20version='1.1'%20id='Layer_1'%20xmlns='http://www.w3.org/2000/svg'%20xmlns:xlink='http://www.w3.org/1999/xlink'%20x='0px'%20y='0px'%20viewBox='0%200%2064%2063'%20style='enable-background:new%200%200%2064%2063;'%20xml:space='preserve'%3e%3cstyle%20type='text/css'%3e%20.st0{fill:%2320B7EB;}%20.st1{fill:%23E9475A;}%20.st2{fill:%23FECE4E;}%20%3c/style%3e%3cdesc%3eCreated%20with%20Sketch.%3c/desc%3e%3cg%20id='Page-1'%3e%3cg%20id='OA-Logo-Black-Background'%3e%3cpath%20id='Shape'%20class='st0'%20d='M14.1,30.1c-1.5-0.8-8.6-3.8-14.1-7.8c1.8-3.4,3.1-5.6,5-9.1c2.7,1.1,1.9,0.5,4.6,1.7%20c0.8,0.4,10.1,4.5,13.8,6.2c2.4,1.1,4.7,2.2,7,3.3L43,30.5l8.1,3.9c4,2,7.2,3.5,11.3,5.5c0.5,0.3-3.7,9.4-3.7,9.4%20c-1.7-0.6-3.9-1.8-5.5-2.5c-4.7-2.1-9-3.9-13.7-6c-4-1.8-6.7-2.9-10.8-4.5C25,34.9,17.1,31.6,14.1,30.1z'/%3e%3cpath%20id='Shape_1_'%20class='st1'%20d='M12.1,54.9c-0.8,0.6-1.6,1.2-2.5,1.6c-0.4-0.5-0.9-1-1.3-1.5c-0.3-1.2-2.3-4.9-2.7-6.2%20c-0.1-0.4-0.7-2.2-0.8-2.6c0,0,5-3.4,8.2-5.9c3.2-2.6,6.2-5,9.3-7.5c1.4-1.1,3.9-2.5,5.3-3.5c2.5-1.7,13-9.1,15.6-10.5%20c5.4-3.3,11.1-6.3,16.8-9c1.7,3.5,1.8,3,3.8,6.9c0,0-17.8,13.5-22.7,17.1c-3.8,2.8-7.5,5.7-11.3,8.5c-1.7,1.3-3.5,2.4-5.2,3.7'/%3e%3cpath%20id='Shape_2_'%20class='st2'%20d='M20.8,2.9l-0.2-0.8C25,0,31.2-0.3,31.4,0.2c0.4,1.1,0.9,2.2,1.2,3.4c1.4,4.4,2.7,8.7,4,13.1%20c0.4,1.4,2.8,10,2.9,10.5c0.5,2.8,1.2,5.6,1.6,8.4c0.8,4.7,1.4,8.6,2.3,13.3c0.6,3.1,1.3,6.3,2.3,11.3c0,0-5.8,1.4-7.5,1.8%20c-0.8,0.2-1.5,0.4-2.4,0.6c-0.3-1.1-0.2-1.2-0.5-2.1c-0.9-3.7-1.8-7.3-2.6-11c-1.5-6.4-3-12.9-4.4-19.3%20c-1.2-5.4-2.6-10.7-4.4-15.9c-1-3.1-1.8-6.3-2.7-9.5C21.1,3.8,21,3.8,20.8,2.9z'/%3e%3c/g%3e%3c/g%3e%3c/svg%3e)